Introduzione

Prerequisito per la rimozione della mascherina dai case unità ottica n. 78, 79, 81

  1. jOcWYAYFKKAeGTKe
    • Rimuovi le tre viti con testa a croce Phillips n. 0 da 3 mm dal case dell'unità ottica.

    Hello, is the sata & power cabla from the mac can directly feet inside the SSD?

    Roman Quenin -

    plug in the back of the ssd

    Roman Quenin -

    I'm trying to find out as well. I read elsewhere you need something like this without the bracket: http://www.amazon.com/gp/product/B0056OB...

    However I have NOT confirmed this.

    Allen Borza -

    If I understand you correctly; the enclosure allows you to use the existing iMac optical cable. Also the enclosure allows for a safe fitting of the optical drive. In my newer machine I had to double side tape the SSD to the back of the iMac and buy a special cable. Note: this was not an optical drive replacement scenario or I would have done exactly as this tutorial suggests.

    EkDor -

    I bought another caddy, not the one from the description. i had to extract the plastic adaptor from the optical drive and put in on the new caddy 12,7mm

    Cristian Pizarro -

    The SDD caddy I purchased was 22 pin SATA both inside and outside so that the optical drive cable (13 pin) would not fit. Does anyone know where I can find a SDD caddy with 13 pin SATA outside for the optical cable and 22 pin SATA inside for the SDD?

    benja.mcg -

  2. VaI5SLkgrwPSJqPx
    VaI5SLkgrwPSJqPx
    j1FOJyLgUP1DEQHO
    yviIbTmuZ3vDVDMj
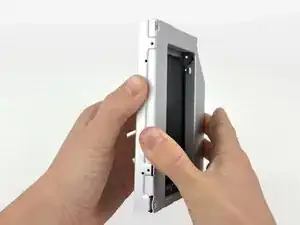
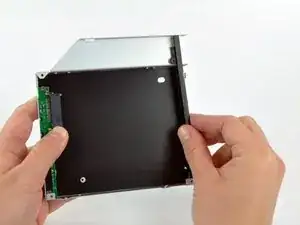
    • A partire dal bordo sinistro, apri delicatamente il case dell'unità ottica.

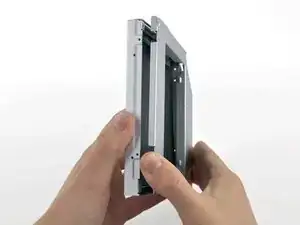
    • Continua ad aprire le due metà del case fino a separarle.

    This is the 12.7mm caddy.. but, the caddy 9.5 mm fit fine as well? or it doesn't fit on imac mid 2010

    Cristian Pizarro -

    My caddy (ordered 5/2019) had two additional screws that needed to be removed from the sides for it to open.

    mr.kaufman7 -

  3. AggSHSpIQC1DHPDo
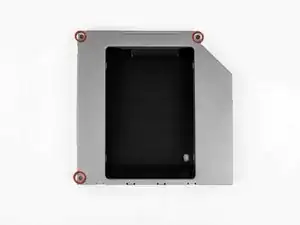
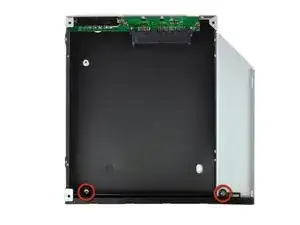
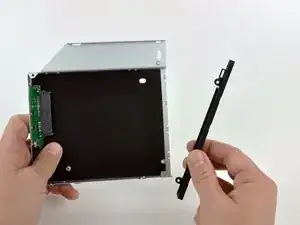
    • Rimuovi le due viti con testa a croce Phillips n. 0 da 3 mm che fissano la mascherina al case dell'unità ottica.

  4. mKipidMkqiDyZSan
    mKipidMkqiDyZSan
    SSLXJwuMeUfXP2Or
    LoVNiaoxGeH4pDaB
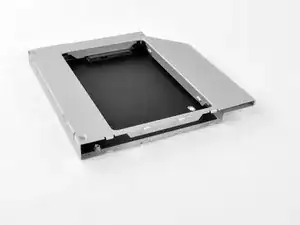
    • Solleva la mascherina in plastica nera dal case dell'unità ottica.

    • La mascherina e le due viti con testa a croce che la fissavano non saranno più necessarie. Conserva questi componenti nel caso tu intenda reinserire la mascherina nel case.

    • Riassembla il case dell'unità ottica senza la mascherina, riutilizzando le tre viti con testa a croce da 3 mm originali per preservarne l'integrità.

    Just curious, why is it necessary to remove this black plastic faceplate from the enclosure? It doesn't appear to serve any function in or out of the enclosure.

    Nic Johnson -

    Maybe because it would interfere with the bracket you have to put back on in step 21?

    Jeff Dickson -

    So I'm confused about the Optical Drive Bracket, the one that originally held the DVD-CD drive. I had an awful time remounting the kit into that bracket as the screws didn't line up correctly. I finally got everything to fit, less one of the four holding screws. Did anyone else experience this problem? I would have expected a much better alignment for this assembly considering the quality of the iFixIt site.

    For the record, the upgrade went fine with a SanDisk Extreme II 480GB SSD, but that one step was next to impossible, and not covered in any detail by the instructions.

    Ron Lockhart -

    Yep, I had exactly the same problem. The alignment was way off.

    olafgoy -

    My kit also did not line up correctly. I had to put all four screws in at an angle cross-threaded to mount the unit.

    Kevo -

    Same here. managed to get two screws in at a decent angle on one side and couldn't get the others in. Felt solid enough once I'd screwed the original ODD casing back onto the iMac.

    Monkeyrebirth -

    I had the same alignment problem, too. I ended up removing the rubber grommets from the plastic enclosure, widening the holes with a small file, then replacing the grommets. All four screws went in, but not in perfect alignment. Should be ok, though.

    nickmalmquist -

    Another possibility is the part has been designed to be used with different types of iMac and some utilise this component. In this case it apparently doesn't.

    EkDor -

    I bought a different enclosure than the one recommended ($18 instead of $39) and it came with new screws because the old screws were too big to fit in the holes for the new enclosure.

    Keith Mewis -

    Hi. Which enclosure did you buy? link please.

    Alex -

    Where did you get the alternative enclosure from?

    Walter Poole -

    I completed this guide last night on my iMac and it all worked great until I got to step 26 and none of the holes on the 12.7 mm PATA Optical Bay SATA Hard Drive Enclosure lined up with the black plastic faceplate. Just like what is being commented on by previous fixers, I could only get 2 screws on one side of the enclosure in, but they were crooked and unable to screw in all the way. It was crude, but it worked.

    The rest of this guide works flawlessly. This is a great site!

    Marc -

Conclusione

Per riassemblare il dispositivo, segui queste istruzioni in ordine inverso.

Brittany McCrigler

Membro da: 05/03/12

88905 Reputazione

0 commenti