Introduzione

Quindi, hai comprato un bel gioco d'importazione giapponese per il GameCube, ma la tua console impostata con la regione europea non lo legge. Sei fortunato! C'è una semplice modifica che puoi eseguire per cambiare manualmente tra NTSC-U e NTSC-J.

  1. EXmngHuO2usXoFLn
    EXmngHuO2usXoFLn
    FHM21aEFmJipvNvw
    VjCSVObtR6vLAFRb
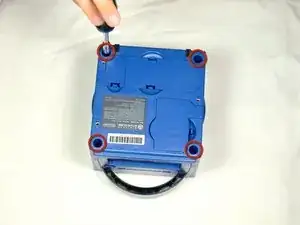
    • Ruota il GameCube in modo che la faccia inferiore sia rivolta verso l'alto.

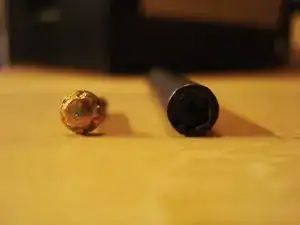
    • Utilizza il cacciavite Gamebit da 4,5 mm per rimuovere tutte e quattro le viti.

  2. TTgX5EeSWjKCqHWb
    TTgX5EeSWjKCqHWb
    PAReZYqLsElCE35E
    LDfiiuYtwUYO6tjf
    • Con la faccia inferiore del GameCube rivolta verso l'alto e le viti rimosse, tira attentamente la copertura esterna della console via dalla copertura superiore.

    • Sposta il GameCube in modo che l'interno sia rivolto verso l'alto.

    This can also be done whilst being in the normal upright position after all 4 of the 4.5mm Gamebit screws have been removed. Pull the top of the shell directly upwards and it should slide off easily.

    Less chance of snagging any wires or parts.

    Christopher Cox -

  3. kXNmWMsVur4bGmBC
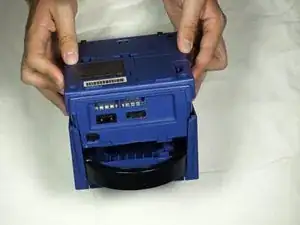
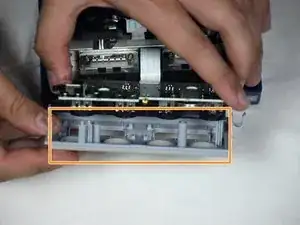
    • Premi delicatamente sui clip posizionati su entrambi i lati del pannello posteriore.

    • Rimuovi con attenzione il pannello posteriore dal GameCube.

    A second picture clearly showing which direction to pull the back panel away from the unit would be nice.

    rubixtriangle -

  4. SoDefm6gSe5cMhiM
    • Sgancia attentamente le porte dei controller sulla parte anteriore della console.

    • Un cavo a nastro (evidenziato in arancione) è ancora collegato alla console. Non scollegare questo cavo.

    • Le porte dei controller sono le porte dove colleghi i controller nella console e sono di forma semi circolare.

    well... what happens if accidentally i disconnected it?

    negroporexcelencia -

    presumably nothing major. The CMOS battery is attached to the controller ports, so the most i'd expect is that the gamecube loses it's date/time setting. As long as you reset that before jumping into animal crossing or something, you should be fine. I'm currently doing a teardown of my gamecube, and if something does prove to have gone wrong, i'll report back.

    sigoshi -

    okay, i finished putting it back together. gamecube works fine and surprisingly still remembers what year it is. boots into smash bros and shows memory card contents fine.

    sigoshi -

  5. TR4hFCNmFQAQbPvG
    TR4hFCNmFQAQbPvG
    fUWjsHkvqvdWIXac
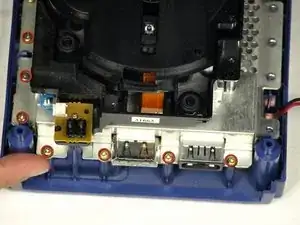
    • Usa un cacciavite a croce Phillips per svitare le 2 viti che si trovano sul retro delle prese dei controller.

    • Separa attentamente la copertura esterna grigia delle porte dei controller e della scheda logica.

    That step is not needed for the laser replacement.

    Vincent Léon -

    Love ur labeling and legends. Good on ya

    Josh Johnston -

    Not a necessary step

    Jilvenhong Dickinson -

  6. YlxsbRCapOkJiWyE
    YlxsbRCapOkJiWyE
    EumsDHVxO6AANqp2
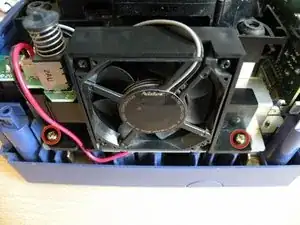
    • La parte sinistra della console contiene la ventola e il suo alloggio.

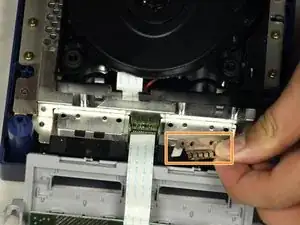
    • Svita attentamente le due viti che fissano la ventola al suo alloggio.

    • Non scollegare i cavi rosso e nero della ventola dalla console. Indicato in arancione

    Why can't the fan wire be detached?

    Josh Hobbs -

    It can, but you might not want to

    Jilvenhong Dickinson -

  7. QXkEOAxCZlSgbIqL
    QXkEOAxCZlSgbIqL
    iYB3kWBN1CPInbGu
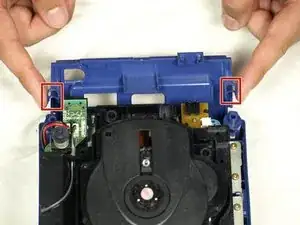
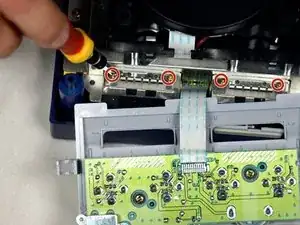
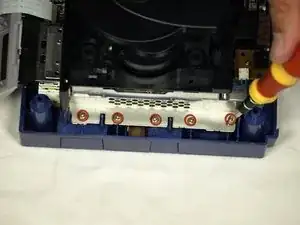
    • Svita le quattro viti a croce Phillips #1 che bloccano le molle della terra.

    • Rimuovi attentamente le molle della terra dalla console come mostrato nella seconda immagine.

  8. ylaqEoUPMkoTQheh
    ylaqEoUPMkoTQheh
    Okn1rg5bLKNDXflJ
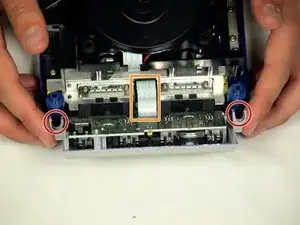
    • Il lettore CD è fissato ad una placca in metallo.

    • Usando un cacciavite a croce Phillips #2, svita le dodici viti attorno al bordo esterno del lettore CD.

    Are these 12 screws the exact same kind like the 2 that were on the fan?

    blaise ventura -

    Yes! As far as I can tell anyway. Makes sense, too since opposite the fan you have five of the same holes as well.

    Ben Zelinsky -

  9. UpsnMRoslMBZjQiY
    UpsnMRoslMBZjQiY
    pScQZBrImQdBnWPO
    lnNsoMXKum6GHJDo
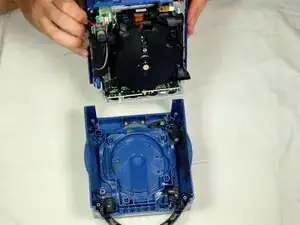
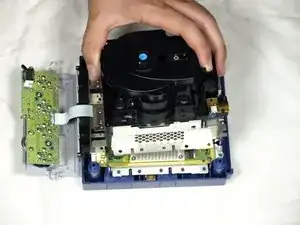
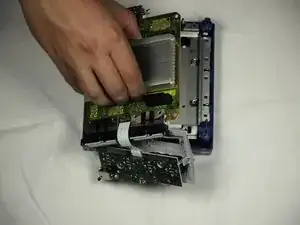
    • Separa attentamente il gruppo del lettore CD dal resto del GameCube.

    • Il gruppo del lettore CD è fissato alla scheda madre sottostante da una presa: potresti dover fare una certa forza per rimuovere attentamente il gruppo.

    • La placca in metallo e il lettore CD resteranno attaccati.

  10. bytGBxg6Djhunevv
    bytGBxg6Djhunevv
    s5YZwa1tILiguPnX
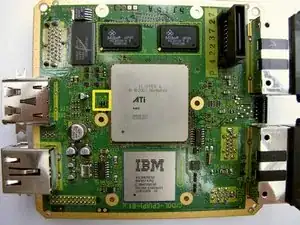
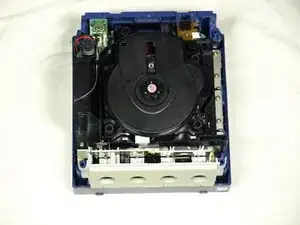
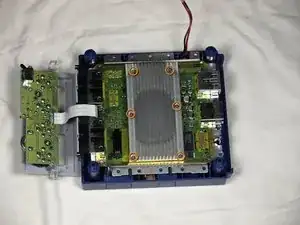
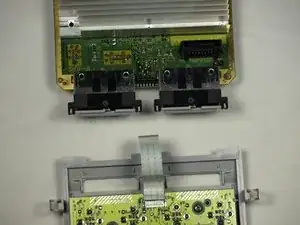
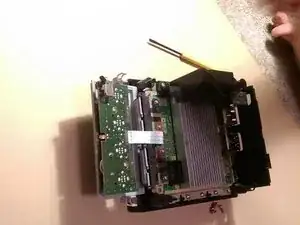
    • Dopo aver rimosso il gruppo del lettore CD, il tuo GameCube dovrebbe essere come quello nella prima immagine.

    • Svita le 6 viti (evidenziate in arancione) sul dissipatore con un cacciavite a croce Phillips #1.

  11. MdsldLQKRqc26Ycy
    MdsldLQKRqc26Ycy
    epOLMyGZyyQApQNV
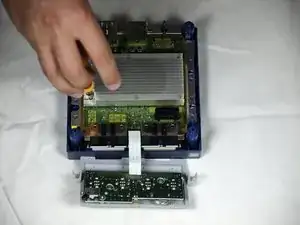
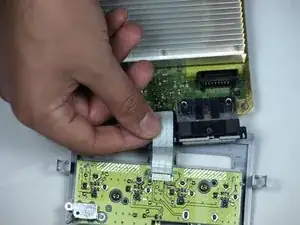
    • Solleva delicatamente la scheda madre dalla base della console (come mostrato nella seconda immagine).

  12. nToe2kpMt6p5rJGV
    nToe2kpMt6p5rJGV
    UEjLviDDBnGHsrNU
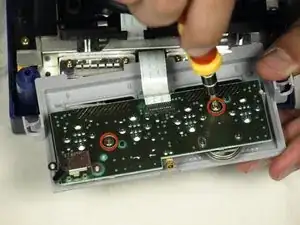
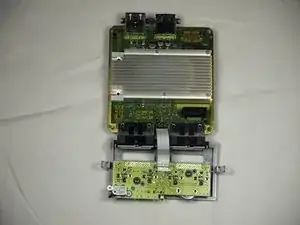
    • Scollega attentamente il cavo a nastro chee collega la scheda madre alla copertura anteriore.

    • A questo punto puoi sostituire la scheda madre originale con una nuova e goderti il tuo GameCube rinato!

  13. aTFi1QWpFkdvI1kx
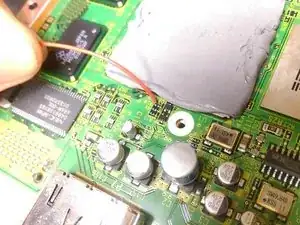
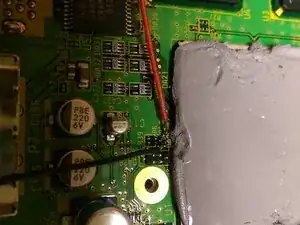
    • Trova i contatti R5 e R6.

    • Sono posizionati alla destra di dove era la vite posteriore centrale posteriore. Se stai lavorando su un sistema americano (come me), i contatti R5 saranno vuoti. Su una console giapponese saranno invece vuoti i contatti R6.

  14. DVuFwMHqaNIUgQTy
    • Salda dei cavi su entrambi i contatti vuoti (R5 per il modello americano, R6 per il giapponese).

    • I modelli americani sono nel formato NTSC-U, mentre i giapponesi sono NTSC-J. I modelli europei sono PAL e non sono trattati in questa guida.

  15. OkNCEQk42KYvUkkn
    • Assicurati che i cavi non siano saldati tra loro. Se lo sono, questa sarà una modifica permanente.

    • Quando reinstalli il dissipatore, usa del nastro da elettricista per evitare di far fare corto circuito ai contatti R5.

    This step is extremely hard. Take your time, and get a super thin tip soldering iron. Do this slow, or you might ruin something.

    Connor Mayfield -

  16. qdwssoRWppNVIL4N
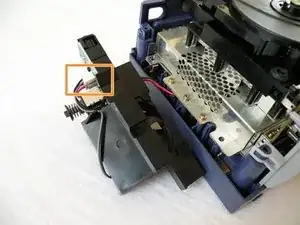
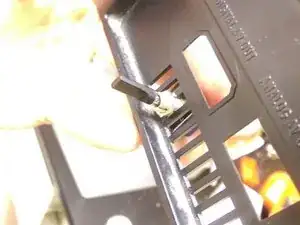
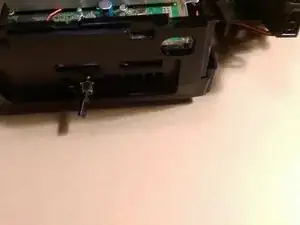
    • Inserisci l'interruttore. In questo esempio, è stata rimossa un pezzo di plastica dalla presa d'aria della ventola per infilarci un interruttore più grande. Assicurati che il tuo interruttore sia saldamente attaccato e che la sua posizione permetta il rimontaggio del sistema.

  17. YuIEwPJylmAWcIfE
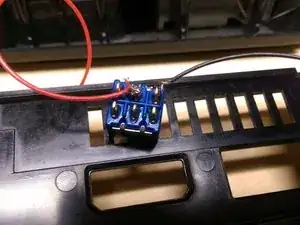
    • Salda i due cavi dai contatti R al tuo interruttore. Salda uno dei due cavi a uno dei due contatti al centro e l'altro sul contatto direttamente sopra o sotto.

    • Usa un interruttore bipolare a due posizioni se vuoi aggiungere una luce di indicazione.

  18. LgRO2TKYKdEMTK4s
    LgRO2TKYKdEMTK4s
    ZyINyPo61ErQtvsq
    • Rimonta il tutto. Fai passare i nuovi cavi in modo che non vengano schiacciati durante il rimontaggio e assicurati che non vengano tirati.

    • Assicurati di seguire i passi in ordine inverso o ti troverai a dover ripetere dei passaggi.

Conclusione

Per rimontare il dispositivo, segui le istruzioni in ordine inverso.

Grandmaster Xiffle

Membro da: 21/01/15

270 Reputazione

12 commenti

great instructions, it really works but now how do i translate the japanese game (Muscle Champion KINNIKUZIMA NO Kessen

Thomas -

There is no way to translate the game itself unless there’s an English option in the game somewhere.

Sandi Lorenz -

Hello, is there any way to switch my gamecube's region from Japan to US without Soldering? I want to keep my Gamecube in US mode and have no intention of switching between the two.

Owen Helm -

Without soldering? Not really, but you don’t need to install a switch to make a permanent jump to NTSC-U (US mode). See the red text note on step 15 about how to avoid making a permanent connection. Hope this helps!

Grandmaster Xiffle -

What did you use for thermal paste replacement? Does it matter what kind?

gatchi -

On further inspection it looks to be some sort of thick thermal adhesive, very thick. The gap between the cpu and the heatsink is quite substantial, and cant be made smaller cause of how tall the screw wells are. Replacing with thermal paste seems risky, I don't know how youd get enough without it seeping out over time.

Unless this is actually a thermal pad? Is it possible to re-use?

gatchi -

Would 22 gauge wire and a single pole throw switch work as well?

Owen LeJeune -

I used a slider switch for this mod that fits perfectly through the back and vent holes without any modification to the shell. I just glued it in and it works like a charm. Easily accessible and discrete. Here's a link to the specific switch I used. https://www.amazon.com/dp/B07PDHSCDN

david crow -

ich muss von Europa zur USA wechseln wie geht das??

Leon Jimmy -

hi my name is spacer sub to me on youtube at spacer :)

Ryan Zimmermann -

I have a question about step 13, it says either R5 or R6 will be empty but doesn’t the image show they’re both empty, empty refers to a wire connection right?

Kingkoop -

Is there a way to convert to Europe meanign PAL format ? pls help

Valentin Petrovitsch -