Introduzione
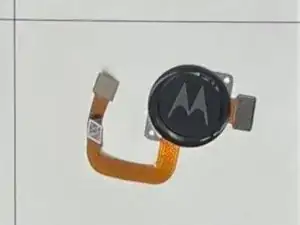
This is a guide to replace the fingerprint sensor on the Moto G Power (2020). Follow these simple steps for a successful repair! If you encounter other issues, refer to our troubleshooting page.
Before you begin, download the Rescue and Smart Assistant app. This will allow you to back up your device and determine if your problem is software or hardware-related.
-
-
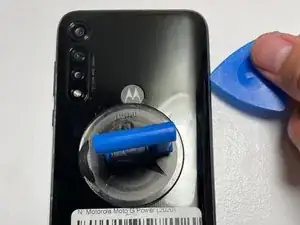
Place a suction cup on the back of the device.
-
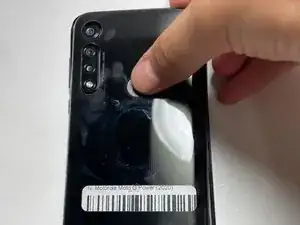
Then open up the back of the device by sliding the opening pick into both sides of the phone.
-
-
-
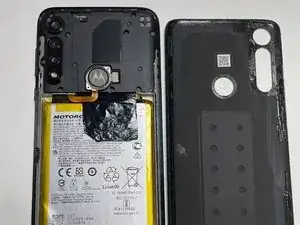
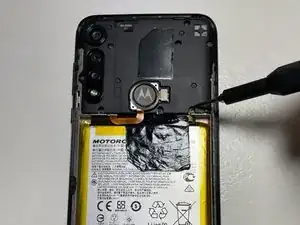
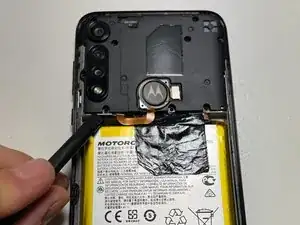
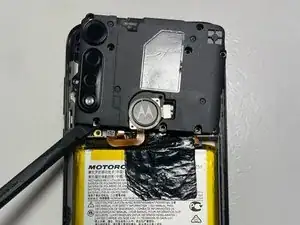
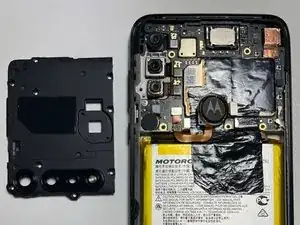
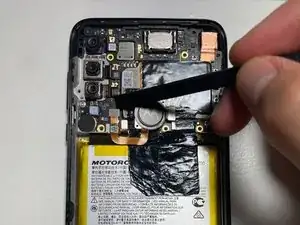
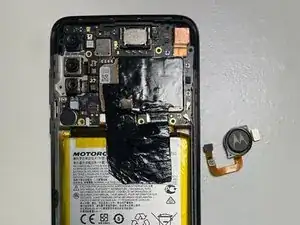
Carefully use the spudger to lift the sensor cable, disconnecting the fingerprint sensor from the motherboard.
-
Conclusione
To reassemble your device, follow these instructions in reverse order.

I am finding it extremely difficult to find an insertion point between the casing and the screen. I've even brought a Stanley No. 199 Utility knife into play. Still, no separation. These instructions should include the use of a heat gun to soften the adhesive that holds the case and screen together. I may have to bring this to a cell phone repair shop.
Jerry Weinhausen -
Light heat with a blowdryer/heatgun will help it flex more, but you can do it this way. It's definitely challenging as you have to pull on the suction cup close to the edge and you might only get like .5mm of gap.
If you don't have a good spudger or thin piicks like in the picture, heat gun is absolutely necessary.
Zach M -
One thing to note: be careful with a spudger or prying near the right side of the phone. A small wire runs from top to bottom of the phone about 5mm past the phone edge. You can see it in the pictures, it's a black wire that's very tiny. It's easy to see in Step 7 where it connects to the board above the right corner of the battery.
Zach M -
I had a terrible time with the adhesive on the back cover, I lost most of the black film around the camera lens and some around the middle of the bottom edge. I put modest effort towards reinstalling the touch sensor into the back cover, but since I use an external case I did not go overboard. I did test the touch sensor before firmly seating the back cover into the remaining adhesive.
Richard Ekblaw -