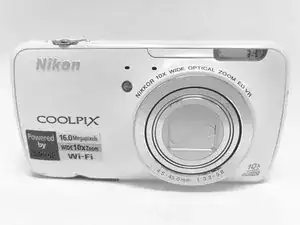
Introduzione

In this guide, we will go over the steps to remove the motherboard from a Nikon Coolpix S800c.

  1. thDXTaQOVsacIEJD
    thDXTaQOVsacIEJD
    e3jIRCehWl6rym5s
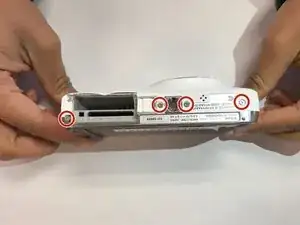
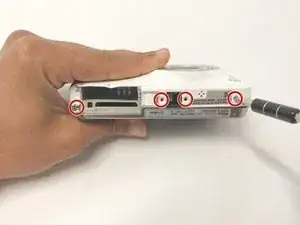
    • Remove all 4 screws from the bottom face of the camera using a Phillips #00 head screwdriver (found in iFixit tool kit).

  2. PciGMSplwEn2CWCV
    PciGMSplwEn2CWCV
    HXBOeACMTPIHLOIb
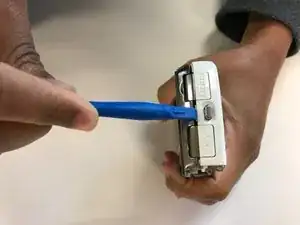
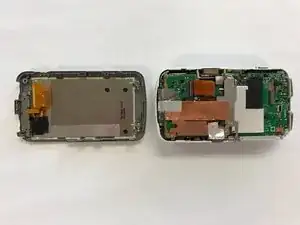
    • Using a plastic tool, pry open the back panel of the camera. Be careful not to apply too much force and damage the camera.

    This doesn’t work!!! I have two S800C cameras, and #1 there are FIVE SCREWS instead of four; one is on the lens side of the case. But once those five screws are out, the LCD will still not separate from the main body. Something in the vicinity of the shutter button is holding the two together. Both cameras are the same in that respect, and because I fear damaging *both* the body and the screen if I try to force it, I’m stuck tight wishing someone could clue me in as to what perhaps simple thing is left out of these instructions.

    The same issue exists with every single guide in this series—the camera WON’T COME APART with the steps shown.

    Brian Capouch -

  3. itbPD6oMw5JnJ1NH
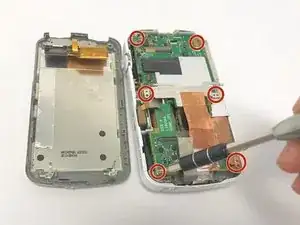
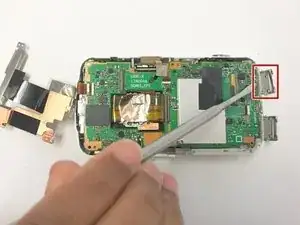
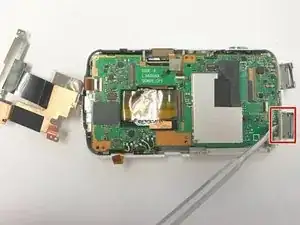
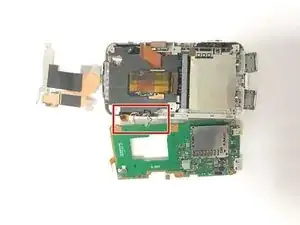
    • Unscrew all 6 visible screws that secure the motherboard into place using a Phillips head screwdriver (found in iFixit tool kit).

  4. CdDTto46cbwJtu1R
    • Pull the shown panel off of the motherboard to expose the Image sensor connection

  5. SYAxd23pC36HdWl3
    • Lift tab up to remove the Image sensor connection strip.

  6. HgTXlrsEDU25NuDh
    HgTXlrsEDU25NuDh
    kthHCLGrkZPSOy3o
    AQASSrJAKtgedMjp
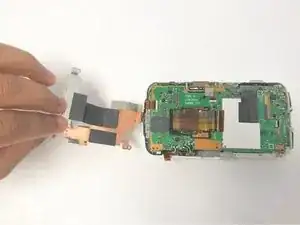
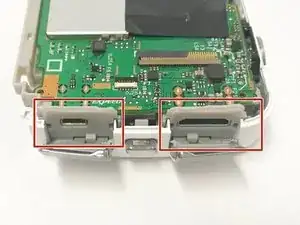
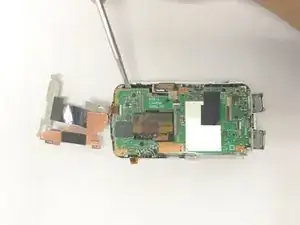
    • Pull the gray panels back to allow the hidden micro usb and hdmi insert connectors to come free.

    • Use a Metal Spudger to help with the process to get these connectors free from the frame.

  7. iUCxxmCThyIR1SV5
    iUCxxmCThyIR1SV5
    RP4IcOPOlYBEILMl
    • Using a Metal Spudger, lift the motherboard up from the body of the camera.

  8. KtmERBkvSNwSatBb
    KtmERBkvSNwSatBb
    IQ1vdXFrGoCJeVPp
    • Pull the motherboard off of the main body of the camera.

Conclusione

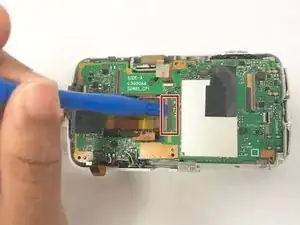
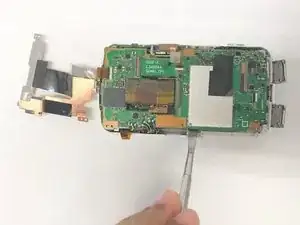
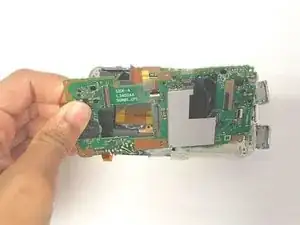
Soldered wires attaching the motherboard to the camera body will need to be disconnected at the motherboard-end and the new wires on the replacement motherboard will need to be soldered on. To reassemble your device, follow these instructions in reverse order.

Kenneth Huynh

Membro da: 30/01/18

133 Reputazione

0 commenti