Introduzione
If you have issues with using the joystick, either due to a broken or unresponsive joystick, the joystick module may need to be replaced. This guide will show you how to replace the joystick module.
Ricambi
-
-
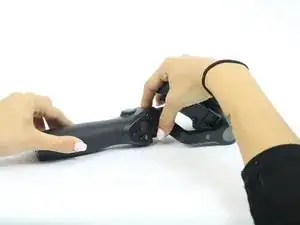
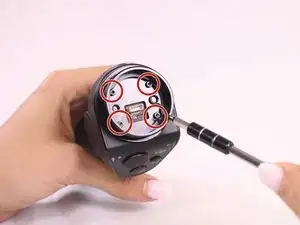
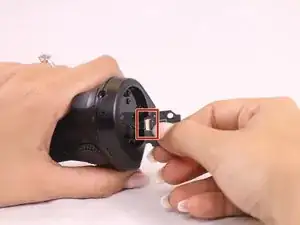
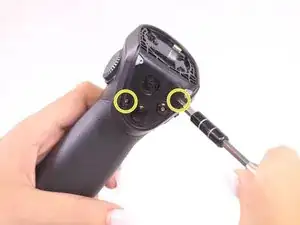
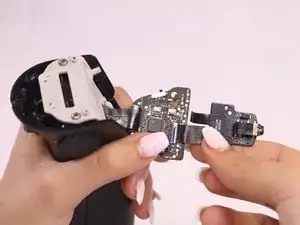
Use Phillips #00 screwdriver to remove the three screws found on the gimbal stabilizer to detach handle from gimbal.
-
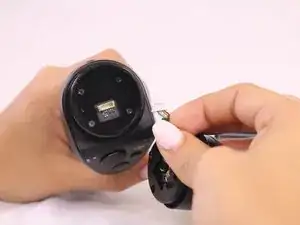
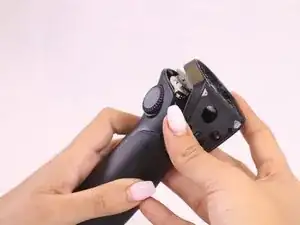
Carefully detach handle from gimbal and disconnect the cable that connects the two.
-
-
-
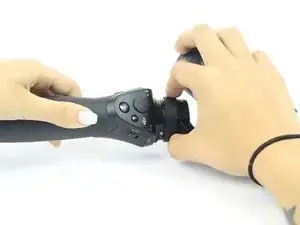
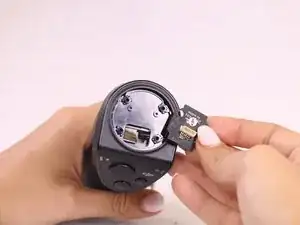
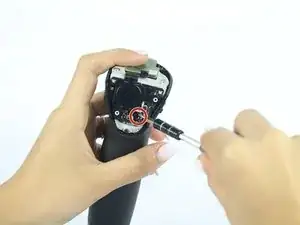
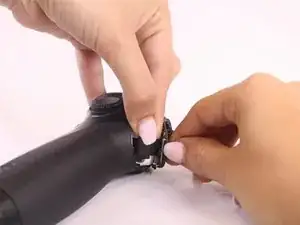
Locate the hex screws found at the top base of the handle, and unscrew using the 1.5mm hex screwdriver.
-
-
-
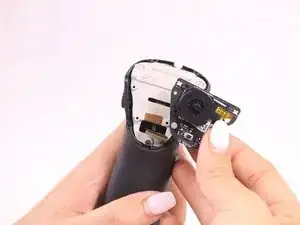
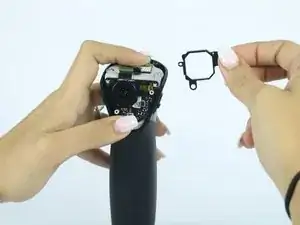
Remove the quick release PCBA by locating the connecting wires and release the ribbon cable with tweezers.
-
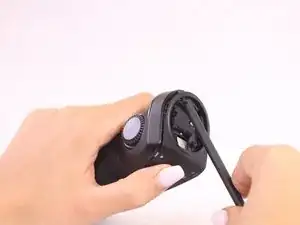
Use the spudger to pry open and remove the face plate, starting at the back of the handle.
-
-
-
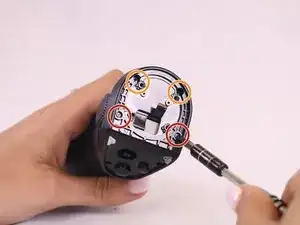
Locate four screws directly on top of handle.
-
Unscrew the silver, bottom two screws, that are closest to the face plate using the 00 screwdriver.
-
Unscrew the black, top two screws, located furthest from the face plate, using the 0 screwdriver.
-
Remove the remaining two screws found on the front of the faceplate.
-
Remove the rest of the face plate shell.
-
-
-
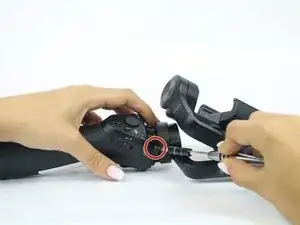
Remove the top left screw on the joystick panel with 00 screwdriver.
-
Lift the faceplate holding joystick module.
-
-
-
Hold down the larger of the two ribbon cables, and pull on the circuit board with a constant and careful down and out motion.
-
-
-
Gently remove joystick module by pulling it through the circuit board and inserting the new module.
-

To reassemble your device, follow these instructions in reverse order.
2 commenti
Well done William! Do you know if the gimbal head of this unit can be reassembled rotated 180 degrees so that it will work with cameras like the Lenovo Mirage VR180 Camera. The Mirage has two forward facing 180 degree cameras that are partially or totally blocked when mounted in the standard configuration. There are other issues that need to be addressed to balance the camera but if the head can be rotated 180 degrees from its standard orientation then the Osmo handle can be held in its normal orientation. Just starting to experiment with this idea and thought you might be able be able to prevent any false starts.
This step isn't clear. How is the ring removed? Twist? Pry?
Jo Dee Lee -
Same question for me
Guitt97ii -
Tried for hours. Seems it’s glued on?
Jo Dee Lee -
ok, the top cap is screwed on. I used a double sided tape around it to have a better grip and just twisted it. The cap has thread lock in it.
Jo Dee Lee -
You passed this step?
Guitt97ii -
U passed this step???
Guitt97ii -
No solution for this step?
Guitt97ii -