Introduzione

  1. bU3kqKeRmyY4YuGx
    bU3kqKeRmyY4YuGx
    bRpfjZoLGQJ5f5wW
    NdNVsDCDiCkgDeoo
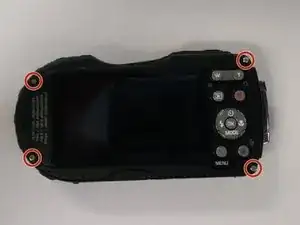
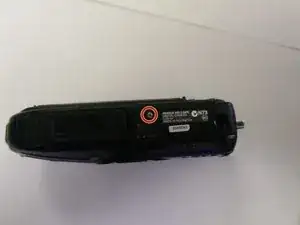
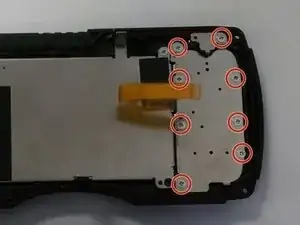
    • Using a Philips head screwdriver, remove the 6, 5 mm screws, 4 on each corner and 2 on the sides of the device.

    • One of the side screws is hidden under the top lining of the device.The lining is glued down to the device, you will have to peel the lining back using tweezers. After you are finished with your work you will have to use glue or adhesive to re-stick the lining back to the device.

  2. 1TuG5HH6VcSjuOxv
    • With the small plastic pry tool lift the back of the camera off carefully.

    • Be aware of a few flex cables that connect the mother board to the screen.

    • Open the devices slowly and disconnect the flex cables. When the flex cables have been disconnected you can take the device apart.

  3. HIPueWUoMaIC6R2F
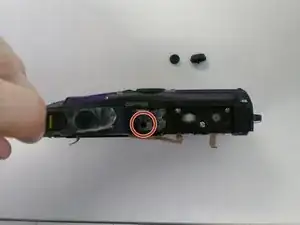
    • Remove the 6, 2 mm screws from each corner of the metal button pad cover.

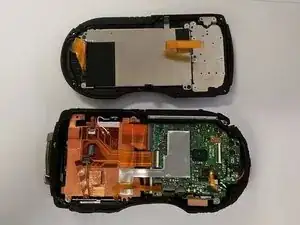
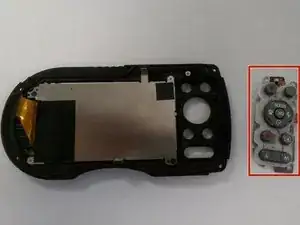
    • Using tweezers remove the metal cover.

  4. TqdNuUeiB1ZTracH
    • Disconnect the flex cables and replace the menu pad button or button component.

Conclusione

To reassemble your device, follow these instructions in reverse order.

Allison Merdian

Membro da: 05/03/15

422 Reputazione

0 commenti