Introduzione

Guida solo prerequisita per aprire il Moto X Pure Edition per sostituire il display o la batteria.

  1. I1VFOoKklSWOU1TX
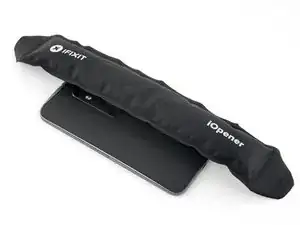
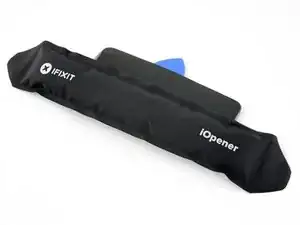
    • Prepara un iOpener e scalda il retro del telefono lungo il suo bordo destro per circa cinque minuti. Questo aiuterà ad ammorbidire l'adesivo che fissa la cover posteriore.

    • Può rivelarsi necessario scaldare e applicare l'iOpener per diverse volte consecutive per poter scaldare abbastanza il telefono. Segui le istruzioni per l'iOpener per evitare il surriscaldamento.

    • Puoi usare anche un asciugacapelli, una pistola termica o una piastra riscaldata, ma stai attento a non surriscaldare il telefono: sia lo schermo LCD sia la batteria interna sono sensibili al calore eccessivo.

  2. 4ITIIfrt26JXPIxU
    4ITIIfrt26JXPIxU
    OHtsmlqMpbdFj1iT
    HoXl4feVInrdRIed
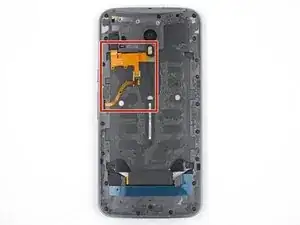
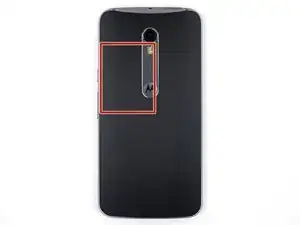
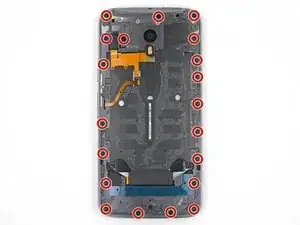
    • Nei passi successivi taglierai l'adesivo che fissa la cover posteriore.

    • L'adesivo è disposto come indicato nella prima immagine, che mostra l'interno della cover.

    • Evita di tagliare nelle aree indicate in rosso per non danneggiare i fragili cavi a nastro.

  3. BbSSSWONko31DNI2
    BbSSSWONko31DNI2
    45SkQkVXlySQoSYl
    aexbJkJH2nZvLCAu
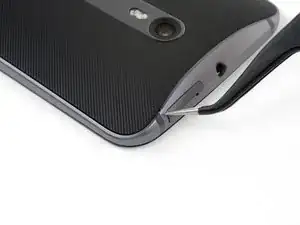
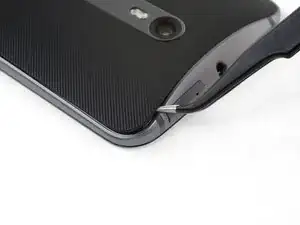
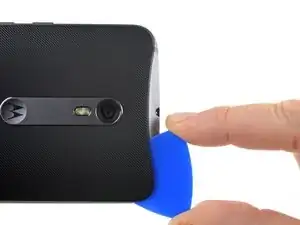
    • Prendi delle pinzette a becchi sottili e, tenendole chiuse, inseriscile nel piccolo foro sul bordo della cover posteriore vicino alla feritoia per la scheda SIM.

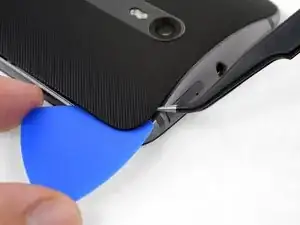
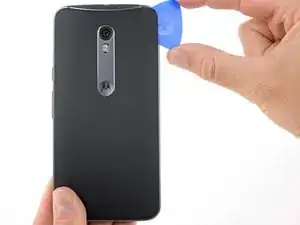
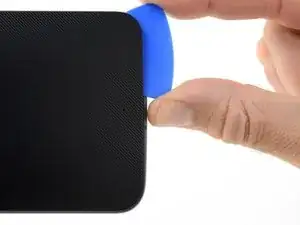
    • Usa le pinzette per sollevare lievemente la cover e fai scorrere un plettro di apertura nella fessura tra la cover e la scocca.

    Insert only one of the tweezers’ point into the hole. Once the rubber backing is lifted high enough, slip a corner of the opening pick under the rubber backing. Leave the first pick near the corner while you use a second pick as directed in Step 6.

    Levi Asuncion -

  4. WfD6WDXBDtObiGgN
    WfD6WDXBDtObiGgN
    p5KZsRrrfyjQLHJA
    SoGbtZZolDdnMPjA
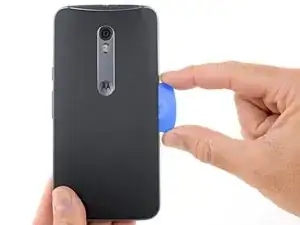
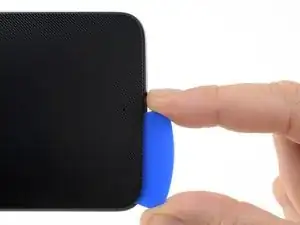
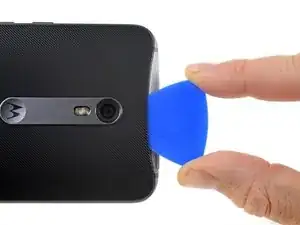
    • Fai scorrere il plettro di apertura lungo il bordo del telefono per tagliare l'adesivo della cover posteriore.

    • Cerca di inserire il plettro alla massima profondità possibile sotto la cover, verso il centro. Nella parte mediana della cover c'è dell'adesivo spesso che deve essere separato.

    • Lascia il plettro infilato in posizione mentre procedi con il prossimo passo. In questo modo impedirai che la colla che hai appena separato possa riattaccarsi.

    I did not have a pick, used a few old credit cards, leaving them in place to keep the phone back separated.

    Used a hair dryer to heat up a little, one section at a time, was enough to remove. Pulled apart slowly.

    Left adhesive on the back and on the phone, where possible, using a tiny screw driver to separate. Reused whatever adhesive remained to reattach.

    Natalie Hursky -

  5. IxCNPhJWutPrxXdc
    • Prepara un iOpener e scalda il retro del telefono lungo il suo bordo sinistro per circa cinque minuti. Questo aiuterà ad ammorbidire l'adesivo che fissa la cover posteriore.

    • Può rivelarsi necessario scaldare e applicare l'iOpener per diverse volte consecutive per poter scaldare abbastanza il telefono. Segui le istruzioni per l'iOpener per evitare il surriscaldamento.

  6. YXJApJG1xQgPLQeZ
    YXJApJG1xQgPLQeZ
    1MoP2YItFZBf2CFY
    • Fai passare il plettro lungo il bordo inferiore del telefono per tagliare l'adesivo.

    • Scalda nuovamente la cover posteriore ogni volta che è necessario per impedire che la colla possono raffreddarsi e indurire.

  7. tZMViRwW2kFwmdoq
    tZMViRwW2kFwmdoq
    QmkNYhL1Kuscm5Kp
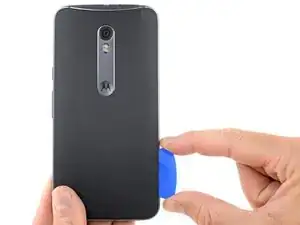
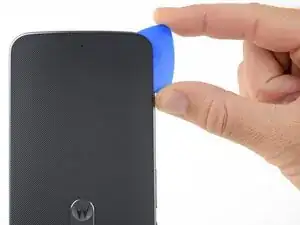
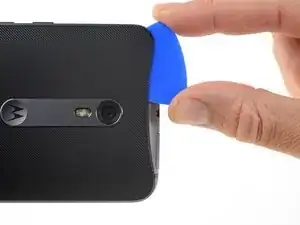
    • Fai passare il plettro lungo il lato sinistro del telefono per tagliare l'adesivo.

    • Cerca di inserire il plettro alla massima profondità possibile sotto la cover, verso il centro. Nella parte mediana della cover c'è dell'adesivo spesso che deve essere separato.

    • Smetti di tagliare quando arrivi al bordo dei pulsanti del volume. Andare oltre questo punto significa rischiare di danneggiare i cavi a nastro sotto la cover.

  8. cjcZoKkITldAUNXJ
    cjcZoKkITldAUNXJ
    mVOBOBxnhTNDTDQp
    lWHNArHdFiVwUwM4
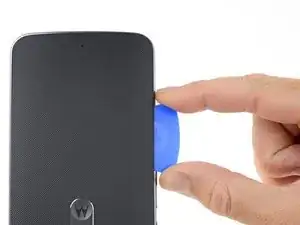
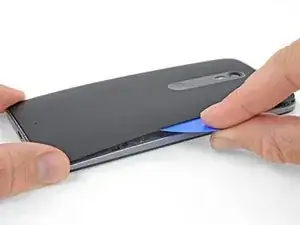
    • Taglia l'adesivo lungo il bordo superiore del telefono, estraendo parzialmente il plettro per farlo passare attorno alla fotocamera posteriore.

  9. QOZOuWRIwJsVmUWg
    QOZOuWRIwJsVmUWg
    hEVyVJoDTCWe1GRK
    TRBGiOQqSjZR15NL
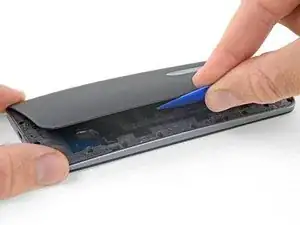
    • Solleva delicatamente la cover dal telefono.

    • Questa operazione può richiedere molta forza se l'adesivo nella parte centrale è ancora attaccato. Mentre sollevi la cover, può essere necessario usare un plettro di apertura per tagliare l'adesivo rimasto.

    • Per rimontare la cover posteriore:

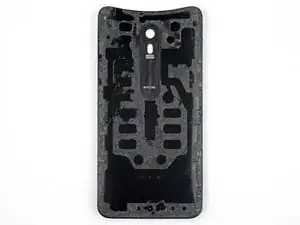
    • Per prima cosa usa delle pinzette e uno spudger per staccare tutto l'adesivo rimasto sulla cover posteriore e sulla scocca del telefono.

    • A questo punto, pulisci le aree di adesione con alcol isopropilico ad alta concentrazione (almeno 90%) e un panno privo di pelucchi. Passa il panno in una sola direzione, non avanti e indietro. Quest'operazione serve a predisporre la superficie per il nuovo adesivo.

    • L'adesivo sostitutivo è fornito in un foglio pretagliato che segue esattamente il contorno della cover. Se non hai questo foglio, puoi usare un nastro biadesivo ad alta tenacità, come il Tesa 61395. Prima di applicare l'adesivo pretagliato sulla cover, rimuovi l'inserto metallico. Applica l'adesivo e poi rimetti l'inserto al suo posto.

    • Dopo aver rimesso in posizione la cover posteriore, applica una forza decisa e costante sul telefono per diversi minuti per favorire una buona adesione della colla.

    • Se vuoi, puoi rimontare la cover posteriore senza sostituire l'adesivo. Rimuovi tutti i pezzi di adesivo più ingombranti che potrebbero impedire alla cover posteriore di essere a filo della scocca. Dopo l'installazione, scalda la cover posteriore e premi bene per fissarla.

    Had the pre-cut adhesive sheet for reinstalling the Moto X Pure’s back cover. It seemed like the most “original” option at the time. I tried and tried to get it aligned inside the back cover, but found it virtually impossible to do. You pretty much have to get it perfectly aligned and then stick it down all at once. If it makes contact with the cover before it’s perfectly aligned, it’s all over. You’ll never get it back off without destroying it.

    After failing with the pre-cut sheet, I resorted to the die-cut strips and corner pieces. This worked just fine.

    Jeff Carleton -

  10. ah4W6JLwrZGvTHTw
    ah4W6JLwrZGvTHTw
    1t1x4EddN5225Miw
    Lv2tFWVD2TuCcHma
    • Usa la punta di uno spudger per sollevare la cover di gomma disposta sopra il connettore della batteria.

    • Rimuovi la cover di gomma.

  11. nDX2pqVCgHMiHA1C
    nDX2pqVCgHMiHA1C
    AxdJRLYT3cLwwmLU
    • Usa l'estremità piatta di uno spudger per staccare il connettore della batteria sollevandolo dal suo zoccolo.

    • Fai leva solo sulla piccola linguetta all'estremità del connettore, dal lato opposto del cavo piatto. Non spingere troppo forte contro il connettore: rischieresti di danneggiare la presa sulla scheda madre.

    Reconnecting the battery was difficult, did not align exactly. Note there are 2 slots that line up and 4 pins. Used a 10x magnifying lens with LED light, purchased to do this job. This step (reassembly) is where the magnifier came in handy. Had to move battery around a bit to get it to line up. Ended up removing adhesive tape from battery, so I could get in place to attach the connector. Battery held in place with screws and phone case, so far so good.

    Natalie Hursky -

    this is the difficult part. I find it is easier to remove this connector as the midframe and phone screen are separating (see step 19). Be also careful in prying this mine got broken luckily it is connected to the old battery which I replaced anyway

    Neil Catalan -

    Broke the battery plug right off the motherboard! Trying to do a 2nd battery replacement. Only push up gently on the edge of the tab and straight up. Shopping for a new phone.

    Natalie Hursky -

  12. 6csWJbhBacko22VM
    6csWJbhBacko22VM
    pUdEueRhCjxB3A3d
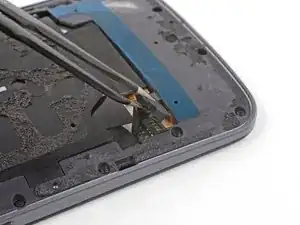
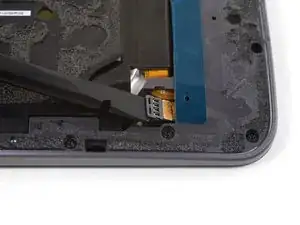
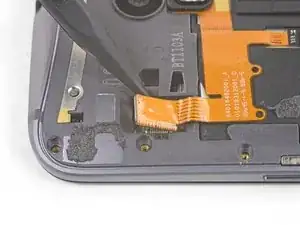
    • Usa delle pinzette per sollevare il coperchio di gomma che protegge il connettore del flash.

  13. gX4tqtZjxamLkswY
    gX4tqtZjxamLkswY
    oMsPvZpCQUtOqbbB
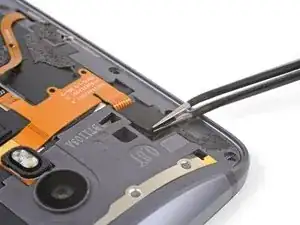
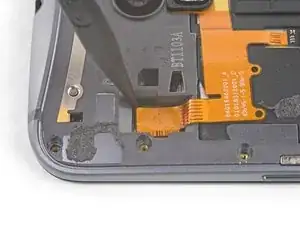
    • Usa la punta di uno spudger contro l'angolo del connettore del flash per sollevare il connettore e farlo uscire dal suo zoccolo.

  14. cuuTufVE1SKP3nu3
    • Usa un cacciavite Torx T3 per rimuovere 20 viti da 2,4 mm.

    Need to add a step for removing the bar holding the buttons in place. Step 5 from the tear down. Still can’t take the mid frame off though.

    Pieter Richards -

    I stripped the threads on one of the 20 screws, had to drill it out. (Managed to do this without cracking the screen, completed battery replacement, all ok.)

    Careful removing the screws, be sure of tight grip. I saw T4 torx suggested on another site for Moto X Pure, this might grip better? Try both.

    Natalie Hursky -

    I did not have to remove the screw holding the volume buttons bar in place. These stay attached, not needed for replacing the battery. Just the 20 screws shown.

    Natalie Hursky -

    DO NOT REMOVE THE SILVER SCREW HOLDING IN THE VOLUME AND ON-OFF BUTTON. If these buttons fall out there are 4 very small springs that will pop out and are very hard to reinsert. If they do pop out do not use tweezers to reinsert but use a magnetic screw driver bit to reinsert.

    Michael Bedwell -

    This is extremely easy to overlook. This screw is a different color (silver versus black) but when you’re in the swing of removing all the screws it’s tempting to just remove ALL the screws. I goofed, had the buttons fall out, could only find 3 of the springs. Put two back in the volume rocker and only one in the power button since it’s smaller, seems like it wouldn’t need two as much. Everything still works, maybe just slightly less tactile than before. Even without the the springs, there’s still some mechanical return to the buttons, so if you do lose them don’t despair.

    Michael Decker -

    This is not working, got two out. Most just strip.

    Christina Denboer -

    Update. The driver provided is not the right size. I had some tools laying around and found one that fit. This allowed me to get all the screws out except the six I stripped using the driver provided by ifiixit. Turns out they come out pretty easy if you have the right size bit. Would have been an easy fix had I not bought the tools…. go figure.

    Christina Denboer -

    What is the right size bit?

    Marlon Nelson -

    The T3 Torx Driver was bundled in the bag with the Alcohol Prep Pad, not with the rest of the drivers! So look before you there before you call support like I did.

    pixilated1 -

    T4 works better, T3 also works. Try both and proceed carefully, get a good grip before turning.

    Natalie Hursky -

  15. TDl2WjeUJqcmYVIZ
    TDl2WjeUJqcmYVIZ
    V4RwIievwOLpDWQJ
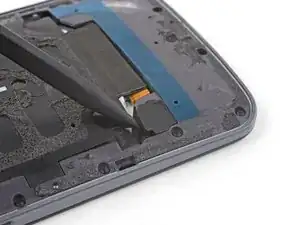
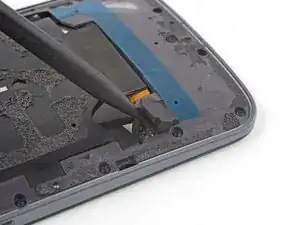
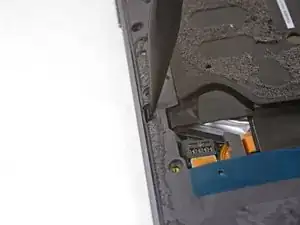
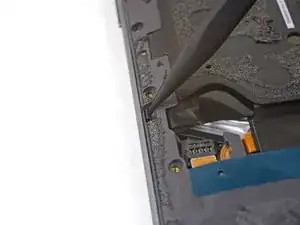
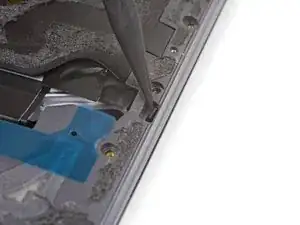
    • Usa la punta di uno spudger per spingere la piccola clip che fissa il lato sinistro del telaio centrale verso il bordo del telefono, sganciando così la clip stessa.

    On reassembly, these did not really click back in place. Held tight when reattaching the 20 (19 in my case) screws).

    Natalie Hursky -

    I had to push rather hard to release both clips. The tip of the spudger bent under the pressure I had to apply. But the the clips did finally release without damage.

    Thomas Bartol -

  16. e2MUxBsMTQjxcoVc
    • Ripeti il passo precedente per sganciare la clip sul lato destro del telaio centrale.

  17. DbVyTklTFsoQH5y3
    DbVyTklTFsoQH5y3
    5gCGwlFmBVlDXTQD
    d3d3HCBhe3bklqDM
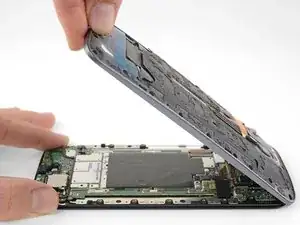
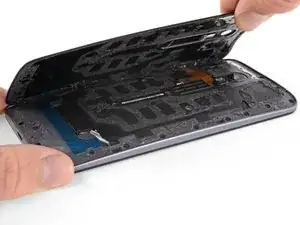
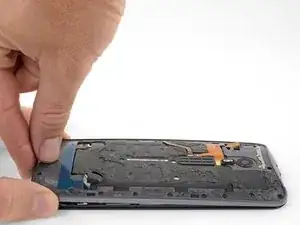
    • Afferrando il display lungo i bordi, solleva delicatamente il telaio intermedio dal display.

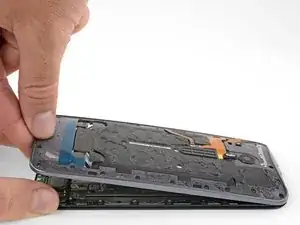
    • Rimuovi il telaio centrale dal display.

    My mid-frame and display were separated on the long sides but seemed a little bit stuck on the top and bottom. I used the flat end of the spudger to carefully pry the two assemblies apart at either end.

    Gary Herber -

    In my case, stuck in the middle. Pulled apart very slowly, giving the adhesive a chance to separate, and not tearing whatever it was in there. Kept an eye on the inside middle, and very SLOW let it separate. Or was that the battery? In either case, go slow on all steps.

    Natalie Hursky -

    Yeah, everything went according to the guide until this step. I lifted the midframe away from the screen assembly as shown and something in the center didn’t separate at all. I spent a good half hour terrified that I had missed a step or a screw or that there was something different about my phone. In the end I read the comments and very slowly and patiently lifted the midframe until something uncoupled and the two parts cleanly separated. I was certain that permanent damage must have been done, but upon reassembling everything seems to be working perfectly.

    Brian Horne -

    Note to self - check that ALL (20) screws have been removed… especially if midframe is stubborn lifting up - i (almost) forgot about the one near the display cable (and it’s threaded into the motherboard instead of the frame) :)

    John Riselay -

    In my unit, the midframe released from the display nicely just as described in the instructions.

    Thomas Bartol -

Conclusione

Per rimontare il tuo dispositivo, segui queste istruzioni in ordine opposto.

Adam O'Camb

Membro da: 11/04/15

195052 Reputazione

0 commenti