Introduzione

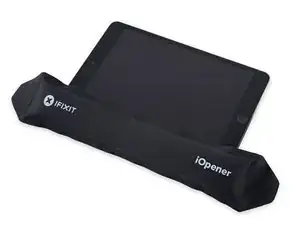
Guida solo prerequisita per aprire l'iPad Mini 4.

  1. HaIxvTqYrjFRYmFf
  2. 13rFSRL3NS4fCQUu
    13rFSRL3NS4fCQUu
    C61ZvErpTPRvm3FK
    1TsMJjmwTMVmHTIa
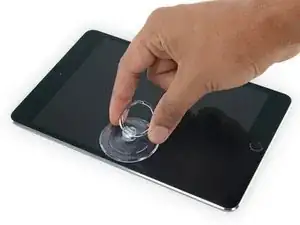
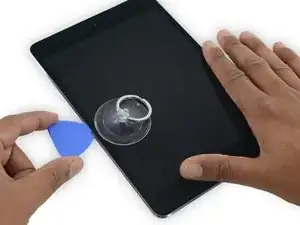
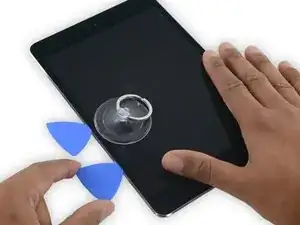
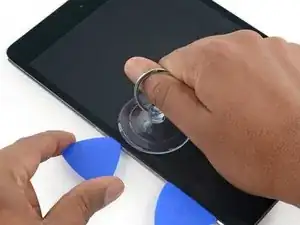
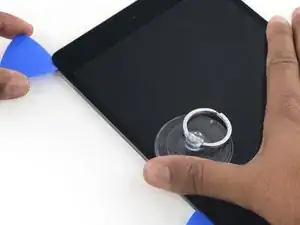
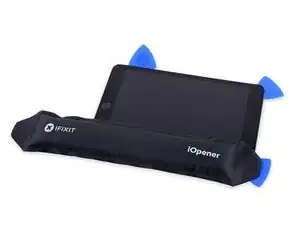
    • Posiziona una ventosa al centro del bordo sinistro.

    • Assicurati che la ventosa sia completamente piatta sul vetro per avere una presa salda.

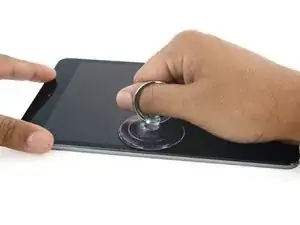
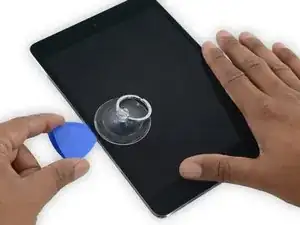
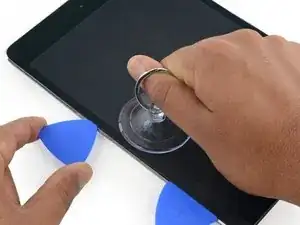
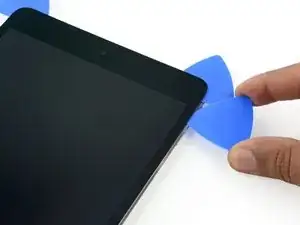
    • Mentre tieni fermo l'iPad con una mano, tira la ventosa con una forza costante per creare una fessura.

    • A seconda dell'età del tuo dispositivo, questo potrebbe essere difficile. Se stai avendo problemi, applica più calore e riprova.

    • Sta' attento a sollevare il vetro solo il sufficiente per infilarci un plettro. Se lo sollevi di più rischi di rompere il vetro.

  3. ohUAS1Ykl4EUbSwG
    ohUAS1Ykl4EUbSwG
    ScjggYUdT4DXsNOK
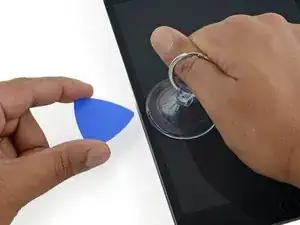
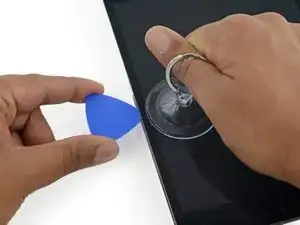
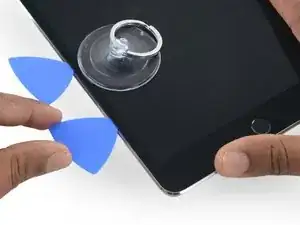
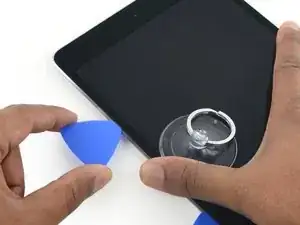
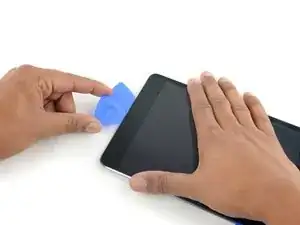
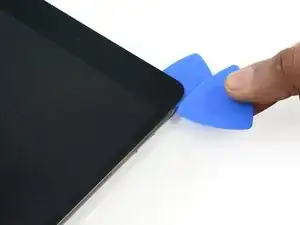
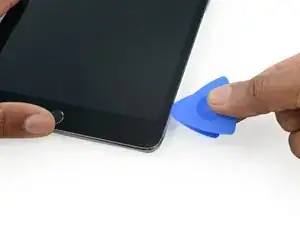
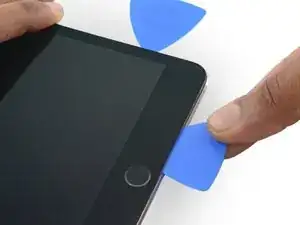
    • Mentre tieni sollevato il vetro con la ventosa, inserisci la punta di un plettro nella fessura tra il vetro e il corpo dell'iPad.

    • Non infilare il plettro più di 2 mm sotto il lato del vetro. Infilarlo più a fondo potrebbe danneggiare il gruppo della retroilluminazione, il pannello LCD o il touch screen.

    “Don't insert the opening pick any deeper than the black bezel on the side of the display. Inserting the pick too far may damage the LCD.”

    Unfortunately, you only know you have inserted it too far when you have, and you start seeing little bubble veins form between the glass screen and the LCD.

    The adhesive can be very stiff/hard, and if pushing through it can result in the pick plunging into the LCD when the adhesive finally gives way.

    Take your time, use alot of heat, and if you need to try and push the pick in, try and do so in a slicing motion along the edge, use the wide edge, or hold the pick so that your finger will hit the edge of the screen before the pick tip will pass the bezel.

    lucanos -

    Adhesive strips are only 1mm wide on sides. Up to 5mm wide top and bottom. I used the Isclack. Screen seemed ok bending without breaking. Worth looking for a photo of the replacement adhesive strips so you know what you have to separate. Be extra careful at the lower right corner where the cables are.

    ian cheong -

    This is a failure of a guide as it doesn’t tell you to insert at a downward angle so you don’t potrude into the LCD… Now I have to spend more money to replace the screen as I pushed adhesive between the LCD and the screen even though I went no farther than a millimeter short of the screen...

    Alec -

    can you open the right side if the left is too cracked to use a suction cup on?

    clark overhiser -

    This guide needs amending urgently.

    You MUST NOT put the pick or whatever you are using more than 2mm under the sides of the screen, or you will cut through the adhesive tape securing the backlight assembly to the LCD glass.

    This will push adhesive into the viewable area of the LCD and cause the backlight assembly to no longer be secured against the LCD fully.

    I now need a new screen.

    This line below from the guide is absolutely INCORRECT and will ruin your expensive display:

    ”Don't insert the opening pick any deeper than the black bezel on the side of the display.”

    The black bezel is 5mm to 6mm wide; you MUST NOT insert anything to that depth or you will destroy your display. 2mm maximum!

    jamesqb2001 -

    thanks. will take this into account for my repair

    Adab Abu -

    I too damaged my display because of this absolute nonsense (The German version, which I used, still had this INCORRECT portion in it). I can't believe how long it took iFixit to update this, even though people have been reporting this for years on end. Sadly iFixit still haven't updated a variety of other things that are still at the very least high risk instructions. I just messaged them the other day, but they don't seem to care about or understand the remaining issues that this guide has. At least they updated one of the most severe things, but they just plainly told me 'I'm wrong' about the rest. I liked iFixit it so far, and I've worked on a variety of (difficult) repairs - but this experience was a very huge let down.

    Mac Stevenson -

    A few thoughts after opening a number of Mini 4’s.

    1) if the display is warm enough you can squeeze the digitizer and LCD back together after a minor incursion with the opening pick and it will reseal.

    2) I’ve started going in at the top just to the right of the camera (I use an iFlex to get in then switch to a pick). Then I run down either side with my fingers choked up on the pick so there only a mm or 2 sticking out. Usually after running down one side, I can get the display open enough to get the pick in behind the LCD when I do the other side

    Stow -

  4. TUkUdEMQJclDVNsZ
    • Scalda di nuovo e riappoggia l'iOpener sul bordo sinistro per qualche minuto.

    • Stai attento a non surriscaldare l'iOpener durante la procedura di riparazione. Aspetta sempre almeno 10 minuti prima di scaldare di nuovo l'iOpener.

    If your iPad is cold, consider leaving the iOpener on for longer than 5 minutes. The aluminum housing is a very large thermally dissipating mass and will quickly cool off the glass and make you have to start over and wait the 10 minutes to reheat. There’s a very slim window in which you’re able to insert the pick into the glass adhesive before it solidifies once again. I’ve been fighting with it for like 20 minutes following these instructions and it’s not working. You really need to leave it for longer than just 5 minutes to get the back housing hot too.

    Crystal S -

    Heat is essential. I used a 3d printer’s heated set at 65 degrees. Chris Storer’s stip above saved me as you really need to let it sit for quite a while to soften the adhesive. Since I was doing a battery change, I heated both sides as the aluminum back is a huge heatsink that really sucks up the heat. Don’t try forcing it; if the suction cup isn’t pulling a gap in the screen, leave it on the heater for additional time.

    garbage911garbage -

    Love the 3d printer idea, I hadn’t thought of that! I have used a heat gun as well but you have to be very careful to not use too much heat. Also watch for inserting the pick too far, it is really easy to delaminate glass from the display!

    russ -

  5. CqMR4hHhWIXsHe31
    CqMR4hHhWIXsHe31
    cxBVHNUwDC4RX1cZ
    Jnv4Ppg4Y5ZUBVkB
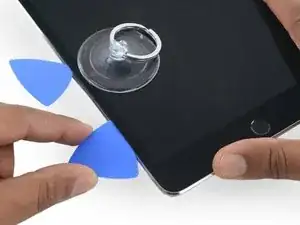
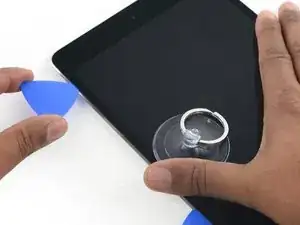
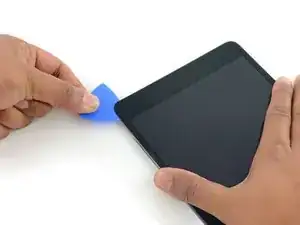
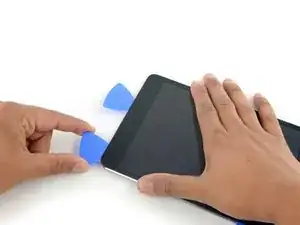
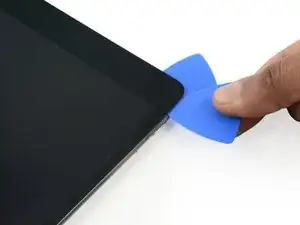
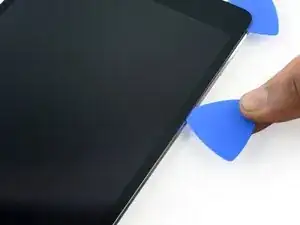
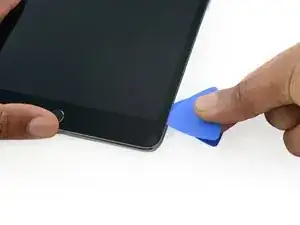
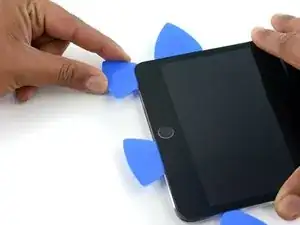
    • Inserisci un secondo plettro accanto al primo e fallo scorrere verso il bordo inferiore dell'iPad, separando l'adesivo.

    • Durante il resto della procedura, se incontri troppa resistenza mentre fai scorrere il plettro sotto il vetro, fermati e riscalda la zona dove stai lavorando. Fare troppa forza con il plettro potrebbe rompere il vetro.

    I have found that wedging a blue pry tool in between the frame and the glass can give you a better edge enough to slide the pick in.

    Crystal S -

  6. WOS4ZM3eJLkCskJC
    WOS4ZM3eJLkCskJC
    Hnga6OLRAMAifQgv
    ypBjyNU4PUckUhxI
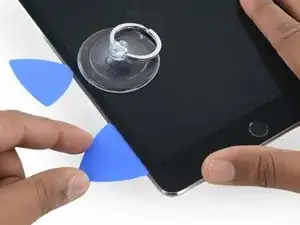
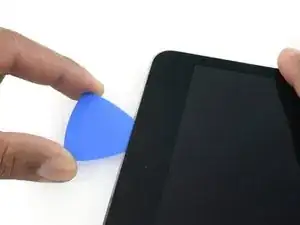
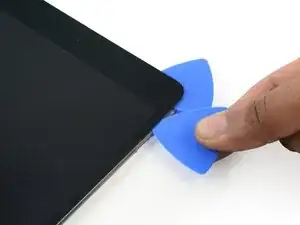
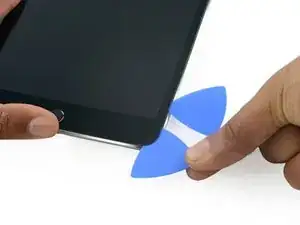
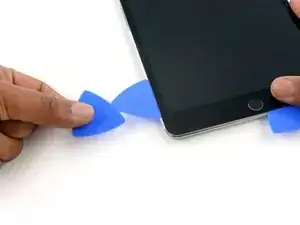
    • Continua a far scorrere il plettro verso il basso per separare l'adesivo.

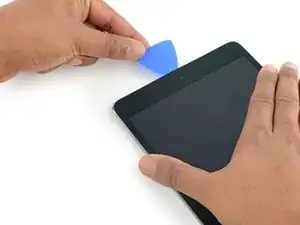
    • Se il plettro si incastra nell'adesivo, "giralo" lungo il bordo dell'iPad, continuando a separare l'adesivo.

  7. g4K1TQaPG4Pcsian
    g4K1TQaPG4Pcsian
    nTaLoCMLNmMdWXfP
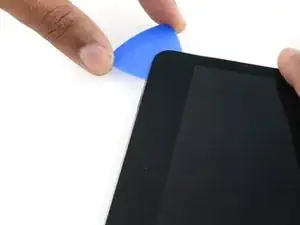
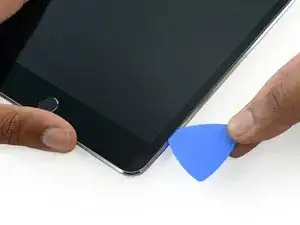
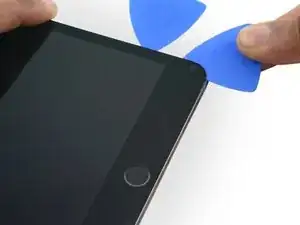
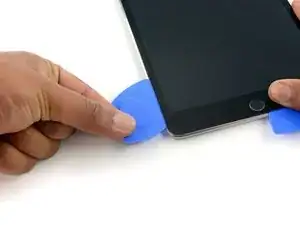
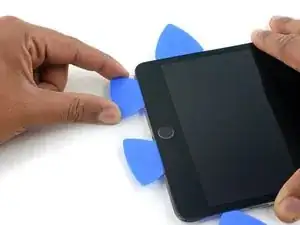
    • Prendi il primo plettro che hai infilato e fallo scorrere verso il bordo superiore dell'iPad.

  8. UbCbTICAd1Qenj1D
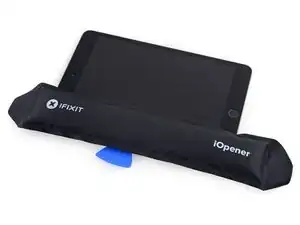
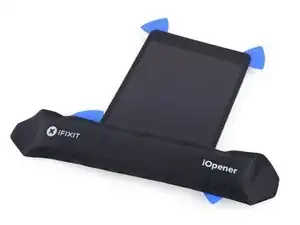
    • Scalda di nuovo l'iOpener e appoggialo al bordo superiore dell'iPad, sopra la fotocamera anteriore.

    • Stai attento a non surriscaldare l'iOpener durante la procedura di riparazione. Aspetta almeno 10 minuti prima di scaldare di nuovo l'iOpener.

    • Se hai un iOpener pieghevole, puoi piegarlo allo stesso tempo sia sopra il bordo superiore che sulla parte superiore del bordo sinistro.

  9. ZMS55hkNx4hdDBSU
    ZMS55hkNx4hdDBSU
    Q5nLFBwJGyFQJD6K
    ajQfyycssK2puFRL
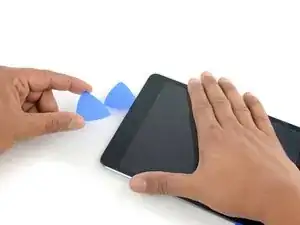
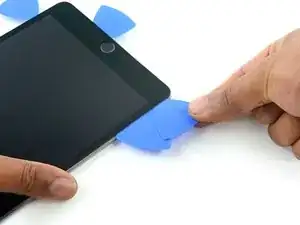
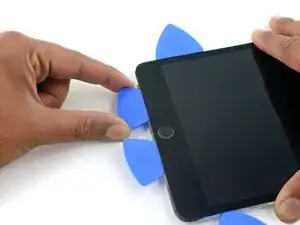
    • Fai scorrere il plettro attorno l'angolo in alto a sinistra dell'iPad per separare l'adesivo.

  10. eoxpXig3yZbNJ5LM
    eoxpXig3yZbNJ5LM
    2UQdxX1TXSBtPnV1
    QJJjM65RQqa2bBUY
    • Fai scorrere il plettro sotto il bordo superiore dell'iPad, fermandoti appena prima deella fotocamera.

    • Mentre ti avvicini alla fotocamera, sfila leggermente il plettro e continua a farlo scorrere sotto il bordo superiore.

    • Evita di far scorrere il plettro sopra la fotocamera, in quanto potresti macchiare la lente con l'adesivo o danneggiare la fotocamera. I passaggi seguenti ti mostreranno come evitare al meglio la fotocamera anteriore.

  11. 2biNwid2uuwBB1dI
    2biNwid2uuwBB1dI
    upKYLNsBIufNuJLK
    lXpUpqTV2IROQlUM
    • Lascia il plettro infilato nell'iPad leggermente dopo la fotocamera.

    • Prendi un secondo plettro ed infilalo a sinistra della fotocamera, dove sei già passato col primo plettro. Fallo scorrere verso l'angolo in alto a sinistra per tagliare del tutto l'adesivo rimasto.

    • Lascia il secondo plettro sotto l'angolo per evitare che l'adesivo si reincolli raffreddandosi.

  12. RBiTBQ1bfbLVlBEQ
    RBiTBQ1bfbLVlBEQ
    QoYVVDyCjOGlRV4w
    • Infila il primo plettro più a fondo nell'iPad e fallo scorrere lontano dalla fotocamera, verso l'angolo.

  13. pIBSCEPokwTEi1cH
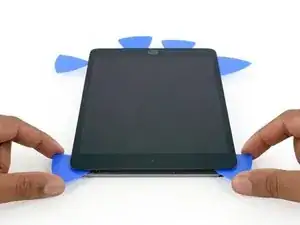
    • Lascia i tre plettri sotto gli angoli dell'iPad per evitare che l'adesivo si reincolli.

    • Scalda di nuovo l'iOpener e appoggialo al bordo destro dell'iPad, dove ci sono i tasti del volume e di accensione.

  14. ICjU4SsE5PcBHfLj
    ICjU4SsE5PcBHfLj
    XHaDLfDSSEKIKO2S
    4MPJUfjxWS21GryD
    • Infila un nuovo plettro e fallo scorrere sotto il bordo destro dell'iPad, separando l'adesivo.

  15. EDS62uJdC4StMJC4
    EDS62uJdC4StMJC4
    6FSbjKEpCFQttuXP
    DYTVSLmFJPWPjOo6
    • Continua a far scorrere il plettro verso il bordo inferiore dell'iPad, riscaldandolo con un iOpener se necessario.

    • Stai attento a non infilare troppo a fondo il plettro vicino all'angolo in basso a destra, o rischi di danneggiare il cavo dello schermo.

  16. WiN5Njbf4TAxgH6j
    • Lascia i plettri sotto gli angoli e scalda di nuovo l'iOpener.

    • Ricordati di non surriscaldare l'iOpener: non scaldarlo più di una volta ogni 10 minuti.

    • Appoggia l'iOpener riscaldato sul bordo inferiore dell'iPad, sopra il tasto Home, e lascialo lì per qualche minuto per ammorbidire l'adesivo sotto il vetro.

  17. KV3iXayvjLwbPJgy
    KV3iXayvjLwbPJgy
    tut5k1RijNURbajb
    krtEFHCd1XVwjLQp
    • Infila un nuovo plettro sotto l'angolo in basso a destra dello schermo, sotto l'ultimo plettro usato sotto il bordo destro.

    • Ruota il nuovo plettro attorno all'angolo in basso a destra del dispositivo.

  18. fPQkoQKAuO4UQw52
    fPQkoQKAuO4UQw52
    njXRBDjMIAIN3kLl
    • Fai scorrere il plettro dall'angolo in basso a destra sotto il bordo inferiore del dispositivo. Fermati a circa un centimetro dal tasto Home.

  19. TyQ2yT4inXSfLZnt
    TyQ2yT4inXSfLZnt
    GJ3JqPpVjZVTbFjD
    • Infila un ultimo plettro sotto l'angolo in basso a sinistra dell'iPad, sotto quello già presente.

  20. 6FCir6UTX1LB11oa
    6FCir6UTX1LB11oa
    I5wxHRns6QLtaanf
    • Fai scorrere il plettro attorno all'angolo in basso a sinistra dell'iPad.

  21. xvXZkOKET1oQ1aeM
    xvXZkOKET1oQ1aeM
    YmcQTJpRREZ6EI6m
    dJISOpWxsTNHryjV
    • Continua a far scorrere il plettro verso il centro del bordo inferiore, fino a circa un centimetro dal tasto Home.

  22. kKFZvGgiSl6PxHNZ
    kKFZvGgiSl6PxHNZ
    L6v3qnXBSmPS3yQc
    CAtEvbHqdCLRe6Xf
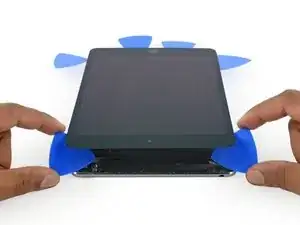
    • Ruota i due plettri sotto il bordo superiore dell'iPad per separare l'adesivo restante che tiene fermo lo schermo.

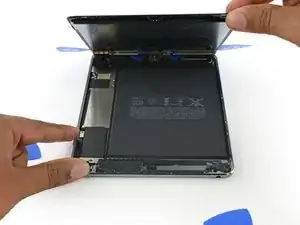
    • Solleva lo schermo dal bordo superiore per aprire il dispositivo.

    "Twist the two picks at the top edge of the iPadTwist the two picks at the top edge of the iPad "

    When I did this twisting motion, and I thought I was being gentle, one of the picks cracked nearly in half. That adhesive is very strong! I probably did not cut into it far enough before applying the twisting to open the screen.

    jharrison -

Conclusione

Per rimontare il tuo dispositivo, segui queste istruzioni in ordine inverso.

Evan Noronha

Membro da: 06/02/15

223184 Reputazione

0 commenti