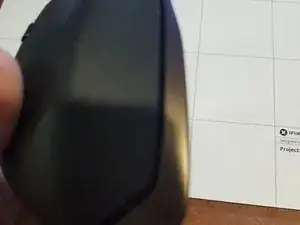
Introduzione

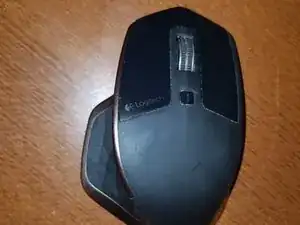
Possiedo il mio MX Master da più di tre anni, e in questo periodo ha accumulato molta polvere e pelo di cane. C'era abbastanza polvere dentro il mouse da creare della frizione quando usavo la rotellina, la faceva rallentare, così ho deciso di pulirlo. Volevo anche indagare se era possibile cambiare la porta micro USB ad una USB-C.

(spoilers: no)

  1. rrSgIXuyYNXehNpQ
    • C'è un sacco di sporco!

  2. CiG1RBP62QYCkNto
    CiG1RBP62QYCkNto
    nanTrAlSfUEtEVja
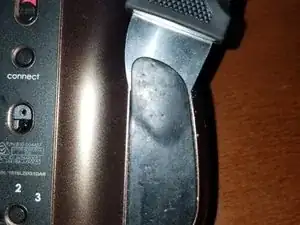
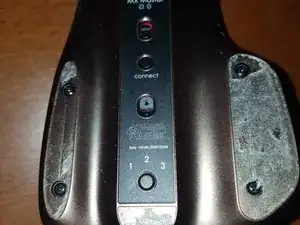
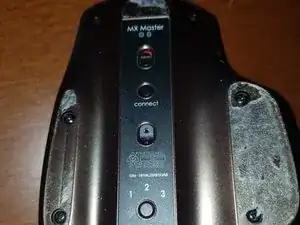
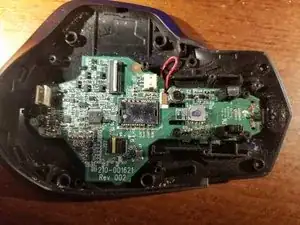
    • Il mouse ha quattro piedini sulla parte inferiore, ma solo i due più lunghi devono essere rimossi. Ho usato Jimmy del Toolkit Pro Tech.

    • Non avevo dei nuovi piedini sotto mano, ho quindi riusato quelli originali. Per questo non c'è nessun passo sulla rimozione dell'adesivo e la reinstallazione dei piedini.

    It makes sense to remove them with heat. That way there is a possibility to return them back to the mouse.

    Stjepan -

  3. MMk3NevAma5UDyZL
    MMk3NevAma5UDyZL
    iLUeMXWZGEkD52SO
    MQyACUA3b4QdV5jY
    • Scaldate i cacciaviti! La prima ondata consiste di quattro PH1 e due viti T5 sulla parte inferiore.

    • Una volta rimosse, dovrebbe essere facile aprire il mouse.

  4. MRtMUaamdRw26BNk
    MRtMUaamdRw26BNk
    CBCJCJejqPGc3TKi
    • Quando cercherai di aprire il mouse, tieni conto della posizione delle clip che lo tengono unito, così da danneggiarne il meno possibile.

    Totally unclear how exactly to open it….

    Service Tool -

  5. vBoxCexNWLFTd3bO
    • Apri il connettore con qualsiasi strumento trovi adeguato, a meno che non succeda come a me che ho accidentalmente scollegato il cavo nel passaggio precedente.

    Well, THAT BROKE. Any advice on how to keep it in without the connector?

    Andrei Pierre -

    Which part broke?

    Skylar -

    How do I re-attach the ribbon cable?

    Peter Szabo -

    any chance you guys know where to buy the ribbon cable and the lock?

    Chino Mercado -

    to release the ribbon, the white bit flaps upwards

    Adam Sherwood -

  6. aJJDrVFnTPTE6Rhr
    aJJDrVFnTPTE6Rhr
    jDTBOQS1ueOPoKEe
    CTKDC4yZSQ1ZYvGU
    • Questa è la parte dove ho capito di avere bisogno di un'illuminazione migliore.

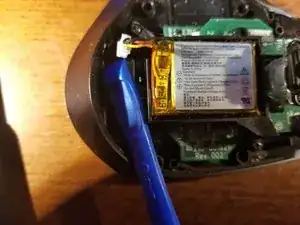
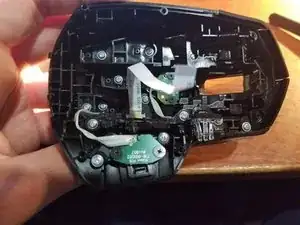
    • Metti da parte la metà superiore. La rimozione della batteria prevede di svitare tre viti PH1 e scollegare un connettore ben fissato.

  7. VVegEe1rjweMksLd
    VVegEe1rjweMksLd
    rg5AoX3N2PPUuvwI
    mPAxtscjlDydnOmU
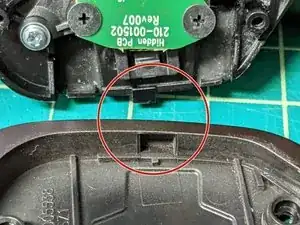
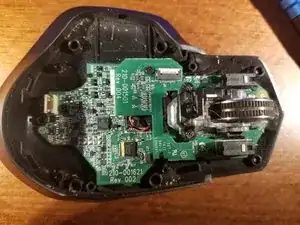
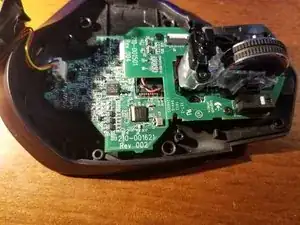
    • Tempo di cambiare punta! Sul PCB sono situati gli switch per i tasti destro e sinistro. Questi vengono via togliendo le quattro viti P0 e una altro connettore ZIF.

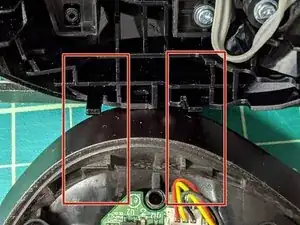
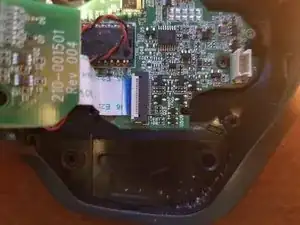
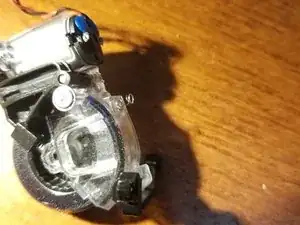
    • Il componente della rotellina è tenuto fermo da due viti P0 sulla parte frontale. C'è anche un connettore per il motore che si nasconde dietro il cavo piatto per il PCB che hai già rimosso.

    • Le viti non sono visibili in questo passaggio, ma possono essere scorte in quello precedente. Sono terribile nel fare foto.

    • Puoi vedere dello sporco che causava i miei problemi con lo scorrimento nella foto precedente,

  8. 6KUvASxHKexCpZsP
    6KUvASxHKexCpZsP
    sVju21puji3YVbmg
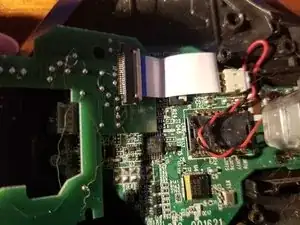
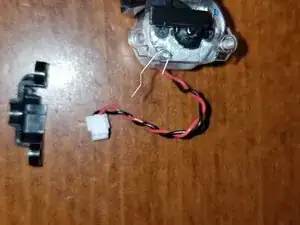
    • Altre tre viti P0 tengono insieme questa parte.

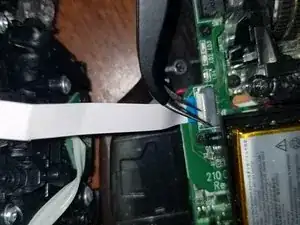
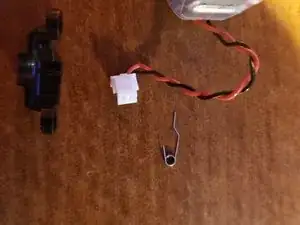
    • Assicurati di posizionare il piccolo aggeggio sul cavo rosso (non ricordo il suo nome).

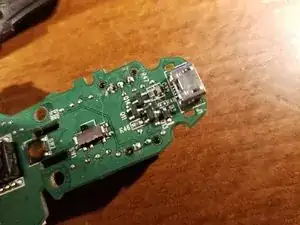
    • Puoi vedere il connettore micro USB sull'altro lato. Sfortunatamente, non posso cambiarlo con un connettore USB-C con gli strumenti che possiedo.

    • Però ho tutto quello che serve per pulirlo! Una bomboletta di aria compressa è tutto quello che mi serve.

  9. BMfhgjvmBZRP2A2W
    BMfhgjvmBZRP2A2W
    YrdRQ6Vh31F5tTEq
    VgGimBaEppGPihbb
    • Non sono riuscito a togliere la rotellina dal suo alloggiamento., ma son riuscito a farla girare con dell'aria compressa. Non lo mostro nel video, ma è volato via un bel batuffolo di polvere.

    • Mi scuso in anticipo per averlo registrato in verticale. Inoltre non sono riuscito a filmare i detriti dentro la rotellina.

    • La molla sulla parte inferiore della foto probabilmente cadrà. Assicurati di non perderla.

    • Ho smontato tutto il componente nella speranza di togliere la rotellina - senza successo. Non so dove questa molla dalla forma strana vada., probabilmente sul piolo. L'ho lasciata fuori e non sembra essere importante.

    I had jam stuck in the casing of the wheel, but the pins of the wheel are firm in place and you can’t remove it from that transparent casing. So I removed the trigger that activates the ratcheting feature. You have to remove the screw that is in the casing. That holds the trigger in place. Then disconnect the spring from the center of the case and slide out the trigger. Then I brought a galss of hot water and dipped the casing and wheel inside and with an end of a zip tie (that is very thin and at the same time very firm and also will not scratch the metal part of the wheel) I esealy removed the dust and jam that was jamming the spin of my wheel and used a tissue to dry the assembaly as I cleaned. Be careful not to get the motor wet though. You can remove the motor and just dip the whole thing in. I also poped out the pin halfway from one side of the wheel by pulling the casing apart a little to make easier access. Be careful not break the casing with too much pressure as that will be it for your MX Master!

    hamidreza saleh -

    I was able to remove the wheel with a butter knife, I forced out the pin on the side opposite the ratchet jammed my finger in a way to stop it slipping, then pried the knife in the other side and levered the other side away. It made a bit of a scary noise but nothing broke. I got it bck in my sitting the wheel holder on a flat surface, pushed down, and pried the plastic apart on the ratchet side with the knife, and it popped in all at once. As a warning though, the friction of the scroll wheel appears to have increased, it no longer scrolls for forever, but just a few seconds when given a hard flick. I was only game enough to try getting the wheel out cos I recently got the MX Master 3 cos the tracking stopped working on my MX Master (It worked again as soon as I opened it though)

    Ethan Corney -

    I can confirm that what Ethan said works. Basically you need to push the left side of the wheel (side without the blades) out first and then stick the knife in on the other side and turn a little bit.

    Jonathan Tsoi -

    Übt diese Feder möglicherweise Druck auf die Innenseite des Mausrades aus und sorgt dann mit im Mausrad befindlichen Nocken zusammen für die Raste-Funktion?

    Niklas -

    I'm going crazy with that "oddly shaped spring"! Does anyone knows how to put it back in place???

    Joao Alberto Gazzinelli -

    Joao, it should be on the top of the motor (servo), about 5mm from the black, halfmoon-shaped moving part.

    Logi logi -

  10. MGCRq5EnKZuPRUJM
    MGCRq5EnKZuPRUJM
    iLkKClSIRmkQItyp
    • Puoi seguire i passi 5-8 nell'ordine inverso per ricomporre la parte inferiore.

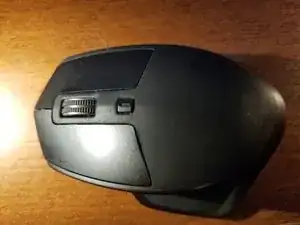
    • La parte superiore ha bisogno solo di aria compressa, nessun disassemblaggio.

    • Puoi premere il pulsante per raggiungere al meglio i detriti sottostanti.

  11. wIwfYEDwaRlnQ6vs
    • Dopo aver seguito i passi 1-4 nell'ordine inverso, il tuo mouse sarà pulito di nuovo! E probabilmente più pulito del mio.

Conclusione

Per riassemblare il dispositivo, segui le istruzioni nell'ordine inverso.

Skylar

Membro da: 22/01/15

1091 Reputazione

14 commenti

I followed your guide and I found a problem when I put everything together again. Now I turn on the mouse and it’s broken. The battery leds just blink and it doesn’t respond to pressing the channel selection or connect buttons, it just doesn’t work or sincronizes with the dongle, just shows the battery leds blinking. Anyone has any suggestion? Many thanks.

Juan Suarez -

I have the same problem (all three LED’s blink green and no response to pressing channel selection or connect buttons) that Juan Suarez describes.

I would also be happy for any suggestions on how to fix the issue.

Max -

And? Did you find a way to fix it?

Nicholas Blair -

Unfortunately I did not.

Max -

Have you tried reseating the ribbon cables?

Skylar -

I have just now.

Is it not just the one ribbon cable (see step 5)?

Max -

Reseating the ribbon cables fixed that for me. There is a blue line on the cables. That has to align perfectly to the edge of the cable lock when down and fixed.

mark -

I would recommend applying heat to the feet before removing them. I damaged one. Used heat and the second one came off and went back on perfectly.

charlie -

This is something I recommend as well since I now do not have the feet back. I removed them with a scalpel and the adhesive is now missing. I think it makes sense to apply heat (hair heater) and just remove them and put back on.

Stjepan -

My scroll wheel stopped responding to input. After cleaning out all the lint from the scroll wheel I still has issues. I cleaned off the boards and wiped down the mouse wheel sensor and ir emitter. Tested it out and it’s working again.

David Johnson -

I’ve had my MX Master for 7 years now and the thumb button broke (got stuck pressed, so the special feature was always active and the cursor didn’t move). With the help of these instructions, I was able to cut the wires to the button to make the mouse usable again. Lost 1 feature but glad to keep the same mouse, hopefully I’ll get another few years out of it!

Tucker Martin -

When you are "in there" anyways, you might consider gluing the the plastic thing on the motor axle with cyanoacrylat. This part working it self up is the typical cause of the wheel click function dying! ;-)

Anders Frederiksen -

I also ended up with a loose spring... I'm pretty sure it goes here: Spring-placement... (Skylar, you are welcome to include the picture!)

Cheers!

Anders Frederiksen -

By the way: I recommend leaving the center part of the low friction pads in place. I've had mine disassembled three (!) times now because of the failing scroll wheel click - and the original pads are still OK (with no additional glue added)...

PS: Annoying the Logitech designers did not leave the screws immediately accessible - especially when they messed up in production (the plastic part on the motor - hopefully the cyanoacrylate means I'm done opening it for that!)

Anders Frederiksen -