Introduzione

This guide will walk you through the process of removing a battery from your Razer BlackWidow V3 Pro.

If your battery is swollen, take precautions.

Make sure to calibrate your new battery.

Dispose your e-waste responsibly.

  1. Xpb5j4EojwnfWRaF
    Xpb5j4EojwnfWRaF
    RU3RmRZV3MrbvNHj
    • Turn off your keyboard

    • Make sure that no lights on the keyboard are on

  2. ZYrJtKilwlDVE55Y
    ZYrJtKilwlDVE55Y
    lniNpM2hmANuwVNU
    L23aDbWMLBWKP23a
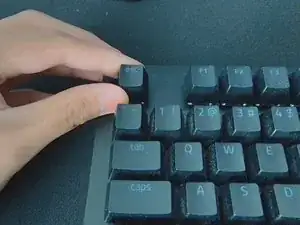
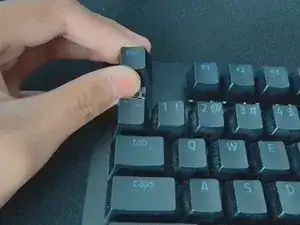
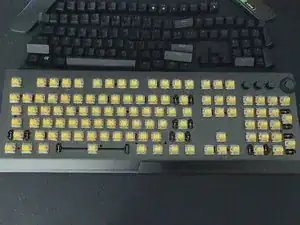
    • Remove the keycaps using either a keycap puller or your hands

    • If you are not using a keycap puller, take caution to only pull the keycaps directly up or you may risk damage. Remove keycaps near the outskirts of the keyboard first, then work your way to the middle.

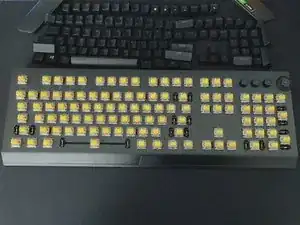
    • Repeat until all keycaps are off

  3. JOdFGQblReHxLUVA
    JOdFGQblReHxLUVA
    rMLFQ3rUx53CwsOh
    • Peel the lower-right rubber feet off just enough to reveal the 9mm Phillips screw.

    • This image turns the keyboard backwards, which is why the rubber feet we are peeling off appears to be on top. If it helps, turn your keyboard backwards too.

    • Be careful as to not rip the rubber feet. If needed, apply an iOpener, heat gun, or hair dryer on the rubber pad to soften the adhesive underneath.

  4. Q3PEkHZAFPSnQcXI
    • Unscrew the 9 mm Phillips screw underneath.

  5. nWC2BGZ6ZwgnG1UU
    nWC2BGZ6ZwgnG1UU
    nThoTROwAoIrBVXN
    • Remove the 15 7 mm Phillips screws

  6. bxSk4x6Ep1wWIopJ
    bxSk4x6Ep1wWIopJ
    LGBOZEceCQZqQknE
    BH1d5xhujIfX3oKg
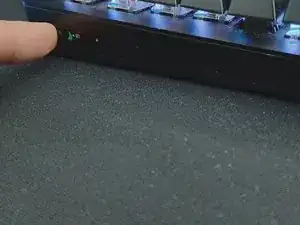
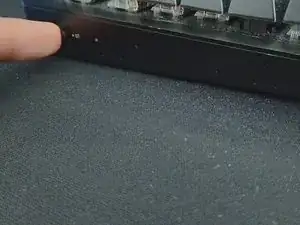
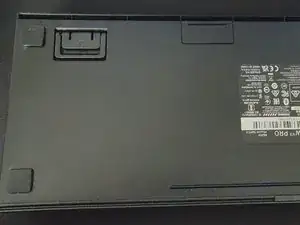
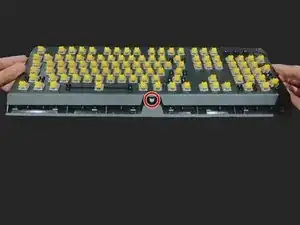
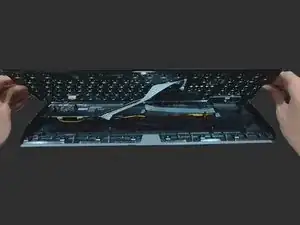
    • Lift the top of the keyboard up and slightly to the front.

    • While pushing up, watch the LED on the front (circled red on the 2nd picture) and make sure it doesn't get damaged while removing the lid.

    • Do not remove the keyboard entirely, there are two connectors still in place.

  7. C5iorGN5nMROefkK
    C5iorGN5nMROefkK
    FJbZpNqyKNAyIXKI
    l3Rt54C1SnDGPXAb
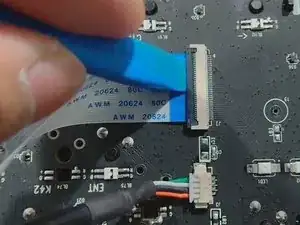
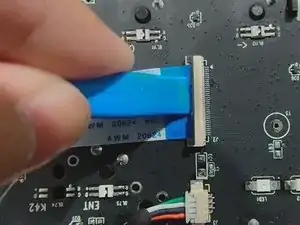
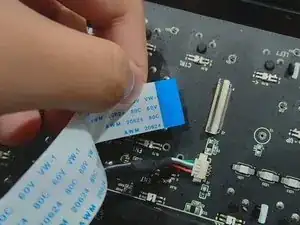
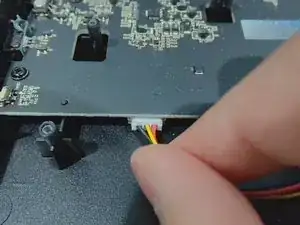
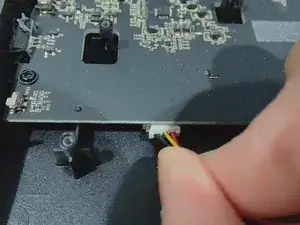
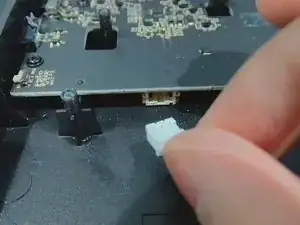
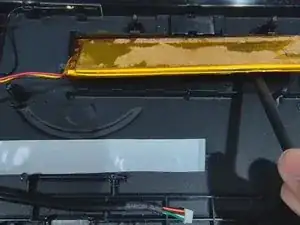
    • Flip up the black locking flap on the ZIF connector using a fingernail or a spudger, then carefully pull out the ribbon cable.

    • During reassembly, try not to bend the ribbon cable, apart from the factory made bend.

  8. JZJx1YEGrni2tfym
    JZJx1YEGrni2tfym
    BXbNtyDAtNWlXEJe
    • Carefully pull out the wires.

    • You may need to wiggle the wires in order to remove them.

    • During reassembly, make sure that you don't assemble these wires backwards, or you may risk damage.

    • Remove the top housing entirely.

  9. EYxBtVe3ArA11Qqe
    EYxBtVe3ArA11Qqe
    n3wMwBFQkcYut6kW
    LthcFGZ4jJEVmqE4
    • Peel off the black plastic covering the battery.

    • Peel off the black plastic piece carefully to make sure the battery doesn't get punctured and release dangerous chemicals.

  10. bNgTxF1YF2klMGmG
    bNgTxF1YF2klMGmG
    H1Po2RqDKmeVoOnH
    lsk3ZTa45Y4kiSYZ
    • Remove the battery connector from the motherboard.

    • You may need to wiggle the connector in order to remove it.

    • During reassembly, make sure to insert the connector back the right way, or you may risk damaging the connector.

  11. fSwYhLbIo2uWGKWO
    fSwYhLbIo2uWGKWO
    tn36PYPgJqLjTpUR
    CC6RSQmKMtuOABER
    • Use your hands or tweezers to remove the wires from the mount.

  12. q1ubBG3Myj55J6AV
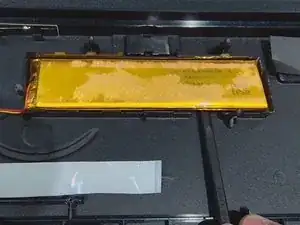
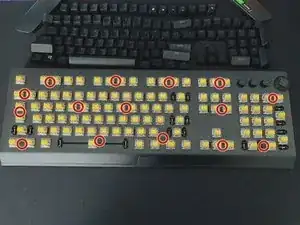
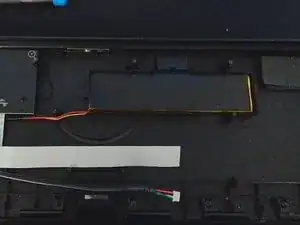
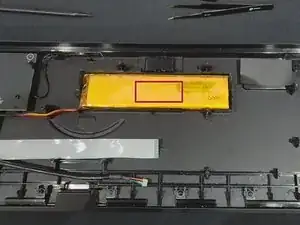
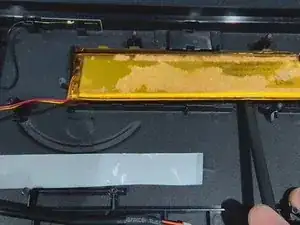
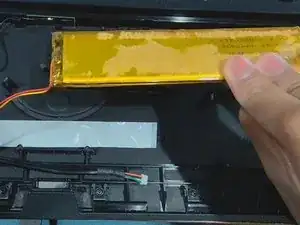
    • The battery is held on with adhesive in the middle, as highlighted. direct your iOpener / heating device, and your tools in this general area to remove the battery.

  13. FkTRLOCY1VbKwGb3
    FkTRLOCY1VbKwGb3
    ffpNmjGijIKGsR15
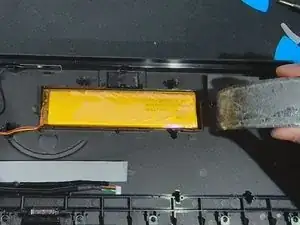
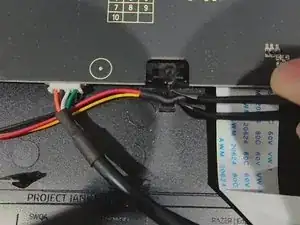
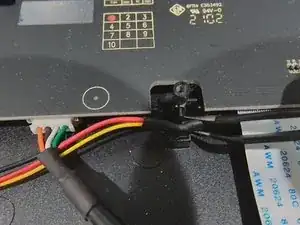
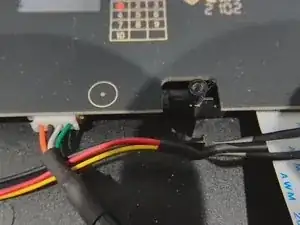
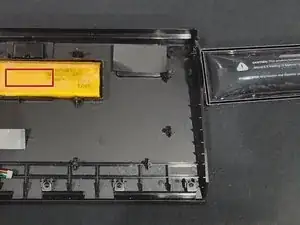
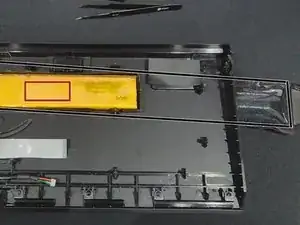
    • Heat and place an iOpener or other heating device (Hair Dryer / Heat Gun) under the general location of the battery's adhesive.

    • Don't apply too much heat to the battery, use the iOpener for about a minute on the battery maximum

    • For your reference, the red box is the general location of where the adhesive of the battery is.

    • For your reference, the black box is where the iOpener is.

  14. VTfZDZwxmtPWCUbc
    VTfZDZwxmtPWCUbc
    rnCxC4yYNeK1ANxJ
    • Go slow, and reheat if the adhesive is still too sticky (Just don't overheat the battery). Do not puncture the battery, or you risk a dangerous situation. If you are using a heat gun or hair dryer, plan in case of a fire.

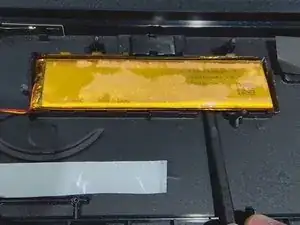
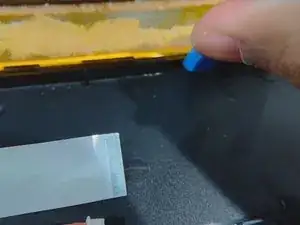
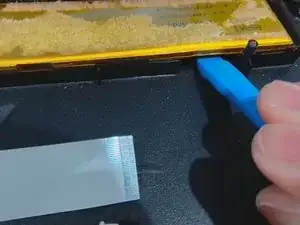
    • Use a spudger to cut the adhesive, or if you have a suction cup, you can pull the battery directly up without risking puncturing the battery.

    • Avoid bending the battery.

  15. AymuSvRrgglFJGm2
    AymuSvRrgglFJGm2
    1KDFltdSgFCmCUNF
    • Use an iFixit opening tool (or flat end of your spudger) to lift the battery up.

    • Prevent bending of the battery and only apply pressure periodically. Reheat if needed.

  16. tOocYYeJp54TxCXQ
    tOocYYeJp54TxCXQ
    TwITyplMoQg6jksR
    k1YtihbFUFPCBDkL
    • Remove the battery carefully.

Conclusione

To reassemble your device, follow these instructions in reverse order.

Recycle responsibly, it may be the law in your area.

Make sure to calibrate your battery.

op_

Membro da: 21/12/23

439 Reputazione

2 commenti

I didn't attach a battery in the parts section for a reason. I found one site selling the exact same model number for the Razer BlackWidow V3 Pro battery, but it was from a site I've never seen before and zero reviews on trustpilot. I'll attach it here just in case, but buying it is at your own risk and you may not get what you ordered.

FT5936E2P Battery Replacement For Razer RZ03-0282 Wireless Keyboard (anvone.com)

op_ -

I really don't know who is going to use this, but here's their battery supplier for who it becomes useful to (Although I don't take responsibility to if this source is reliable or not, it was just a quick Google search :))

op_ -