Introduzione
You need to disconnect or replace the speakers of your Dell XPS 13 9380, this guide is for you!
Strumenti
-
-
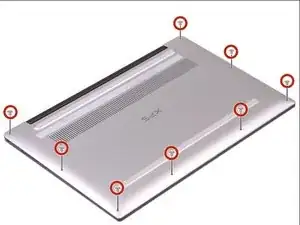
Use a Torx T5 driver to unscrew the eight screws securing the back panel.
-
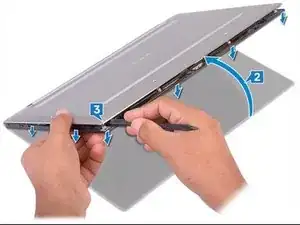
Use a spudger to pry up and loosen the back panel.
-
Lift the back panel up slightly from the non-hinged edge.
-
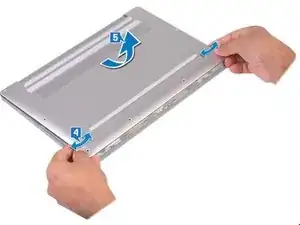
Pull the back panel away from the hinged edge, wiggling it back and forth to loosen the clips.
-
When the back panel clips are free, remove the back panel.
-
-
-
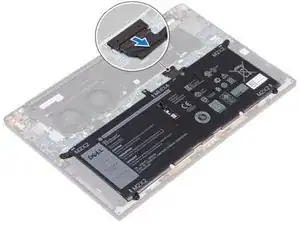
Disconnect the cable from the battery by pulling the connector towards the battery.
-
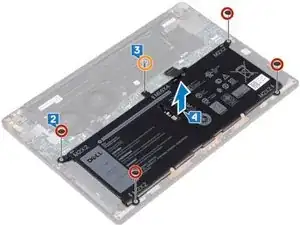
Remove the four screws (M2 x 2) securing the battery.
-
Remove the screw (M1.6 x 4) securing the battery.
-
Remove the battery from its recess.
-
-
-
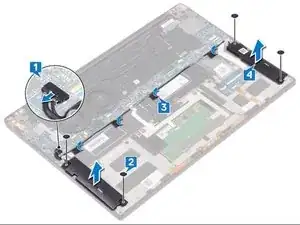
1- Disconnect the speaker cable from the motherboard.
-
2- Remove the four screws (M2x2) that attach the left and right speakers.
-
3- Note the routing of the cable from the speakers and remove the adhesive tapes (4) that attach the cable to the keyboard.
-
4- Lift up the left and right speakers and their cables and remove them.
-

To reassemble your device, follow the instructions in reverse order.

You should be careful when removing the back panel as there also two clips on its back where the air ducts lie. If you are quick to remove it you may tear the air ducts which are quite (unreasonably) fragile given the fact they are plastic. I was unfortunate and I broke two of them so I had to use some duct tape as a minor gap would be visible between the back panel and the plastically covered air ducts. Other than that, it’s a pain to remove the back panel but not as difficult as it sounds.
Iraklis -