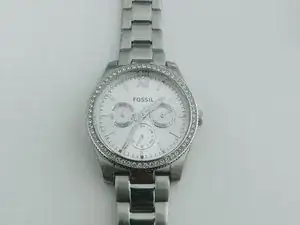
Introduzione
Repairing a watch like this is no walk in the park. Be prepared to be working with micro gears in a very small and congested space. I suggest in addition to the Autoxel Watch Repair Kit, having a powerful, hands-free magnifying glass to work with is essential. Also, it would be wise to work in a well light area with a white or bright background in case you lose a gear or pin. A steady hand, attention to detail, and patience is the key to this project.
Good luck as this is not a project for someone who easily gives up but definitely worth it in the end! May the odds be ever in your favor.
Strumenti
-
-
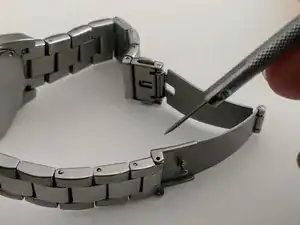
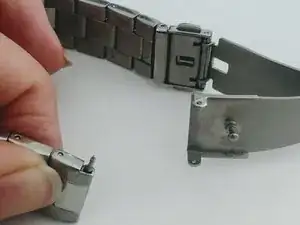
Disconnect wrist band by using the right size Push Pin for your watch to push the Spring Shaft back through the watch band hole.
-
Simultaneously push the Spring Shaft down and gently pull the band and shaft away, releasing the band.
-
-
-
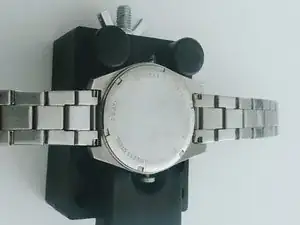
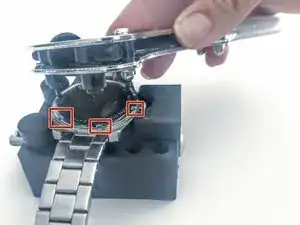
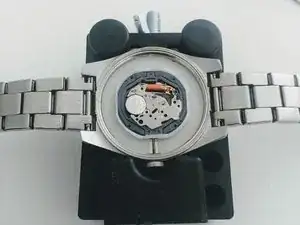
Place watch face down in the watch holder.
-
Tighten the holder with the wing nut on the side of the watch holder until watch is snug.
-
-
-
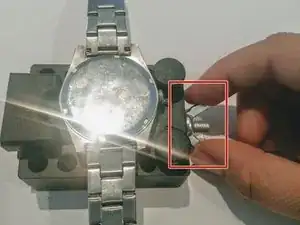
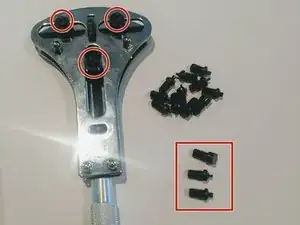
Identify the correct size tooth that matches the indention on your watch's back case.
-
Screw the three identical teeth into the back case screw driver and use the wheel on the top of the screw driver to line the teeth up with the intentions on the back case.
-
Line up the teeth to the small indentions on the back of the watch, apply a slight amount of pressure, and unscrew the back case of the watch.
-
-
-
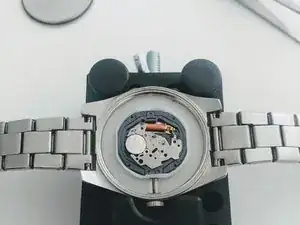
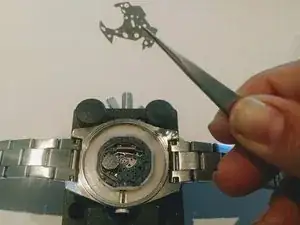
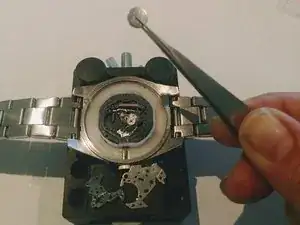
Once the back of the watch is removed, use tweezers to carefully remove the first two plates which are connected.
-
-
-
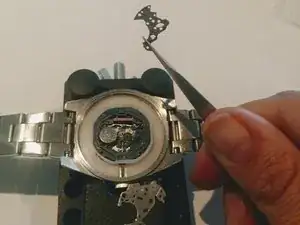
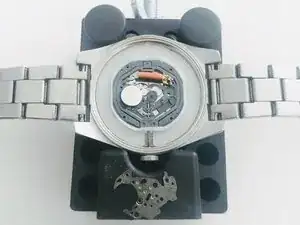
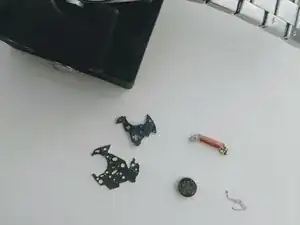
Once the gears are exposed, inspect gears for any disconnection. If no issues are discovered, investigate other connecting parts.
-
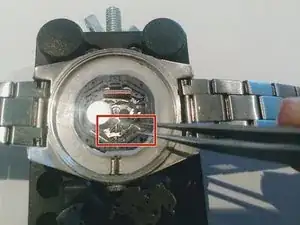
Locate the small metal connector arm that is touching the gears and turning the minute and second hands. If it is not connecting, remove it and adjust it as needed.
-
Note: This was a very small metal arm at the bottom of the picture
-
-
-
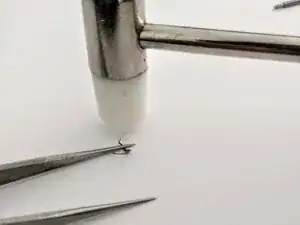
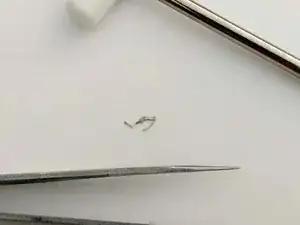
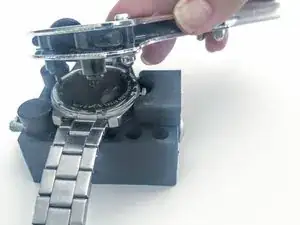
Use the small mallet and tweezers from your kit to straighten and adjust your connector piece so that it makes direct contacts with the gears.
-
-
-
After straightening the bent connector, reassemble your watch by starting at Step 6 and working backwards to Step 1.
-

To reassemble your device, follow these instructions in reverse order starting at Step 6 and working backward to Step 1. It is imperative to replace all pieces back in the correct order. Take your time and don’t forget to breathe!