Introduzione
Ho deciso di creare questa guida perchè mi sono "triggerato" cercando di riassemblare il controller Dualshock 4 PS4.
Strumenti
-
-
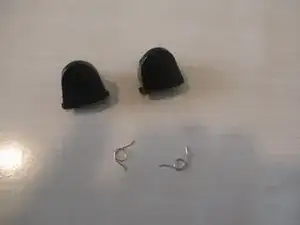
Rimuovi i due trigger e le molle dalla scocca.
-
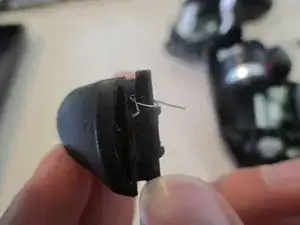
Identifica quale trigger va su quale lato e inserisci le molle nella parte interna dei trigger.
-
-
-
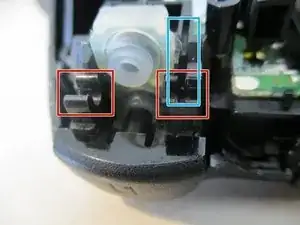
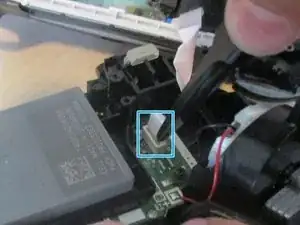
Connetti il cavo della lucina con le dita. Assicurati che sia ben inserito e collegato correttamente.
-
-
-
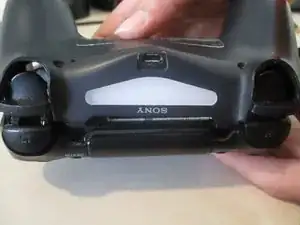
Chiudi la cover partendo dai lati dei trigger. Non ti preoccupare se incontri resistenza, ma fai attenzione a non rompere la plastica tra trigger e bumper.
-
Premi fino a sentire click da tutti i lati.
-
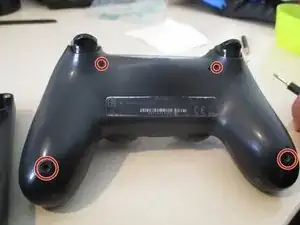
Infine avvita le viti usando il cacciavite PH0.
-


3 commenti
Thank you so much! I had a ps4 controller that had a broken r2 button and i had gotten a replacement (which is now having battery issues) Today I took the old controller apart… the spring had come out of the rail. That was it!
Dee -
This guide is wrong. The top part spring should be inside the trigger, if you look at the other trigger it’s not exposed.
Thanks for pointing it out. I do not have this controller anymore as it was from a repair job so unfortunately, I cannot correct it. If you or someone else happens to have one and is able to take high-quality pictures I’d be more than grateful to accept your correction.
Devnol -