Introduzione

Questa guida ti mostrerà come rimuovere* il disco rigido dal tuo MacBook Pro.

*Ricordati che aprire il tuo MacBook Pro invaliderà qualsiasi garanzia Apple.

  1. NMw2fChqQ4CvTHBv
    NMw2fChqQ4CvTHBv
    DEeXXeFLaBGHyGUM
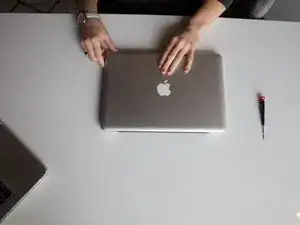
    • Spegni il MacBook Pro e scollegalo dall'alimentazione. C'è la possibilità di di prendere la scossa o danneggiare il MacBook se l'alimentatore è collegato.

    • Gira il MacBook Pro in modo che il logo Apple sia rivolto verso il basso e la cerniera nera sia dalla parte opposta alla tua.

  2. YfSsQxWJUZLN2Nr5
    YfSsQxWJUZLN2Nr5
    qKynKFZd1BoCqGkQ
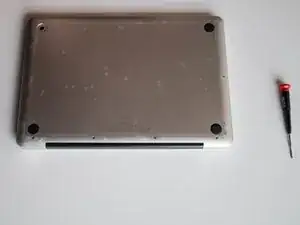
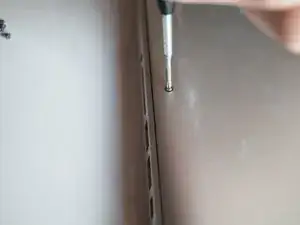
    • Svita le dieci viti con un cacciavite Philips #000. Premi il cacciavite sulla vite e giralo spingendolo verso il basso per evitare di spanare la vite.

    • Dopo aver svitato una vite, Appoggiala accanto al suo foro. In questo modo eviterai di fare confusione quando dovrai riavvitare le viti.

    The two closest to the rear hinge are the short screws

    lucas -

  3. qbhxpK1LM2rulZdv
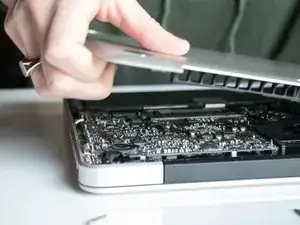
    • Solleva la scocca posteriore dal MacBook Pro e mettila da parte. Potrebbe librarsi facendo un forte rumore: va tutto bene.

  4. UdLqvGwbCXQQXHoJ
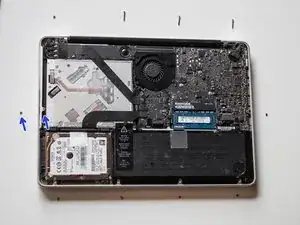
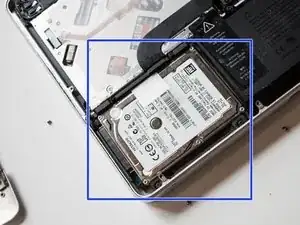
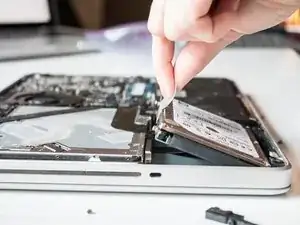
    • Identifica il disco rigido. Con la cerniere dalla parte opposta alla tua, puoi trovarlo nell'angolo in basso a sinistra, vicino a te. è un rettangolo argentato.

  5. eqnNDUyOc6KuEBi6
    eqnNDUyOc6KuEBi6
    mYIdFSkNDA5Ty2BD
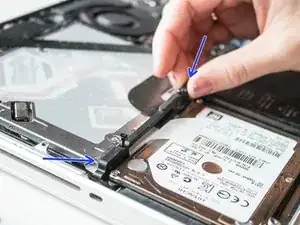
    • Identifica la barra nera che tiene fermo il disco rigido. Questa barra è sopra il disco rigido.

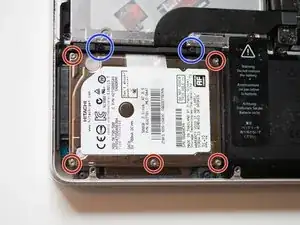
    • Svita le due viti nere sulla barra usando il cacciavite. Assicurati di non svitare le viti argento.

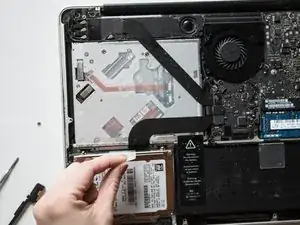
    • Solleva la barra nera dal disco rigido e mettila da parte.

  6. UvVLijwQjGwYT6V1
    UvVLijwQjGwYT6V1
    ueNCFR4RivPWPRTV
    • Tira l'aletta in plastica per sollevare il disco rigido dal suo alloggio.

  7. BOQvBNZssuNrh3OL
    BOQvBNZssuNrh3OL
    IiNfKNKlM4USNCTS
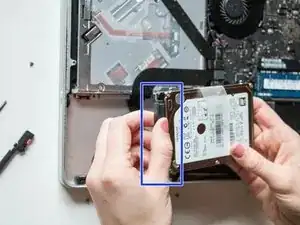
    • Tira delicatamente la barra nera collegata al fianco del disco rigido. Questa barra resterà collegata al portatile.

Conclusione

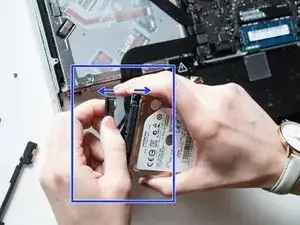
Per installare un nuovo disco rigido nel portatile, segui queste istruzioni al contrario.

Inizia svitando le viti di supporto dal vecchio disco rigido e avvitandole nel nuovo. Se vuoi usare il vecchio disco come memoria esterna, lascia le viti di supporto al loro posto e acquista un adattatore USB per dischi rigidi.

McKaila Ruud

Membro da: 29/03/17

746 Reputazione

12 commenti

Great documentation, photography was very good.

Jim Brennan -

wonderful, thank you very much.

Luc Constantin -

Will a T6 screwdriver work to remove the screws holding the back and hard drive?

Iris R -

Save the four mounting screws located on the side of the hdd . You will need them for your new hdd.I'm

James Michaud -

How do I remove those screws? They seem to be permanent placed.

lalof-1 -

Can I remove the old harddrive as instructed above and just have macpro use and external harddrive?

Ron -

The computer should work fine without a hard drive installed, but you will want a high speed external hard drive that connects over something faster than USB2 in order to have a usable experience. Depending on the model of computer you have, the drive could be connected over Firewire, Thunderbolt, USB3, or USB-C.

David Green -

Once I have my old HD out, how do you transfer the existing OS/files from it to the new SSD drive?

melvinwahl -

Suggest you install fresh copy of MacOS on another drive, and then run the ‘Migration Assistant’ (found in Applications/Utilities) The Assistant will ask for the source drive and whether you just want documents, or everything, applications, etc.

Hal D -

Excellent descriptions and photos, upgraded from 250GB to 1TB. Thanks!

Base ManDan -

Excellent-well done.Many thanks from those of us dependent on the kindness of techies

Kevin Quigley -

Darf man die Schrauben an der Seite der Festplatte entfernen? Ich möchte die Festplatte gerne auslesen, weil da meine ganzen Daten drauf sind. Alle Festplattengehäuse passen leider nicht aufgrund der seitlichen Schrauben. Vielen Dank für Eure Hilfe!

Heike von Fuchs -