Introduzione
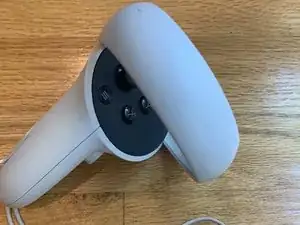
Dopo un lungo periodo di utilizzo, l'Oculus Quest 2 potrebbe soffrire di un problema di "drift" che provoca un movimento lento ma continuo durante le partite anche se non viene dato nessun comando. In questa guida imparerete come risolvere questo fastidioso problema.
Strumenti
Ricambi
-
-
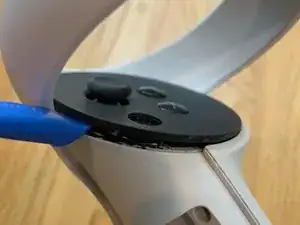
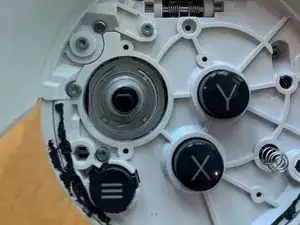
Rimuovete la piastra frontale, quella in plastica nera utilizzando uno strumento di apertura in plastica come quello di iFixit. In alternativa potete utilizzare un cacciavite a taglio.
-
-
-
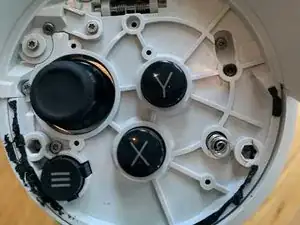
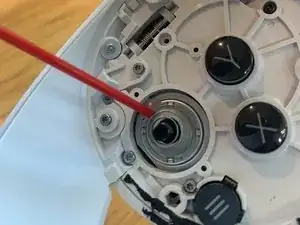
Tira delicatamente la parte superiore del joystick finché il cappuccio non si stacca dal joystick.
-
-
-
Iniziate spruzzando aria compressa nell'alloggiamento del joystick per eliminare le particelle più grandi intrappolate al suo interno.
-
Applicate una piccola quantità di pulitore per contatti, oppure di alcol isopropilico al 90% o superiore al joystick e muovetelo un po'. Quindi aspettate che si asciughi.
-
Per rimontare il dispositivo, seguire queste istruzioni in ordine inverso. Se hai bisogno di un video che dimostri questi passaggi, puoi trovarne uno qui.

42 commenti
I did that and it works, but now the touch sensor on the thumb stick doesn’t work. Any ideas?
The spring that goes between the joystick housing and the cap is what connects the touch sensor to the controller. While i did not inspect the cap to see for myself i believe there should be a metal contact on the underside of the cap that the spring should be touching.
Tl;dr: Make sure the spring between the joystick cap and housing is properly connected to both sides.
Thanks, just what i needed.
Just one problem.
You never mention the spring that goes between the joystick housing and the cap. I understand that you took it off completely to get a better picture, but to me it seems better to not take it off completely and just let the joystick cap hang by the spring while you spray cleaner down into the housing. As long as you're careful not to bend or break the spring i believe this would lower the chance of the touch sensor not working like one of the users here already have problems with.
Otherwise the guide is good and on-point.
I should mention tho, i bought my quest on day one so perhaps my controller is an earlier model. On my controller the spring between the joystick cap and housing wasn't easily removable from either side, which is why i decided to leave the cap hanging. It could be that on later models the spring is not connected to the cap but instead is just pressing up against it.
The spring is still there! It might be a bit hard to see however and I’ll note that in the guide.
after putting the faceplate back on the buttons are slightly shorter pls hepl
Make sure all the plastic posts click in place I and that you didn’t break any of the posts
Better ways to do this. This is proven that it wrecks the controllers joystick and it will make the joysticks life span shorter by ALOT.
Mark Zuckerberg said NOT to open the joystick compartment on a tweet, when fixing the Joystick drift issue. Look up different ways, or just send it back and spend a couple of bucks from a professional.
WARNING DO NOT OPEN YOUR CONTROLLER AND PULL THE JOYSTICK!
You have been warned.
Ryo DerpDog -