Introduzione
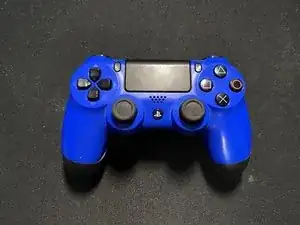
Questa è una guida per un controller Sony DualShock 4, ma può essere usata su qualsiasi altro controller di terze parti (controller Scuf o personalizzati).
Questa procedura ti aiuterà a riparare la levetta R3 o L3 che non funziona correttamente o da problemi col movimento.
Stai attento durante l'intera procedura, in quanto queste sono componenti molto piccole e delicate, e anche nei passi 1 e 2 per non danneggiare alcun cavo che collega il controller e la batteria. Vale lo stesso durante il rimontaggio.
-
-
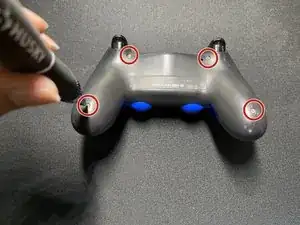
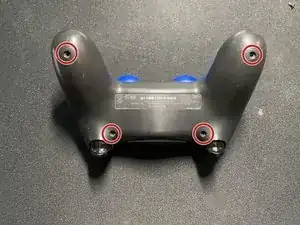
Svita le quattro viti sul retro del controller con un cacciavite a croce Phillips #0.
-
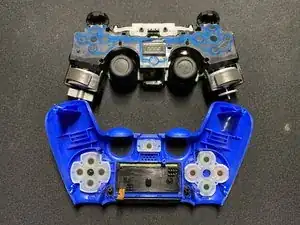
Separa il fronte dal retro del controller.
-
-
-
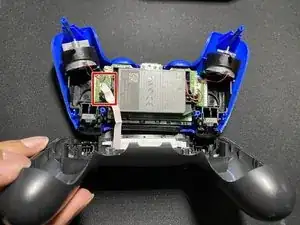
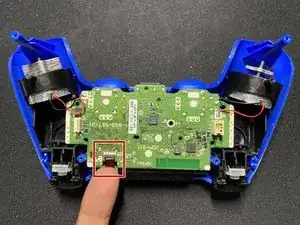
Svita la vite sulla copertura posteriore della scheda madre con un cacciavite a croce Phillips #0.
-
Rimuovi la copertura posteriore dal controller.
-
-
-
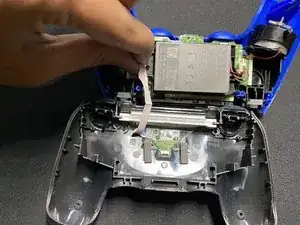
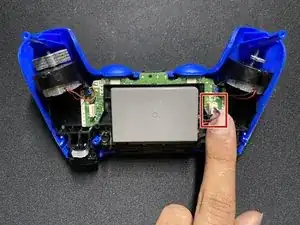
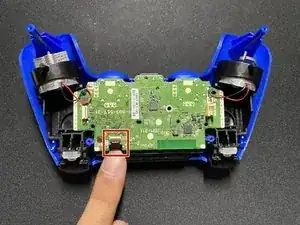
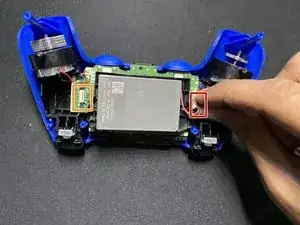
Scollega il cavo a nastro che collega il retro del controller alla scheda madre.
-
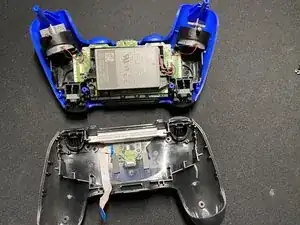
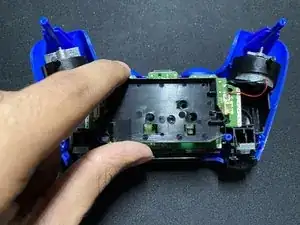
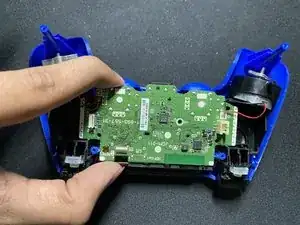
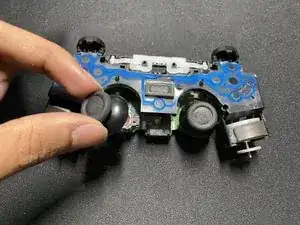
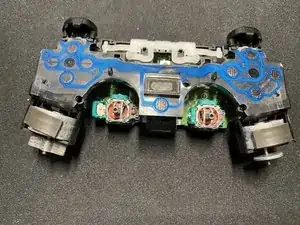
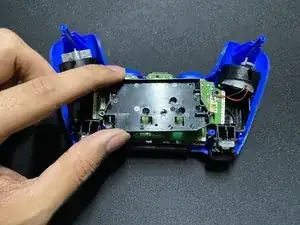
Rimuovi la scheda madre dal retro del controller.
-
-
-
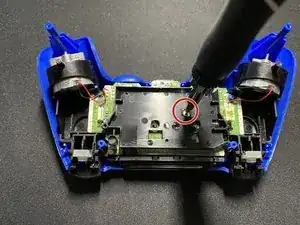
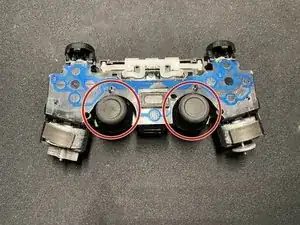
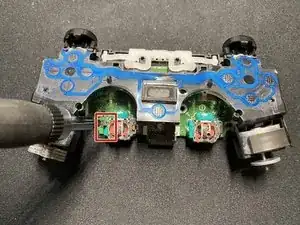
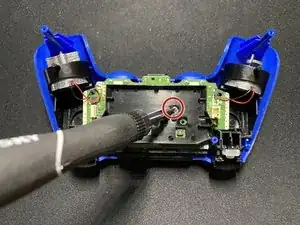
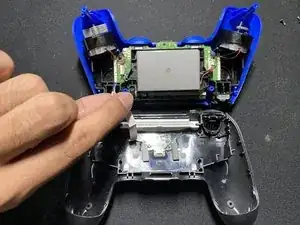
usa uno spudger per aprire il sensore dell'analogico.
-
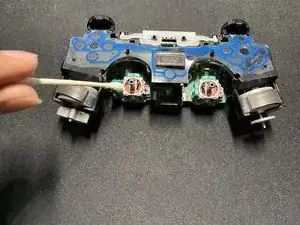
Usa un batuffolo di cotone con dell'alcool per rimuovere la sporcizia accumulata sul sensore.
-
-
-
Per rimontare il controller, appoggia la copertura del controller sulla scheda madre.
-
Fai scorrere il cavo rosso lungo la copertura del controller e collegalo.
-
-
-
Collega la batteria e posizionala nel suo alloggio.
-
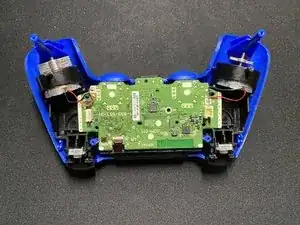
Collega il cavo bianco sul retro della scheda madre.
-


5 commenti
Thank you for this!! So many great pictures!! :D
The drift for me also prevented or interrupted movement with the left analog stick. Menus would continue to scroll after i scrolled them or wouldn’t move my character on screen.
Nach Wechsel der Potis hatte mein Controller Drift an beiden Achsen. Das liegt daran, dass die Potis nicht 100% mit denen der Werkskalibrierten übereinstimmen. Eine nachträgliche Kalibrierung ist leider nicht so einfach möglich, da die Korrekturdaten im EEPROM des Controllers gespeichert sind. Deshalb habe ich parallel zu den Potis je einen 2MOhm Poti gelötet, mit denen der Spannungsoffset kompensiert werden kann. Ergebnis: Keine Drift mehr. Die Controller arbeiten wieder einwandfrei.
zapf2000 -
Well organised pictorial lecture.great work.
Egeonu -
This actually breaks the clips on the upper left and right side of the top cover.
You can see it happen on their screenshots as well. It doesn’t matter too much because it gets assembled without an issue.
GlossGhost -
I think this is for telling if someone has broken into their controller, as I couldn’t find a way to open the controller without breaking this clip. The controller works perfectly fine without it, but its annoying its there.
Cameron -
It’s perfectly doable once you know where they are, just slide a prong between the case pieces, and twist in a way that “unlocks” the clips. All of my clips are intact after studying the images for a bit
Franz Rolfsvaag -
Hu… didn’t break either of mine.
Jake Fatwin -