Introduzione

Il suo fattore di forma ridotto sottopone il NUC al rischio di surriscaldamento dovuto all'accumulo di polvere nelle lamelle di uscita dell'aria di raffreddamento della CPU.

  1. iLv2KjMvmsEfKi3Y
    iLv2KjMvmsEfKi3Y
    cWkGXg56xnc1GGM2
    ElVf2YnFFoXJ3ODF
    • Capovolgete l'unità NUC e selezionate un inserto a croce appropriato

  2. 5LXcETZhgCEBFtFI
    5LXcETZhgCEBFtFI
    yhK2wBwtjDRRugrU
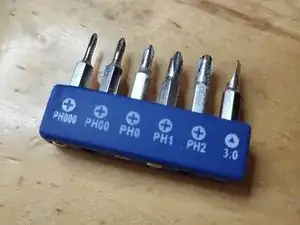
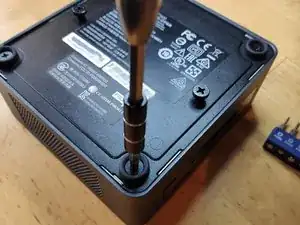
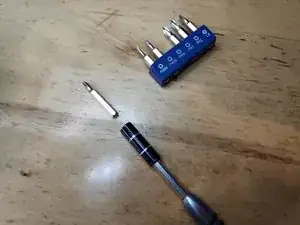
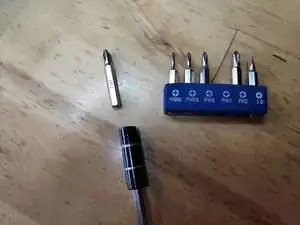
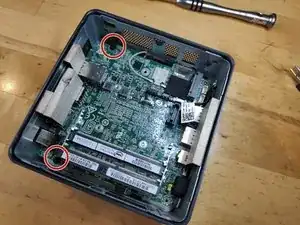
    • Utilizzate un inserto Philips (a croce) #2 per allentare e rimuovere le viti che serrano il coperchio inferiore del dispositivo.

    • Queste viti hanno un sistema di ritenuta per cui non cadranno quando le sviterete.

    What are the size of these case screws?

    Michael Lepore -

  3. bhndLRHUWyFtdiAA
    bhndLRHUWyFtdiAA
    QCAYcvFb6ruhUtpT
    Js5rdDRXVIdhWCDH
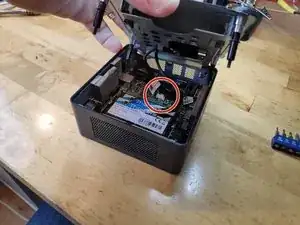
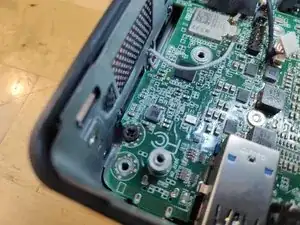
    • Aprite il coperchio, e tenete d'occhio i cavi che vanno alla scheda madre. Si tratta del cavo di alimentazione e del cavo dati del vassoio del hard disk da 2,5 pollici.

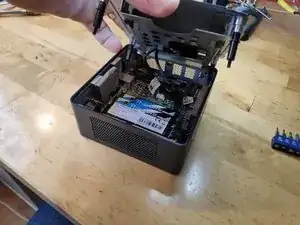
    • Scollegate delicatamente i cavi dalla scheda madre e mettete da parte il coperchio col vassoio del HDD.

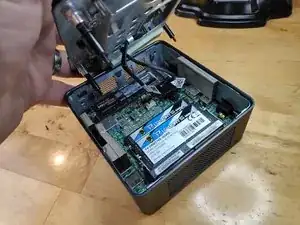
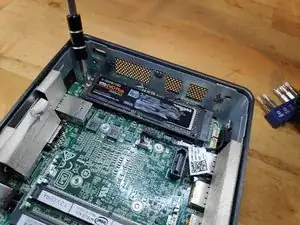
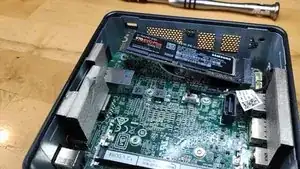
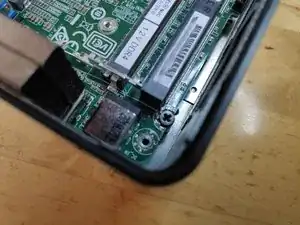
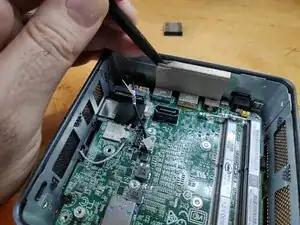
    • Nell'ultima foto potete vedere lo slot per l'SSD M.2 indicato dalla freccia rossa. Si può utilizzare questo slot per installare un SSD, per tenerlo fermo c'è una comoda vite.

  4. YGPRvVCtYEhLU3Lt
    YGPRvVCtYEhLU3Lt
    asuqDIHLiiFmxoMX
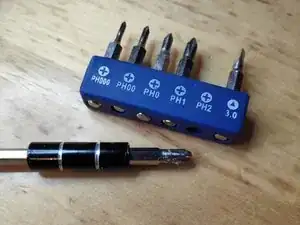
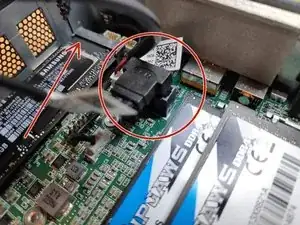
    • Prendete l'inserto PH1 e inseritelo nel cacciavite.

    • Svitate la vite che tiene in posizione l'SSD V-NAND ed estraetelo delicatamente dallo slot.

  5. Potete vedere il passo precedente in questo comodo video.
    • Potete vedere il passo precedente in questo comodo video.

  6. MIpgTEX1mQENjsuu
    • Montate l'inserto PH1

  7. frD4VaxFk5pt4o16
    frD4VaxFk5pt4o16
    4EXFJdxOJKpMDNDC
    IwkjojFXbgxpK2GU
    • Svitate le viti cerchiate in rosso sulla fotografia.

    Hello, may I know what is the screw size? I already stripped mine so I'm trying to get a replacement screw when I have the stripped out. Mine was stripped and cannot get it out. Can you please help me? I've already used the rubber and glue method but no luck.

    Fitri Suhaimi -

  8. bXN2KelA6UENepsV
    bXN2KelA6UENepsV
    dJAAGRBCACvZLIsX
    ejDFmgh1Q1KhFLJI
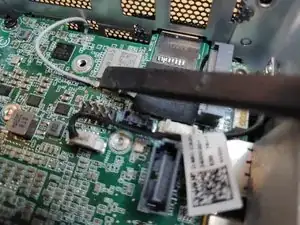
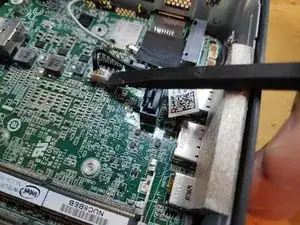
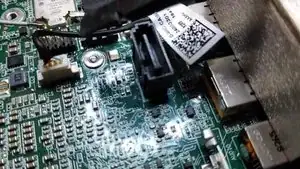
    • Scollegate i cavi dell'antenna WiFi e Bluetooth (fate molta attenzione altrimenti potreste strappare i terminali dalla scheda PCB)

    • Scollegate i cavi del microfono stereo dai connettori sulla scheda madre.

    • Fate attenzione al cavo del WiFi che si trova nascosto sotto a un pezzo di nastro nero.

    Remove WiFi an Bluetooth antenna Cable very carefully. Terminals can be ripped of easily.

    Christian Reinhold -

    very true, I’ll add it to the guide

    Vladimir Knobel -

    Added to the step in the guide, thanks for pointing that out!

    Vladimir Knobel -

    Note that the WiFi and Bluetooth antenna cables lift/pull off vertically (not slide off horizontally, as I presumed from the photo). They are circular connectors with a pin in the middle. Getting them off was okay (I actually used tweezers), but it was fiddly work trying to push them back on.

    Carl -

  9. Scollegate il cavo del microfono
    • Scollegate il cavo del microfono

  10. Rimuovete i pannelli protettivi dai lati.
    • Rimuovete i pannelli protettivi dai lati.

  11. iieAfEfVcF1664xQ
    iieAfEfVcF1664xQ
    canT2xLG6FaTCVcD
    • Non è necessario rimuoverli tutti, solo quelli nelle fotografie.

    Hallo, kann man den Lüfter auswechsel. Bei mir ist er nach ca. 15-20 min sehr laut.Ich glaube das das Lager defekt ist . Wenn ja, wo bekomme ich einen neuen her?.Für eine ausführliche Nachricht wäre ich sehr Dankbar.

    Mit freundlichen Grüßen

    Joachim Arndt, j.a.50@web.de

    joachim arndt -

  12. tOgKIPOLBLUM3Q23
    tOgKIPOLBLUM3Q23
    J6onfbukKHgZMbNn
    pHZ6AT6LBiErPDil
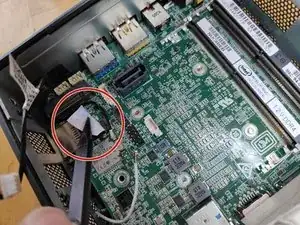
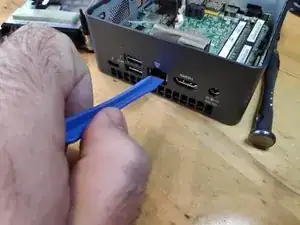
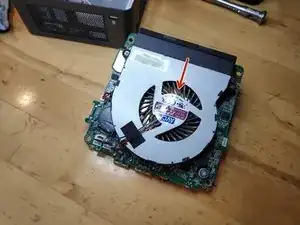
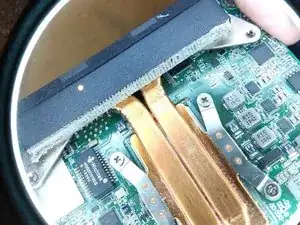
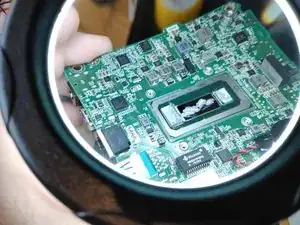
    • Utilizzate una leva per rimuovere la scheda madre dalla carcassa

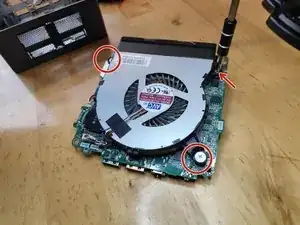
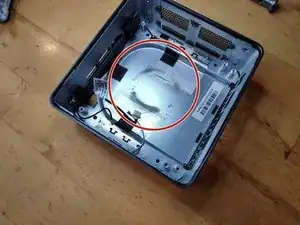
    • Cerchiato in rosso potete vedere il segno lasciato dalla polvere mossa dalla ventola di raffreddamento

    Amazing! Could replace the fan. Have also removed the 4 screws of the heatsink , and renewed the thermal paste underneath it. That was necessary. It was dried out. THANKS!! It works like new: no overheating anymore. A lot faster.

    lutgart.schreyen -

    The key for getting the motherboard is to move apart very firmly the two opposite sides of the metal casing, so as to let the connectors move down.

    Jan Drouaud -

    Thank you Jan for that tip!

    I spent 20 minutes trying to jiggle it out before I read that!

    Yes, pull it apart somewhat and it comes out (relatively) easily.

    Bob Mudford -

  13. b2loOl4pHWk2AWEI
    b2loOl4pHWk2AWEI
    lSEN6rDxlTGZTArG
    gIus2WZ1LXyrfyvF
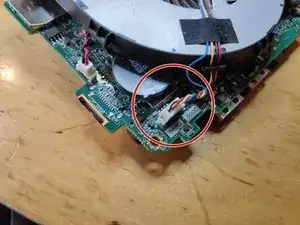
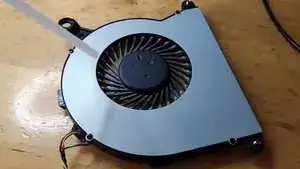
    • Svitate le 3 viti della ventola

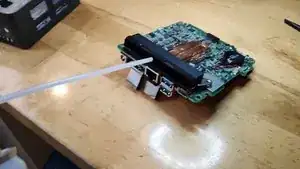
    • Scollegate il connettore del cavo di alimentazione della ventola dalla scheda madre

  14. XX4cfJEPUri4g1Nu
    XX4cfJEPUri4g1Nu
    jbQCYWbHtPxfZbGd
    TwgYhyw4wmajCiEU
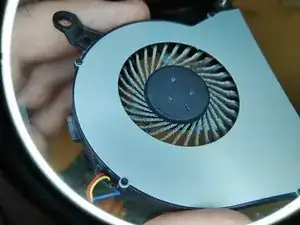
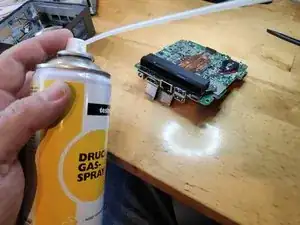
    • Dovrete utilizzare l'aria compressa, un piccolo aspirapolvere o qualcosa del genere per staccare la polvere

  15. yZHBjqwRcOdprTGR
    • Io ho utilizzato una bomboletta di aria compressa

  16. Eccovi il video della procedura
    • Eccovi il video della procedura

  17. Ecco un altro video della procedura
    • Ecco un altro video della procedura

  18. 2GVOetl3MgYykCBb
    2GVOetl3MgYykCBb
    mQ3lCLr1ICfsKHOx
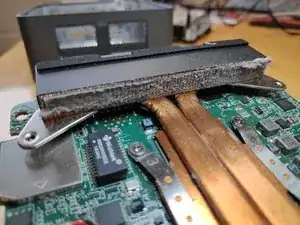
    • Probabilmente questo passo non sarà necessario, ma lo metto per completezza.

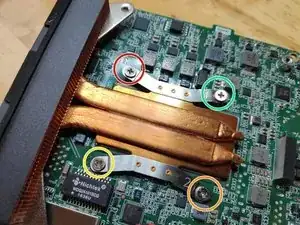
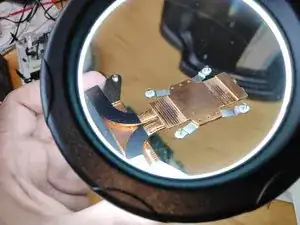
    • Svitate le viti del dissipatore della CPU seguendo l'ordine dei numeri indicati accanto alle viti stesse

  19. Z4oypypSsIKp6exn
    Z4oypypSsIKp6exn
    4T1XAY1UhB4tZpGu
    AHniYsTgCGKTJSpM
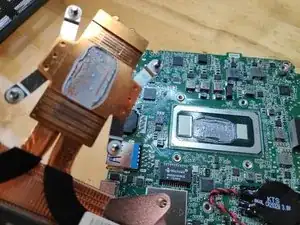
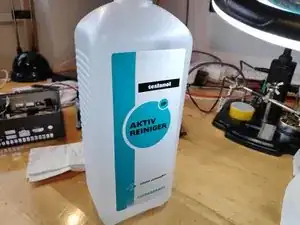
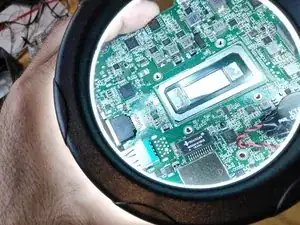
    • Utilizzate dell'alcol isopropilico e fate attenzione a non toccare i pad termici dei chip attorno alla CPU.

  20. LXvg5FSF56PwaKRj
    • Fate attenzione a non metterne troppa (in questa foto mi pare decisamente troppa, n.d.t.)

Conclusione

Per rimontare il dispositivo seguite questa guida in ordine inverso.

Vladimir Knobel

Membro da: 27/03/14

2656 Reputazione

29 commenti

Very helpful, thank you!

Ray Wang -

Great tutorial, thanks, now my fan is very clean and quiet. Thanks for spending time to create this guide!

Schüszterl Ferenc -

I did see this guide after finding out the same steps myself and having seen this guide before doing so would be very helpful.

Jack Graus -

Great tutorial. Clear pictures, solid instructions. Thanks a lot!

Koen Veys -

you are welcome

Vladimir Knobel -

Thank you. Awesome video! How often do NUC's get heating issues from average use? Is this also Intel's troubleshooting method, or would they ship a replacement NUC?

UTuberoni -

Thank you very much! This seems to be problem with NUCs because the first one I had was replaced under warranty after the fan quit but glad I was able to clean this to hopefully keep it running longer.

Patrick McNamara -

Glad it helped!

Vladimir Knobel -

Just what I needed and couldn’t find elsewhere! Thank you.

Nikolay Cholakov -

Great guide. Super useful, A+

Brad Thelad -

Hello,

Thank you very much for this tutorial.

What is the thickness of thermal pad?

L B -

Hi @L+B I don’t know which one you mean but I’m afraid I don’t possess that information.

Vladimir Knobel -

I own the same model as yours (8i7BEH).

I have bought thermal paste for CPU but not yet the thermal pads (for eDRAM and PCH) and was wondering what to buy before disassembling my unit :-)

L B -

Incredibly helpful, thank you! My NUC started blowing like a jet engine and thermal throttling and I realized it was hitting 100C temps. Followed this guide and found my heatsink / fan slots were completely blocked with fine dust - no hair or dust bunnies, but just plugged completely. Blew it out and am back down to 75C at max (transcoding) usage.

Answering two questions above:

- antenna connectors pull straight out from the motherboard. A pair of tweezers is a good tool for this.

- thermal pads are 1mm. came up as 0.7 on my calipers so assuming slightly compressed.

My personal mistake - if you find any of the screws connecting the outer case to the unit won’t screw down, check where you put the screws connecting the motherboard to the base. I had accidentally put a motherboard screw into a case screw hole and then couldn’t screw in that case screw until I moved the motherboard screw.

Taking photos as you go is a good idea!

solstyce9 -

Awesome guide. Helped me a lot!

trajche.manev -

Can you measure the distance betwen the holes that hold the cooling radiator ? I’m planning on upgrading it with a regular CPU cooler. Thanks !

Lucian Pop -

Great, thx! Works for Intel NUC8BEB / Wortmann Terra PC-Micro Sielent 6000 almost identical. After disassembling the unit, I applied a little WD40 to the noisy fan. Did the trick!

Tobias Baumhauer -

Thank you so much. I was able to strip the fan out and blew it out with my compressor. It still made a noise when I moved it with my finger (like it was almost off-center) sprayed a bit of WD-40 into it and more air. It is quiet (for now).

But, thank you very much again

regards

Aubrey (aka cyber7, Cape Town, South Africa)

Aubrey Kloppers -

Very helpful! I followed this for the NUC8i7BEK: the thin version of NUC8i7BEH without space for 2.5" drive. It was the same except for step 3, and I didn't need to remove any padding in step 11; could take motherboard out and back in whilst keeping them attached.

Step 17: I believe it's not good for the fan to make it spin fast like that. Better to hold it stationary while blowing with canned air.

I made the same mistake as another commenter with not putting in the motherboard screws back in the same spots, and then not being able to tighten the screws in the lid.

I skipped steps 18-20 as it was not needed for now.

Thanks again! NUC sounds much healthier now (quiet).

Bauke -

Excellent tutorial!

Have you ever thought of publishing this along your other services as a PDF poster, on paper? As a

modest ontology?

If interested, please mail,

Wolfgang

Wolfgang Bock -

Thanks for the guide. I was able to clear the dust blockage. Without the guide I would not have attempted it. I am still amazed at how poorly fan and cooling design is in 2022. It should be a simple thing to clear dust out of a system with filters properly placed.

Shaun Potts -

Great instructional!

It was indeed the cause of overheating.

Thank you man

Tzachi Halimi -

Has anyone tried something simple like a vacuum with moderate suction agonist th vent grill? J E Barnes, 11/29/22

John Barnes -

Thank you.
Very useful

Vadim Vadimych -

Perfect! Less noise, less throttling now. Performance improved by about 10% under load.

Yuri Kritsky -

Thank you for the help!

Kristi Farinelli -

Suche ein Mainboard von diesem Model

Rostislav Klein -

Thanks for the tutorial. Replacing the original thermal paste which was not applied properly at the factory (the paste did not completely cover the surface) was a game changer!

I used Thermal Grizzly Conductonaut (73 W/m K) as a replacement and on idle the computer now runs at 38-44° C instead of 65-75° C. Under load the CPU was throttling all the time due to its 100° C temperature and was simply unusable in some circumstances. Now it runs at 70° C on heavy load. It's a 30° degrees gain!

Philippe Docourt -

thanks for sharing! The heatsink was competely blocked by dust. Temperature decreased by 40°C.

Reinout Depoorter -