Introduzione

This guide shows how to remove and replace the evaporator fan (aka circulation fan) in your Samsung RF28T5001SR refrigerator.

The evaporator fan circulates cold air from the evaporator coils into the freezer compartment. If your freezer isn't cooling sufficiently or evenly (the back of the compartment gets much colder), you may have a faulty evaporator fan.

  1. SaOfLbkeAxgmho5g
    • Unplug your refrigerator before you begin your repair.

  2. ZTTIYaEFF6ZdISHG
    ZTTIYaEFF6ZdISHG
    fuIZPfyAOmkVsjpD
    • Slide the freezer drawer fully open.

  3. B3BH1kMNJbrdbPQJ
    B3BH1kMNJbrdbPQJ
    wsECVLuq4kTMRxnI
    ZAdhTl3fvTFmipPl
    • Lift and remove all the freezer bins from the drawer.

    • You may need to open the refrigerator doors in order to remove the large bin.

  4. kPjGsbeRHMufdoYs
    kPjGsbeRHMufdoYs
    PHUoAbLSGpFUkCVW
    SGoorloWsZCEKEAR
    • A plastic tab locks each drawer rail in place.

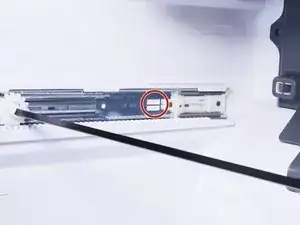
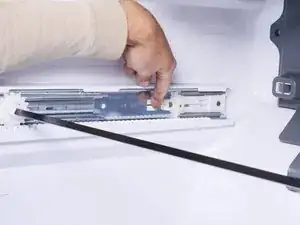
    • Use a flathead screwdriver or your fingers to press in the plastic tab near the inner end of the drawer rail.

    • While pressing the plastic tab, grasp the rail with your free hand and slide it towards you slightly to unlock the rail.

  5. JOwH5YPrArsRB11W
    • Repeat the rail unlock procedure on the other drawer rail.

  6. pOxow11R622vcHLG
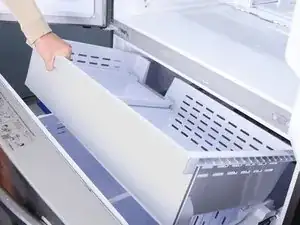
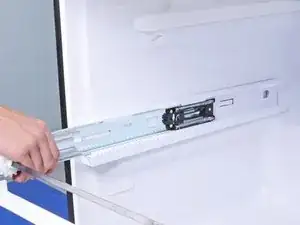
    • Once both rails are unlocked, firmly pull both rails to slide them out of the refrigerator wall guides.

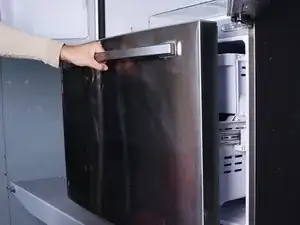
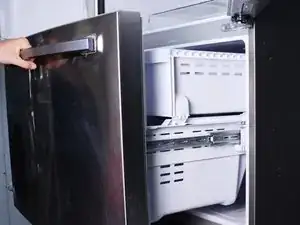
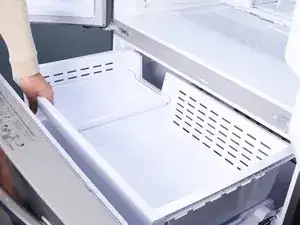
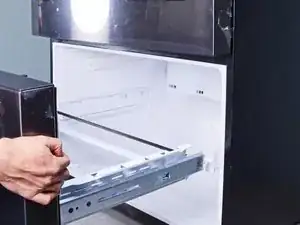
    • Remove the freezer drawer.

    • To reinstall the freezer drawer:

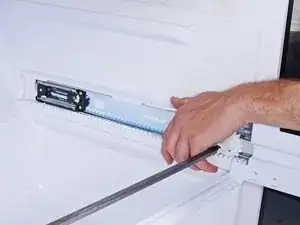
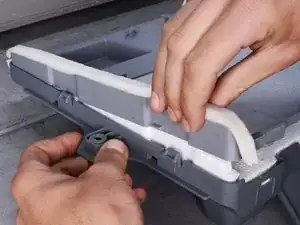
    • Push the geared torsion bar until it rests at the very end of the rails.

    • Align the drawer rails to the refrigerator wall guides.

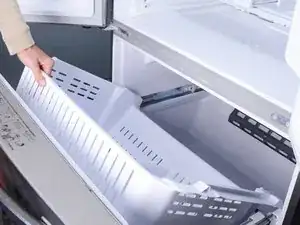
    • Close the freezer drawer until the rails lock back in place.

    • If you don't hear a click, visually check if the plastic tabs have locked in place. You may need to push the rails in a little further with your fingers to set the tabs.

  7. ofIJhQeSq2C3Okja
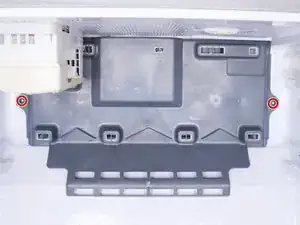
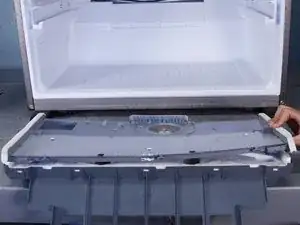
    • Use a Phillips screwdriver to remove the two 18.5 mm‑long screws securing the evaporator cover to the refrigerator.

  8. qAfwkKegoOoM2aBb
    qAfwkKegoOoM2aBb
    OPcHnFlNUMSBSWcP
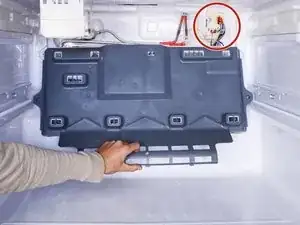
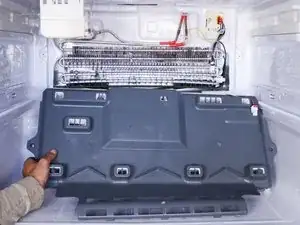
    • Lift the bottom edge of the evaporator cover away from the refrigerator to release the bottom clips.

    • Don't try to fully remove the cover. It's still connected by a few wires.

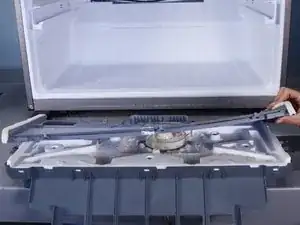
    • Shift the evaporator cover downwards to access the connectors in the top right corner of the freezer compartment.

  9. rVhsx5blIYJdBbaP
    rVhsx5blIYJdBbaP
    dFBBI6MmFQAdsbLJ
    i1ZKKnKqlUHMAVdS
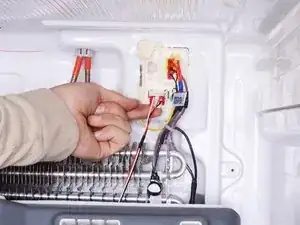
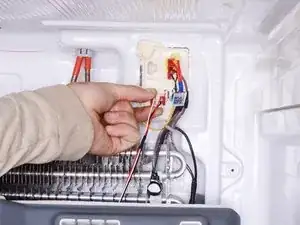
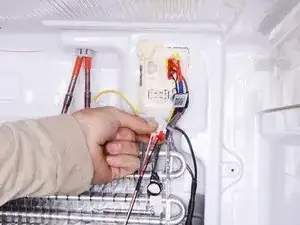
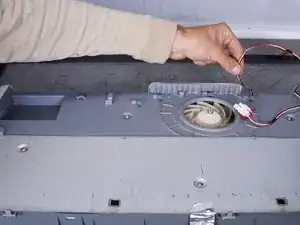
    • Squeeze the bottom edge of the fan connector to unlock it from the freezer wall.

    • Pull and disconnect the fan connector.

  10. Au3jbUgTFE1uZVKg
    • Remove the evaporator cover.

  11. IChPrVVgmqLC3RRn
    IChPrVVgmqLC3RRn
    PONHxcRTxmuv2uUv
    AYi1MhsSRDDr5vEl
    • Guide the fan cable out of the evaporator cover clips.

    • If you have trouble getting the cable out of the clips, squeeze the clips with pliers to create a wider gap.

  12. jGk3EohTtToYDbQT
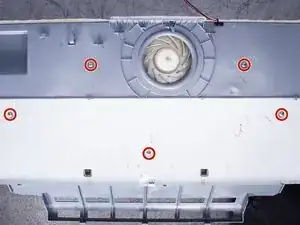
    • Use a Phillips screwdriver to remove the five 14.5 mm‑long screws securing the back panel to the evaporator cover.

  13. GvHebR5XWtu5eDrP
    GvHebR5XWtu5eDrP
    LTToIMYqoMOSgONk
    bSBImfCpFv6sLvXA
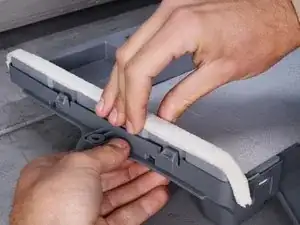
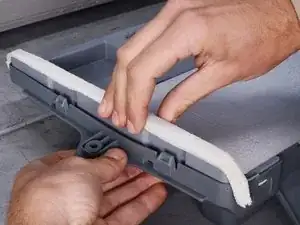
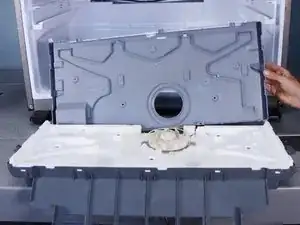
    • Use your fingers to pry and release the clips along the short edge of the evaporator cover.

    • If the perimeter foam insulation prevents you from releasing the clips, cut the foam with scissors.

  14. nlGtPrLbZW2Xtpdp
    nlGtPrLbZW2Xtpdp
    d1gIILJ3ipiFBrv1
    Oq6xGmXtPhPxC2qf
    • Lift and separate the back panel from the evaporator cover.

  15. ZZKEFexueVQ2SKwy
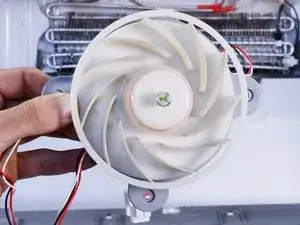
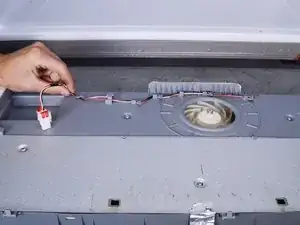
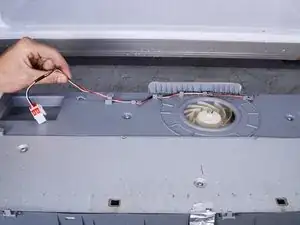
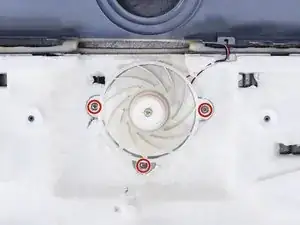
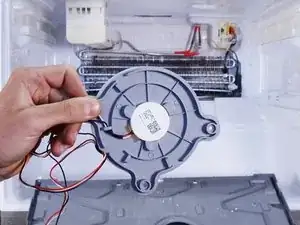
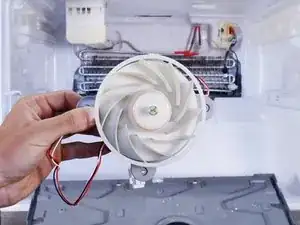
    • Use a Phillips screwdriver to remove the three 14.2 mm‑long screws securing the evaporator fan.

  16. OhIyIXKQHZY6CSxf
    OhIyIXKQHZY6CSxf
    G1gcvbrP6CcSOA1U
    • Lift and remove the evaporator fan.

    • During reassembly, be sure to install the fan in the right orientation: the side with the center label should face down towards the evaporator cover.

Conclusione

To reassemble your device, follow these instructions in reverse order.

Take your e-waste to an R2 or e-Stewards certified recycler.

Repair didn’t go as planned? Try some basic troubleshooting, or ask our Answers community for help.

Arthur Shi

Membro da: 03/01/18

248264 Reputazione

0 commenti