Introduzione
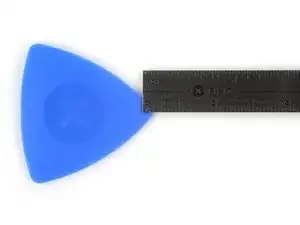
Questa guida mostra un suggerimento utile per evitare di danneggiare cavi o componenti sensibili del dispositivo mentre si taglia l'adesivo.
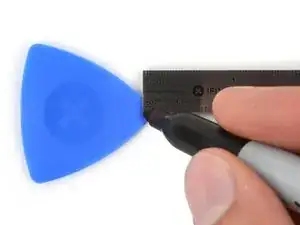


Questa guida mostra un suggerimento utile per evitare di danneggiare cavi o componenti sensibili del dispositivo mentre si taglia l'adesivo.
Got to step 2 and realized the fix kit doesn't include an opening pick! Looks like a guitar pick, and I have those lying around. Is that expected? Looks like the pick is used in many steps below. There's a little blue crowbar that isn't mentioned in the instructions. Perhaps that replaces the opening pick?
Sloan Looney -
Hi! I can't see which guide you were using when writing this comment. Can you reply here with which guide and fix kit you used?
Clay Eickemeyer -
I see you posted this in Meta. I hope it's resolved soon! In the meantime, a guitar pick may work well enough for your repair.
Clay Eickemeyer -
what fix kit?
Meow Purr -
My fix kit didn't include an opening pick either
WILLIAM HARRIS -
Make sure you check inside the black boxes after emptying them. My pick was stuck inside one of the boxes.
AndyF -
My AliExpress refurbished screen came with a pick that has a coin-like circle that pops out, so no modification was necessary
Gijs Leegwater -