Introduzione

Questa guida vi illustrerà come smontare il computer Intel NUC8i7BEH e altri modelli similari.

  1. iLv2KjMvmsEfKi3Y
    iLv2KjMvmsEfKi3Y
    cWkGXg56xnc1GGM2
    ElVf2YnFFoXJ3ODF
    • Capovolgete l'unità NUC e selezionate un inserto a croce appropriato

  2. 5LXcETZhgCEBFtFI
    5LXcETZhgCEBFtFI
    yhK2wBwtjDRRugrU
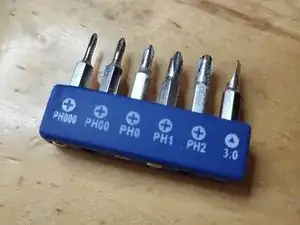
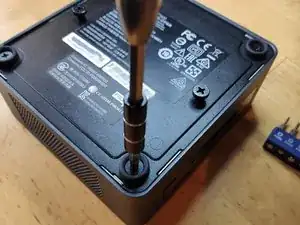
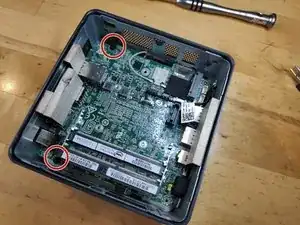
    • Utilizzate un inserto Philips (a croce) #2 per allentare e rimuovere le viti che serrano il coperchio inferiore del dispositivo.

    • Queste viti hanno un sistema di ritenuta per cui non cadranno quando le sviterete.

    What are the size of these case screws?

    Michael Lepore -

  3. bhndLRHUWyFtdiAA
    bhndLRHUWyFtdiAA
    QCAYcvFb6ruhUtpT
    Js5rdDRXVIdhWCDH
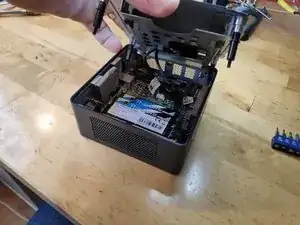
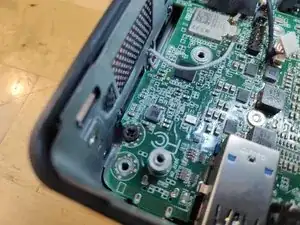
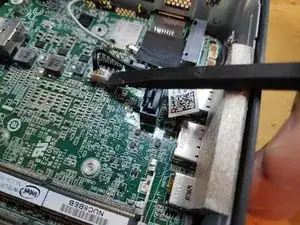
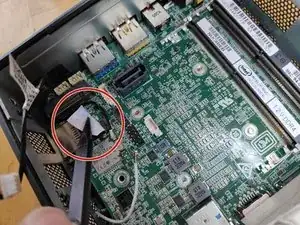
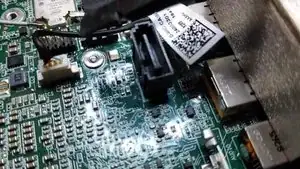
    • Aprite il coperchio, e tenete d'occhio i cavi che vanno alla scheda madre. Si tratta del cavo di alimentazione e del cavo dati del vassoio del hard disk da 2,5 pollici.

    • Scollegate delicatamente i cavi dalla scheda madre e mettete da parte il coperchio col vassoio del HDD.

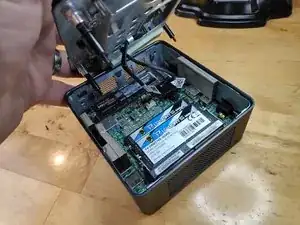
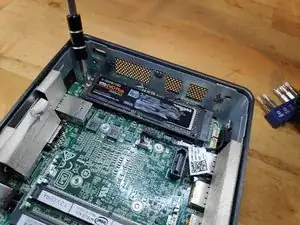
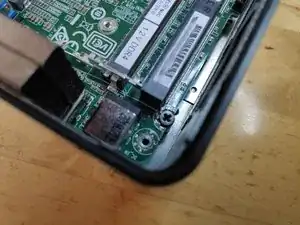
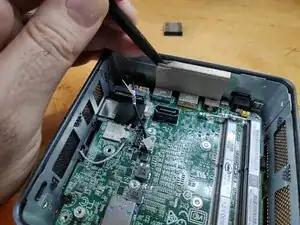
    • Nell'ultima foto potete vedere lo slot per l'SSD M.2 indicato dalla freccia rossa. Si può utilizzare questo slot per installare un SSD, per tenerlo fermo c'è una comoda vite.

  4. YGPRvVCtYEhLU3Lt
    YGPRvVCtYEhLU3Lt
    asuqDIHLiiFmxoMX
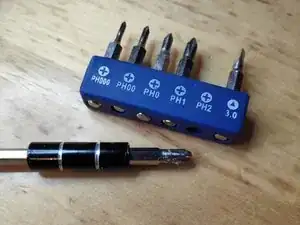
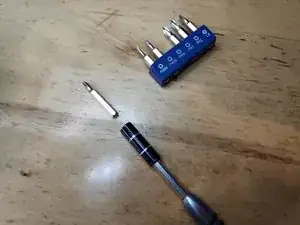
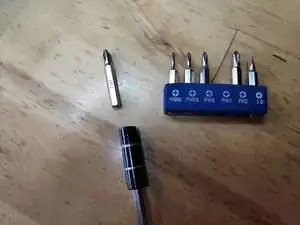
    • Prendete l'inserto PH1 e inseritelo nel cacciavite.

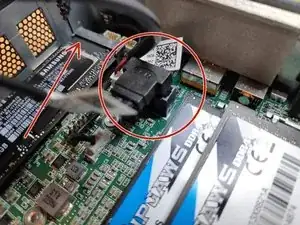
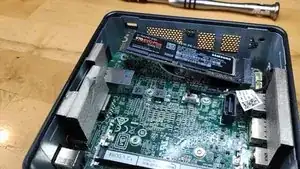
    • Svitate la vite che tiene in posizione l'SSD V-NAND ed estraetelo delicatamente dallo slot.

  5. Potete vedere il passo precedente in questo comodo video.
    • Potete vedere il passo precedente in questo comodo video.

  6. MIpgTEX1mQENjsuu
    • Montate l'inserto PH1

  7. frD4VaxFk5pt4o16
    frD4VaxFk5pt4o16
    4EXFJdxOJKpMDNDC
    IwkjojFXbgxpK2GU
    • Svitate le viti cerchiate in rosso sulla fotografia.

    Hello, may I know what is the screw size? I already stripped mine so I'm trying to get a replacement screw when I have the stripped out. Mine was stripped and cannot get it out. Can you please help me? I've already used the rubber and glue method but no luck.

    Fitri Suhaimi -

  8. bXN2KelA6UENepsV
    bXN2KelA6UENepsV
    dJAAGRBCACvZLIsX
    ejDFmgh1Q1KhFLJI
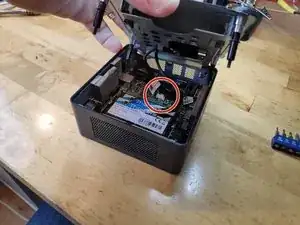
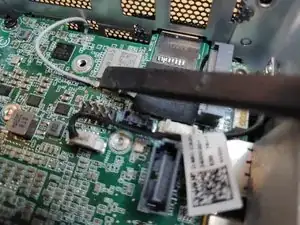
    • Scollegate i cavi dell'antenna WiFi e Bluetooth (fate molta attenzione altrimenti potreste strappare i terminali dalla scheda PCB)

    • Scollegate i cavi del microfono stereo dai connettori sulla scheda madre.

    • Fate attenzione al cavo del WiFi che si trova nascosto sotto a un pezzo di nastro nero.

    Remove WiFi an Bluetooth antenna Cable very carefully. Terminals can be ripped of easily.

    Christian Reinhold -

    very true, I’ll add it to the guide

    Vladimir Knobel -

    Added to the step in the guide, thanks for pointing that out!

    Vladimir Knobel -

    Note that the WiFi and Bluetooth antenna cables lift/pull off vertically (not slide off horizontally, as I presumed from the photo). They are circular connectors with a pin in the middle. Getting them off was okay (I actually used tweezers), but it was fiddly work trying to push them back on.

    Carl -

  9. Scollegate il cavo del microfono
    • Scollegate il cavo del microfono

  10. Rimuovete i pannelli protettivi dai lati.
    • Rimuovete i pannelli protettivi dai lati.

  11. iieAfEfVcF1664xQ
    iieAfEfVcF1664xQ
    canT2xLG6FaTCVcD
    • Non è necessario rimuoverli tutti, solo quelli nelle fotografie.

    Hallo, kann man den Lüfter auswechsel. Bei mir ist er nach ca. 15-20 min sehr laut.Ich glaube das das Lager defekt ist . Wenn ja, wo bekomme ich einen neuen her?.Für eine ausführliche Nachricht wäre ich sehr Dankbar.

    Mit freundlichen Grüßen

    Joachim Arndt, j.a.50@web.de

    joachim arndt -

  12. tOgKIPOLBLUM3Q23
    tOgKIPOLBLUM3Q23
    J6onfbukKHgZMbNn
    pHZ6AT6LBiErPDil
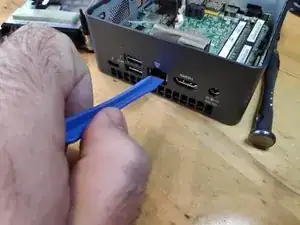
    • Utilizzate una leva per rimuovere la scheda madre dalla carcassa

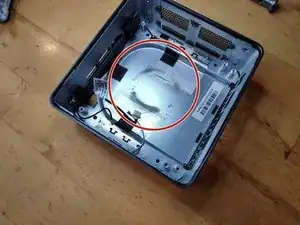
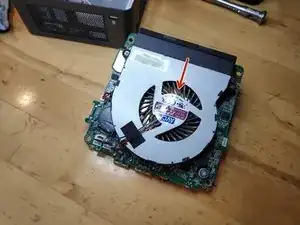
    • Cerchiato in rosso potete vedere il segno lasciato dalla polvere mossa dalla ventola di raffreddamento

    Amazing! Could replace the fan. Have also removed the 4 screws of the heatsink , and renewed the thermal paste underneath it. That was necessary. It was dried out. THANKS!! It works like new: no overheating anymore. A lot faster.

    lutgart.schreyen -

    The key for getting the motherboard is to move apart very firmly the two opposite sides of the metal casing, so as to let the connectors move down.

    Jan Drouaud -

    Thank you Jan for that tip!

    I spent 20 minutes trying to jiggle it out before I read that!

    Yes, pull it apart somewhat and it comes out (relatively) easily.

    Bob Mudford -

Conclusione

Per rimontare il dispositivo seguite questa guida in ordine inverso.

Vladimir Knobel

Membro da: 27/03/14

2656 Reputazione

11 commenti

I’ve awarded the 30 points because these how to in steps are just great. One little critic, having read other stuff I understood the later models had greater risks of breaking things because of the more complicated wifi and mic cables, and these steps could have been better explained, like do the wifi cables plug in or slide off a splade like connection, and what can I use as a pry tool from around the house. These are the frightening steps to someone who has not done this unit before, while just about everything else isn’t much different to opening and taking parts out of a laptop.

Marlon Kirby -

Thank You, I was having fan noise issues with my NUCi7BEH and was trying to figure out how to pop the MOBO from the case.

This guide was fantastic, loads of dust collected on the heat sink, clean air and it seems to be running great now.

Ave temp before this clean out was 65ºC but would spike from 90-100ºC under any load at all, even the VMs just spinning up.

Now after clean, all is good, temps idle sitting at around 35ºC now and under load about 70º C. Huge difference.

Big Thanks to Vladimir for making this wonderful guide.

Alan -

Thanks, Vladimir Knobel, for putting together this excellent instruction with video and pictures. I used it to remove and replace my fan. I greatly appreciate it!!

Jeff Humpton -

merci, ça m’a bien aidé et j’espère avoir résolu ce pb de ventirad, j’ai pu dépoussiérer. encore merci.

contactsebastien -

thanks for all ! Experienced pb with my Intel® NUC Kit NUC8i5BEH : CMOS battery failed. Everything is ok now thank you for all the screens and videos very good tutorial to disassemble and check the problem

Regards Raph

Raph GLC -

Thanks Vladimir, very clear.

I love my NUC. About 6 years old and trouble free; except now. Going down with the message overheating.

It will boot OK and heats up quickly and goes down in 10 to 15 minutes.

Hoping its something simple like dead fan.

Regards, Robert

Robert TURKINGTON -

I can't fix things like that. My machines broke down when I touched them.

iscribble

bowman wise -

hello, I also cleaned everything, I disassembled everything, replaced the thermal paste, it was dry after two years and I cleaned the fan, the housing has already gathered dust and now the computer is like new from the factory, all processors at rest are 33 Celsius. INTEL NUC 8I7BEH

Regards

Mateo

mateo -

Hi Vladimir Knobel, thank you for the video.
I have a different issue, hope you can shed some light. My BOXNUC8i7BEH suddenly went off while running and no matter what I try it wont start, the power LED wont even light-up. I have cleaned the CPU fan, changed the thermal paste... any suggestions ?

zeehao -

Donde lleva batería cmos

Pescador -

I accidentally ripped the base contact terminal off the PCB on Step 8; how can I fix it? I used the tape to hold them now, but the WiFi sometimes disconnects.

Effendy Abdullah -