Introduzione

Abbiamo riscontrato problemi di surriscaldamento e deciso di pulire la console. Ecco i passaggi che abbiamo seguito.

  1. OPmA41Gn6YSkTxDy
    OPmA41Gn6YSkTxDy
    ggVeoWjBHIyKNPtX
    QqhGVAU2Sm2qw1NM
    • Usa le unghie o uno spudger per rimuovere la copertura.

    • Svita la vite PH1.

    • Sfila l'HDD.

  2. Gq3mQjwM3ZOC2XmY
    Gq3mQjwM3ZOC2XmY
    iRsEwQg4CH4FviRQ
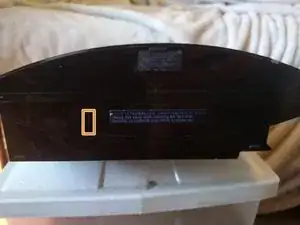
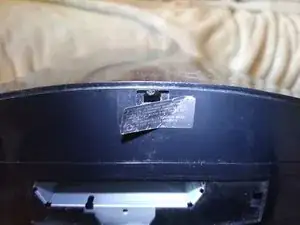
    • Rimuovi l'adesivo e il gommino sottostante.

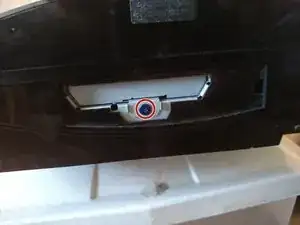
    • Svita la vite Torx Security T8.

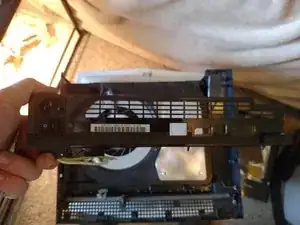
    • Tira la scocca verso di te per rimuoverla.

    Slide the cover towards the screw opening would have been a better instruction as people may do this repair with the system on its side. Also, a picture showing that sliding it is how you take it off not “pulling it” would have been perfect.

    Dylan Y -

    It's T8 or T9 ?

    Sebastien Plante -

    I confirm it's a T8 security torx.

    Sebastien Plante -

  3. AWUDDWhAr2VRhV2p
    AWUDDWhAr2VRhV2p
    Jk6f3KFAUIbgDykb
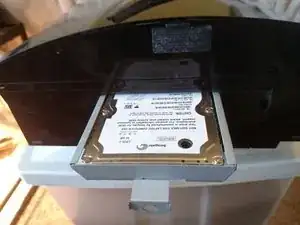
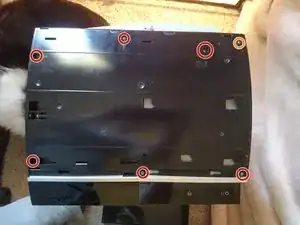
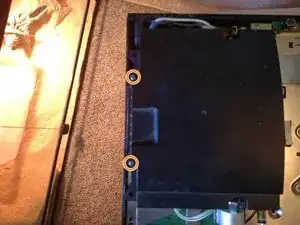
    • Svita le 6 lunghe viti.

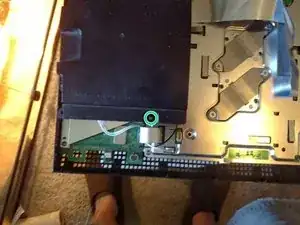
    • Svita la vite più corta. Questa vite è indicata da una S se non ricordi dove vada.

    • Il lettore Blu-Ray NON è avvitato, quindi non inclinare la console!

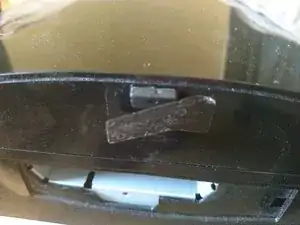
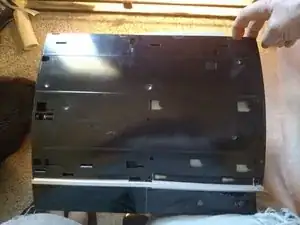
    • Usa un dito per premere il gancio accanto alla vite corta e tira verso l'alto. La scocca ruoterà attorno alla parte anteriore.

    • Durante il rimontaggio, reinserisci il bordo anteriore e ruota la scocca. Le viti faranno assestare il tutto in posizione corretta.

  4. bdi1puFBqUQPLLHc
    bdi1puFBqUQPLLHc
    OIqNuXXvZNkneIEC
    DVD11AYvh5JQkTD4
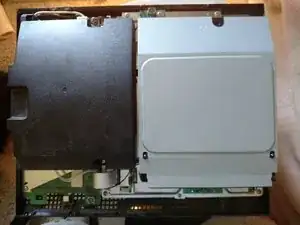
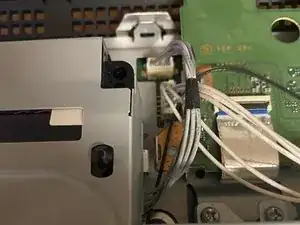
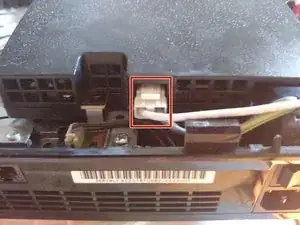
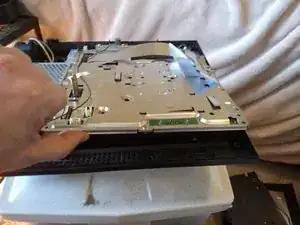
    • Gira il lettore Blu-Ray a testa in giù e solleva l'aletta del connettore per sfilare il cavo.

    • Disconnetti il cavo a 4 pin collegato al lettore Blu-Ray.

    Mine had a label covering the entry to the Blu-ray casing, so I needed to remove the power supply and disconnect the Blu-ray ribbon cable from the motherboard instead.

    Bil -

    Mine also has a 4-pin cable on the side that also has to be detached

    gordonhamachi -

  5. cfuJE5GSsNkWplOy
    cfuJE5GSsNkWplOy
    sRrhYVLaMBLaAWRB
    M46VSK3m1sRrrNHk
    • Svita la vite M.

    • Svita le viti di lunghezza media.

    • Svita le viti M lunghe.

    • Durante il rimontaggio, le viti con filettatura più fine sono indicate con una M.

  6. QmbAPgZqEVXLGJWG
    QmbAPgZqEVXLGJWG
    FmbZ2IIiVTMwKMLk
    • Premi sull'aletta del connettore e scollegalo.

    • Tiralo parallelamente al tavolo.

    Where does that ribbon cable on the second pic on step 6 go?! kinda confused on how to take it out..(that Rainbow shaped wire thing)

    kevinpaulenriquez -

    That connects the front peripherals to the main board. There should be a brown tab on each side that you just flip down. Then just lift the ribbon cable up.

    knyrii -

    how many pin that ribbon cable which connect to front usb ?

    Adirose Axl -

  7. o3ogehBAbHlxNUDB
    • Non usare uno spudger in metallo! Ci sono dei contatti esposti che possono fare corto circuito o darti la scossa.

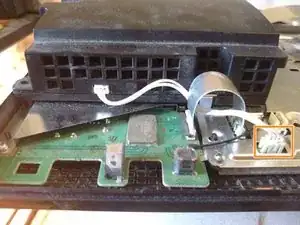
    • Usando uno strumento non conduttivo, solleva l'angolo nell'immagine per facilitare la rimozione.

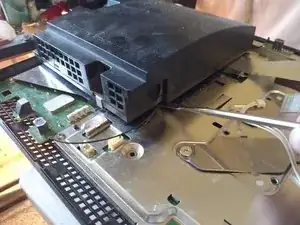
    • Tira verso l'alto l'alimentatore per rimuoverlo.

  8. GOBHU43KlBJoDiau
    GOBHU43KlBJoDiau
    hTqNMNht6vNTleHU
    LoDWkHf553SXUIu3
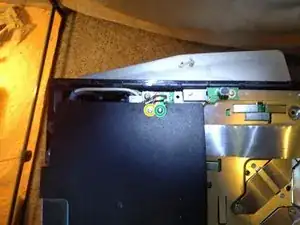
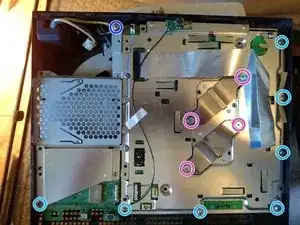
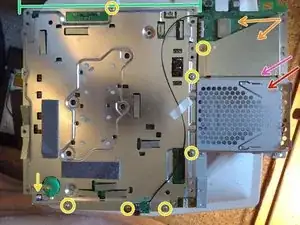
    • Svita le viti corte.

    • Svita la vite della terra.

    • Svita le viti dei dissipatori e dei loro supporti.

    • Solleva la parte anteriore per rimuovere la protezione.

    • Fallo lentamente. I dissipatori non sono avvitati e potresti danneggiarne le alette se fai troppa forza.

    • Non c'è la pasta termica sui chip nelle immagini poiché avevamo già aperto in precedenza la console e non l'abbiamo rimessa per lo smontaggio.

    • Durante il rimontaggio tutti i buchi per le viti sono segnati. Se un foro non è segnato, non infilarci una vite.

    Base not brace right?

    kajussls121 -

    Ground screw wouldn't go in through the ground wire no matter what I tried. It would if I screwed it straight into the brace, but not if I put it through the ground wire first. Ended up stripping it.

    Joe Mama -

    You wrote that if the hole doesn’t have a marker, then don’t put a screw in there, but shouldn’t there be two screws in the bottom-right? I also noticed that you marked the screw on the bottom, second from the right, twice. It’s marked in this image and the next one. Also, the number of screws I have left over seems to suggest I’m right and a second screw should go near that bottom-right screw where there is no circle. Did I screw up?

    Cole Fudge -

    I did screw up. I missed one screw for the USB and WiFi controller. The screw hole I was talking about is filled by one of the long screws that goes through the cover and past the disk drive. My bad!

    Cole Fudge -

    Please how do i know of the heatsink fin is spoilt?

    Abiodun -

  9. 52lgJAJhJtvHADKZ
    52lgJAJhJtvHADKZ
    Y4mgCMWMICXahAfO
    • Svita le viti M e scollega la batteria della scheda madre. Dovrai reimpostare la data e l'ora della tua PS3.

    • La protezione va sotto alla metà superiore della gabbia per l'HDD.

    • Solleva il bordo indicato della gabbia per l'HDD e fallo oscillare per sganciarlo.

    • Rimuovi la protezione del controller delle USB e del WiFi.

    • Rimuovi il controller delle USB e del WiFi. Si solleva verso l'alto. Rimuovi il nastro bianco.

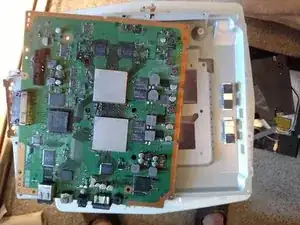
    • Solleva il bordo indicato per rimuovere la protezione della scheda madre.

    • Rimuovi la scheda madre tirandola verso l'alto.

    I need help i cant get that battery with the yellow arrow, do i just pull it out?

    The_Sinkre -

    The battery is spring loaded: just pull it out.

    Daniele Carminati -

    The motherboard does not lift out.. it seems to be held down by something despite all the screws having been removed.

    Randy Van Damme -

  10. IK1dv52yO1MIKBoS
    IK1dv52yO1MIKBoS
    VbIyEYDj2EQQCfvP
    • Ci siamo dimenticati di scattare una foto prima di svitare la parte inferiore. Ci sono 4 viti piccole da svitare.

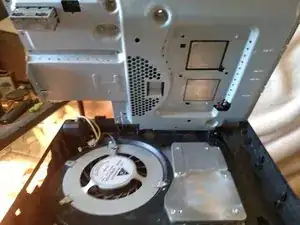
    • Solleva la scocca posteriore verso l'alto.

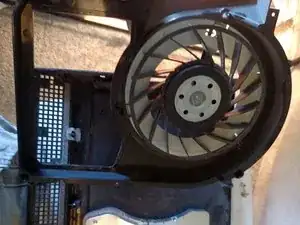
    • Solleva la ventola e la sua protezione verso l'alto.

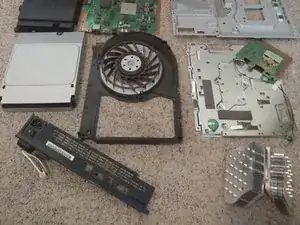
    • I dissipatori non sono avvitati e possono essere rimossi.

    what is small medium, where are the screws, what kind of screws?

    Thijs van Ulden -

  11. 2lDqLfFsSkJYSEu6
    2lDqLfFsSkJYSEu6
    IIKEUc33LVDGkiPU
    • Pulisci la console rimontala.

    Very nice and extremely time saving, without you guidance I would be at the pawn shop replacing the one that is in 1,000,000 pieces because "it accidentally fell."

    Jeffrey Geisenberger -

    I need the bottom @knyrii

    kajussls121 -

    Lo felicito por su ordenado, detallado, sintético, claro e ilustrado tutorial. Gracias por las imágenes, que ayudan enormemente, y por las explicaciones resumidas (sin palabras de más).  Mil gracias por el tiempo que se ha tomado para poder compartir su conocimiento con nosotros tal que realmente podamos entenderlo.

    mimimoni -

knyrii

Membro da: 25/07/15

2421 Reputazione

26 commenti

I have this exact same ps3 model and I took it apart to clean it and now the controller won't sync. I press the PS button and all 4 lights blink rapidly (faster than when 1 blinks when it's charging) for about 30 secs and then turn off. I have tried to sync it a couple diff ways with the same result.

Jeff -

The ribbon cable in image 2 of step 6 may be loose.

knyrii -

My ps3 Fat bluetooth not working i am changing thE bluetooth plate but not working pls help

harpreet singh -

Only a few things I can think of:

Replacement module is bad

Replacement module is the wrong version

Something is interfering with the bluetooth signal

knyrii -

My PS3 keeps shutting down when trying to load a game...sometimes it goes but some other times not...

Any help?

Thanks in advance

Ana Teixeira -

Hi, you may need a new psu, but do some more research before purchasing.

Eli Coates -

BTW my PS3 is model: CECHH01

Ana Teixeira -

I believe I have the original PS3 module, I took it apart the first time to clean it out. When put back together, the device still automatically shuts itself off in mid gameplay. I've made sure the PS3 has more than enough room for it to not overheat again.

I'd place my hand on its back to see how hot it is, it wouldn't have to be TOO hot, but it unfortunately still continues to turn off on its own... please help.

Aileen Barrera -

could it be the thermal paste?

Aileen Barrera -

Good! Now maby i can fix one of my ps3's i bought broken.

labiosus -

Everything is cleaned out and I reapplied thermal paste and put everything back together but, I wanted to know if it is possible that the ribbon cable for the blu ray player is essential in running any apps or games (that don’t require a disc) on the ps3 because that is the only thing that might not be in securely because mine differed slightly from the photos you provided. Thank you for the guide.

Jesse crum -

No problem! I’m glad it helped. I’m sure that the drive not being recognized or missing will not prevent you from running downloaded games. A bad connection may cause it to not boot or throw an error if something got shorted out.

knyrii -

My poor ps3fatboy crapped out 4 years ago this winter and I finally got around to tearing it down to see why when I power it on the system beeps, red light f;ashes, turns green then turns off before anything appears on screen. So, I'm hoping I'll find some clue by taking it apart or discover a passion of taking apart people's ps3's across the land just because I can….

Anyways, thanks for this great guide! I'm hoping it's a simple short or broken solder connection since I read the root cause for many people is Big Fat Brittle solder joints cracking.

John G. W. VI -

One of the more difficult and badly designed systems to fix. Multiple problems on my end! The case of the “Temperature sensors” Followed schematics to see where they are located. My motherboard is working correctly, GPU CPU fine, thermal paste in check and the system is not hot. Soo many people are being fooled by the warning pop up (upper right screen) System is too hot and shutting down” This has nothing to do with your motherboard being faulty, GPU/CPU or thermal paste. It has to do with this models’ power supply and temperature sensors. Swap out power supply for a compatible one and or get the schematics to where the temperature sensors are located and fix them. Ugh! Love the PS3…hate the MODEL!!

Dee -

My phat PS3 won’t take disks. There is no disk in it, but It won’t even go in, then immediately eject. It just won’t take it. Thanks to anyone who replies.

Legendary Ocelot -

Thank you !

Wanted to sell my PS3, but it wasn’t a possibility to sell to someone a console that made the noise of a Jumbo Jet starting up.

Everything went well, cleaned every bit of and and changed the thermal paste, now it’s good as new !

Really easy to follow, good job making this tutorial ! :)

Lucas Gustin -

Hello, I am having trouble removing the round green CR battery from the motherboard, i tried wiggling it out and pulling but it won’t budge, any help? and thank you very much for the tutorial.

Neon Nostrade -

I opened mine today to try to do a long overdue, deep cleaning. After lifting the cover for the hard drive, I saw that the blue security screw was completely stripped but the previous owner of the system. Is there any way for me to remove this screw?

Geo Castellano -

Try with some pliers to grab the screw and turn it.

Daniele Carminati -

Thanks! Hopefully that helps. I was already going going down the rabbit hole of trying to find tools to help remove the screw.

Geo Castellano -

I took my fat PS3 4 port USB apartment cleaned out the thermal paste and reflow the chips then reassembled it. Now I have no indication of power at all. Any ideas what happened?

Sam -

The power supply (the black box) should have two cables plugged into it, check they’re properly seated on both the power supply and the motherboard.

defski -

what is that cable name at pic 5

isimsiz oyuncular30 -

I have no HDMI connection. AVI works. Unit was connected to TV that was hit from a lightning strike. Any guidance on which components to look at for failure?

Matt T -

With these directions, I let my dog do it! Well done my man!

Ckyu29@gmail.com -

Wayyyyayyywayy why wont my ps3 connect to wifi after opening it to clean and change thermal paste? Poor me cry cry boo hoo.... Please help me amnd my poor ps3

mike bloodofodin -