Introduzione

  1. uPo3AEtVjGUOXlda
    uPo3AEtVjGUOXlda
    mwuqER61PwOt1uE6
    2mwhXcw14Cve5xpk
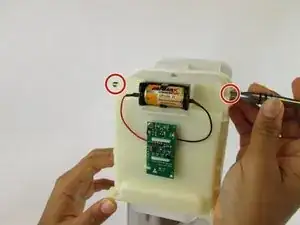
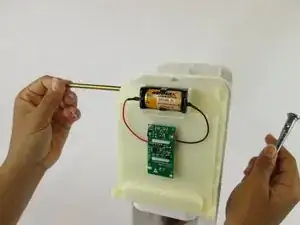
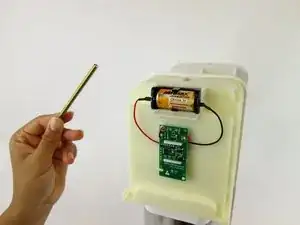
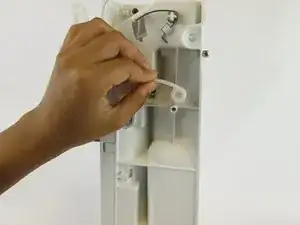
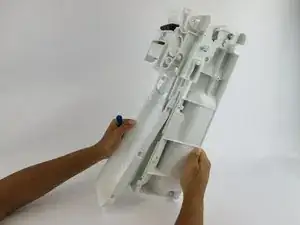
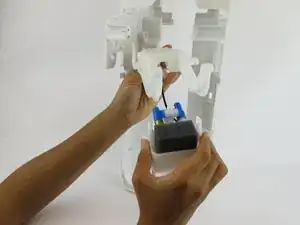
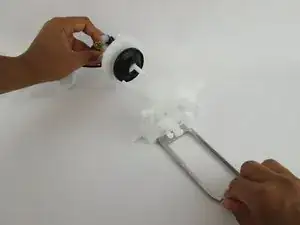
    • Spingi la barra dorata, posizionata nella parte superiore del dispositivo, fuori dal blocco di gasatura.

    • Puoi usare la punta del tuo cacciavite per spingere questa barra.

    We could,remove this covee, without sliding the assembly out ofbthe case. There was NO gold bar in the system…

    Robert Coles -

    ….. no gold bar either in my device…. ??????

    hbergeron -

  2. GphQUg1qNkEDRTcT
    GphQUg1qNkEDRTcT
    3NxQEZirCDyytuUo
    qf5UgdCjM4uZKNKH
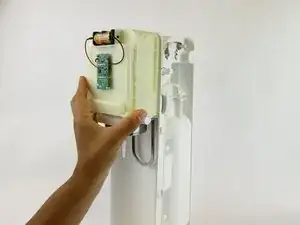
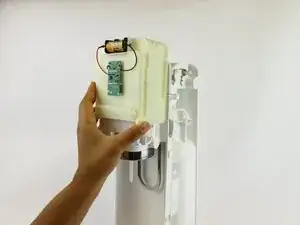
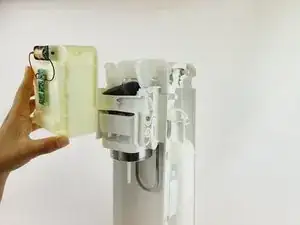
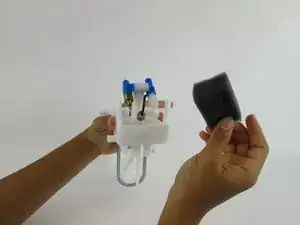
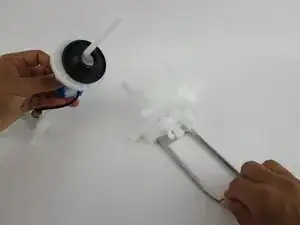
    • Fai scorrere la copertura gialla della batteria verso l'alto e poi allontanala dal dispositivo per rimuoverla.

    Careful! I had springs and retainers go flying on this step

    Felicia Renaud -

    Yep…same here. Took me a good minute to figure out where they came from!?

    Rodney Davis -

    Fun fact: The lights on the SodaStream are simply a timer. They are in no way linked to a pressure gauge. If you want more bubbles it doesn't mean you have to press on the activation mechanism harder. you can press gently and just wait longer. This way the water will not spill out over the top and leak all over the table. Ignore the lights and just wait for the safety release valve to activate as you are filling the bottle. that's how you know you have reached the limit.

    Ken Ostrovsky -

    I don't have see springs but led don't work? How work led? The battery is charge. Thank you

    Letizia -

  3. MyqGNupIls4esFYK
    MyqGNupIls4esFYK
    SoBGKXxOyqRVkDdg
    • Sgancia il pezzo inferiore dei bracci in plastica da entrambi i lati del dispositivo.

  4. hKsCCevvmGpuqCOj
    hKsCCevvmGpuqCOj
    IeXvoBOnR1oDwP1a
    • Solleva la parte superiore dei bracci in plastica per rimuoverli da entrambi i lati.

    Slot screwdriver works just fine for these next two steps

    Scott -

  5. WplpmtfCWF3Yhvag
    WplpmtfCWF3Yhvag
    6oJEPbASQJCQ35YI
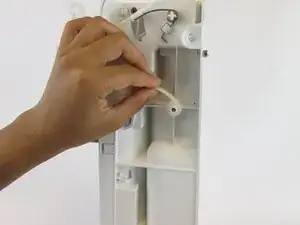
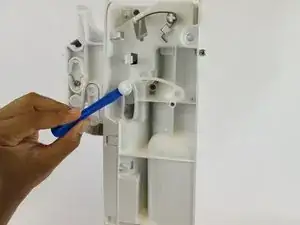
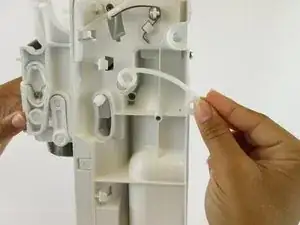
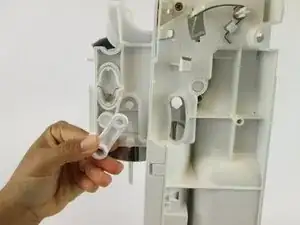
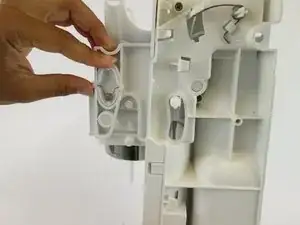
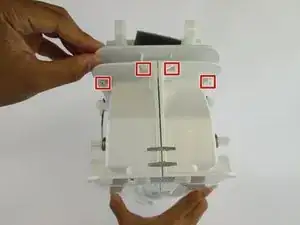
    • Rimuovi i pezzi di plastica, posizionati vicino alla parte anteriore del blocco di gasatura, da entrambi il lati del dispositivo usando uno strumento di apertura in plastica o uno spudger in nylon.

    Be careful…they will fly off across the room!

    Rodney Davis -

  6. DaRJ6MhBiBihfSJt
    DaRJ6MhBiBihfSJt
    RZygY4bEgNJsDSvK
    • Rimuovi l'ovale in plastica e la molla al suo interno.

    Do not have this piece on mine?

    ronkellington -

    nor do I. They must have made some changes.

    Scott -

    This piece exists on my 2013 metal chassis version, but not on my 2016/17 plastic chassis.

    Darryl Marko -

  7. XHqPTJfYlsRZRWpD
    XHqPTJfYlsRZRWpD
    Y1nZCpBr1gbrMw62
    • Tira il riquadro di carica verso il basso e allontanalo dal resto del blocco di gasatura.

  8. QZYhTiECMNFJ4yun
    • Svita le tre viti da 17,9 mm posizionate sul lato destro.

    • Queste viti possono essere difficili da raggiungere.

    Should this be four screws? I followed all directions (I think) and had one extra screw to remove, just above the bottle mount, before I could split the two halves apart

    Phil Wilkes -

    Yes I had a 4th screw at this step too. Going backwards the missing fourth screw in the instruction messed me up and I had to redo it!

    Daniel Sylvester -

    Yes the 4th screw still isn't mentioned - and just below it is the rare-earth magnet that can fall out when the halves are separated. This magnet activates the LEDs when the carbonating block is pushed down - no magnet, no lights.

    Malcolm Noble -

  9. tRskmIiswd2dIWWT
    tRskmIiswd2dIWWT
    YVheV5LUOmF2vEIU
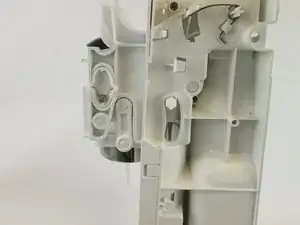
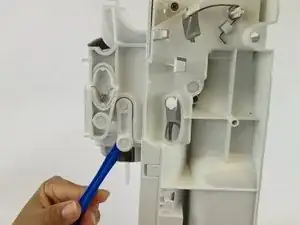
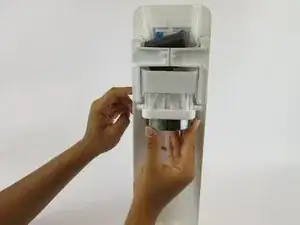
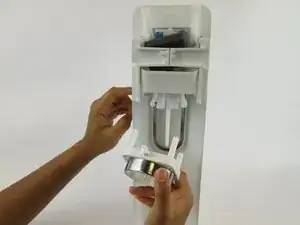
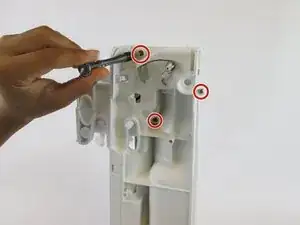
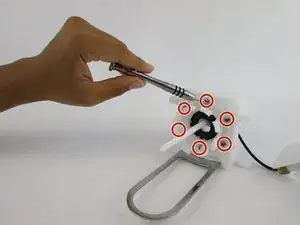
    • Rilascia i quattro ganci sulla parte superiore del blocco di carbonatura e rimuovi la copertura in plastica.

  10. Kpo2GkMvnSPDLHlJ
    Kpo2GkMvnSPDLHlJ
    cN32IXyu2cZUQYPk
    1OsWloFwisA2OA2E
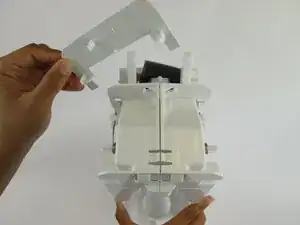
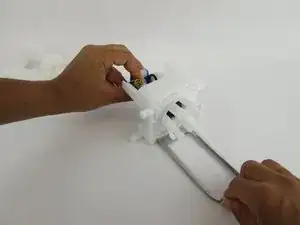
    • Solleva i ganci posizionati su entrambi i lati con uno spudger in plastica. Sfila la copertura anteriore.

  11. jEnRGH6ULh4rYv6F
    jEnRGH6ULh4rYv6F
    vtIDqL1hraJfUYUa
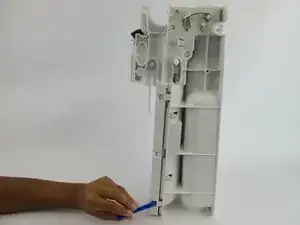
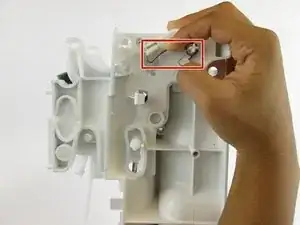
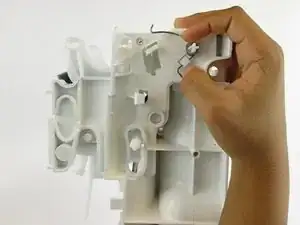
    • Sgancia i bracci argento a molla da entrambi i lati del dispositivo spingendoli verso il basso.

  12. HNUK2PBMpGYJJPgP
    • Prendi i lati destro e sinistro del dispositivo e aprili in due metà identiche.

    • Una volta separati questi due pezzi, tutte le restanti componenti interne cadranno fuori dal dispositivo.

    what happens to the middle white piece?

    Noah Langer -

    Yeah there's a step missing here…between 17 & 18

    Daniel Sylvester -

    Is it better to lay it on its side?

    Gareth White -

    I hope someone will document the missing step of what it looks like if you separate the halves without having all the parts fall out.

    What does it look like and where do they go? Kinda' important for reassembly.

    Joe -

    I've added a photo to this step showing just this, fingers crossed it gets approved

    lizzbeeton -

    Liz - would you post a link to your pic here so we can see it even though it's not approved yet?

    Joe -

    Re: "missing step"

    On the newer models, (at least 2016/17) the valve is attached to the left side and it's two Phillips head screws must be removed.

    These instructions are correct for earlier models where the valve is in the middle, so there is no missing step.

    Darryl Marko -

    Se voce deitar o aparelho com cuidado, nada cairá e as peças ficarão no lugar

    J.Poppa -

    Thanks to this guide, I’ve taken a part my SodaStream Source a few times now. Like others have mentioned, during reassembly, this step tripped me up every time. It’s definitely missing details about the part orientation. I took some additional photos in efforts to help others. Please find the album here.

    Mitch -

    Thanks Mitch!! That's exactly what I needed! been pulling my hair out trying to figure out how that white piece went back in.

    KayLynn Mathews -

    You’re very welcome! I’m so glad it helped you out!

    Mitch -

  13. JWdRZrQqWysjWsVd
    JWdRZrQqWysjWsVd
    DXtYONVnU6D22mK2
    keuLcodMFNVLKBR1
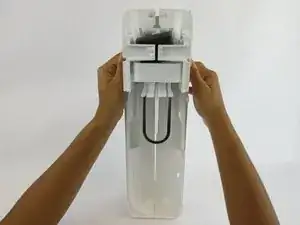
    • Tira la spugna verso l'alto per rimuoverla dalla parte anteriore della componente di gasatura.

    Any source for spare parts known? Ebay and Amazon does not help here!

    lutz Ziffer -

    no foam pad on mine either

    Scott -

    What is the name of the part that is in blue? Mine is broken and I would like to replace it

    Tony R -

    The part on mine that was broken is the plastic cap/nut that connects the black hose to the canister holder.

    Going to try and superglue it. Wonder if there's a source for this nut?

    Joe -

    I wish it was that simple. The hose has a brass ferrule crimped on it, and the nut cannot be replaced without being able to remove and crimp a new ferrule to the (new?) hose. I have found a listing (eBay Europe?) for a split brass nut that allows replacement, but...

    https://www.google.com/url?sa=t&source=w...

    https://picclick.co.uk/Messing-Mutter-f%...

    Darryl Marko -

  14. FVBvef2ilBWlEBsU
    • Svita le sei viti da 17,7 mm da sotto il riquadro di carica.

  15. WA4F2d2O2T61TZDG
    WA4F2d2O2T61TZDG
    K5COTeJWIAfAPx4F
    lE4HAFSWo3RD1OWx
    • Tira via il riquadro di carica dal beccuccio.

    Dove posso acquistare il tubo dell'aria del gasatore?

    zorzi.corrado2 -

Conclusione

Per rimontare il tuo dispositivo, segui le istruzioni in ordine inverso.

Angela Mossgrove

Membro da: 20/02/17

1072 Reputazione

2 commenti

Bonjour j'ai une pièce à l'intérieur dont je ne retrouve pas du tout la position au remontage.

Pouvez vous m'aider ?

Delphine Renard -

De quelle partie s'agit-il, peux-tu prendre une photo ?

Toon Konings -