Introduzione
Usa questa guida per smontare la scheda madre dalla scocca anteriore e da quella posteriore.
Strumenti
Ricambi
-
-
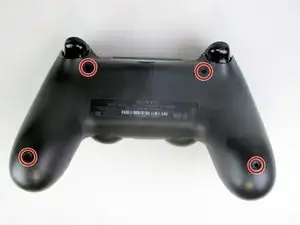
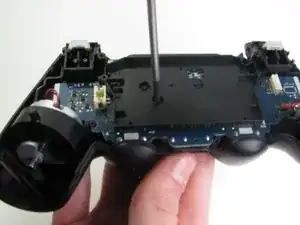
Aiutandoti con un giravite Phillips #00, rimuovi le quattro viti da 6.0 mm che fissano la scocca posteriore al controller
-
-
-
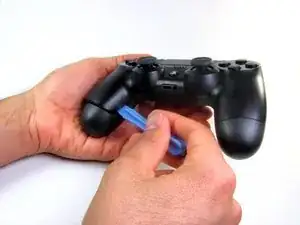
Comincia con l'impugnatura sinistra:
-
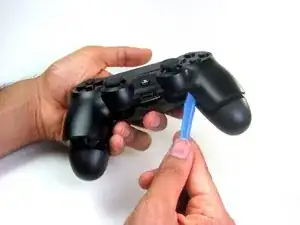
Per cominciare, afferra l'impugnatura sinistra del controller.
-
Inserisci uno strumento di apertura in plastica all'interno della fuga, e scivola sino agli sticks.
-
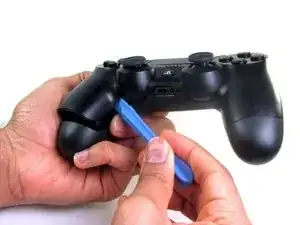
Fai leva sullo strumento per continuare a aprire il dispositivo.
-
Ripeti questi passi per l'impugnatura destra.
-
-
-
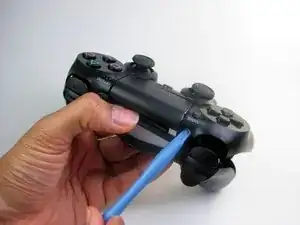
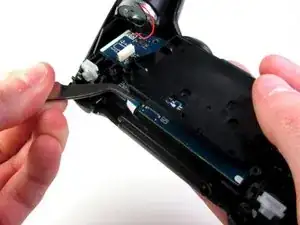
Inserisci uno strumento di apertura in plastica all'interno della fuga, e separa le due scocche in un punto nei pressi di questi bottoni:
-
Tasto Share
-
Tasto Options
-
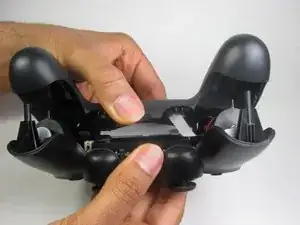
Adesso separa i due pezzi che compongono la scocca del controller, tenendo sempre presente che saranno ancora collegate tramite un nastrino da circuito.
-
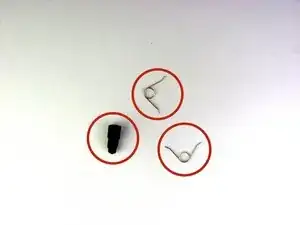
2 Molle dei Trigger
-
1 Estensione di colore Grigio del Tasto Reset
-
-
-
Rimuovi l'unica vite da 6.0 mm Phillips che si trova proprio sotto l'alloggio della batteria con il Giravite Phillips #00.
-
-
-
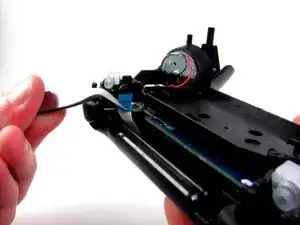
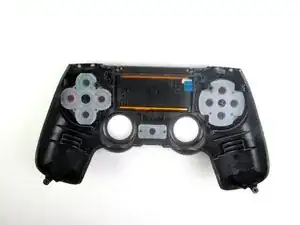
Stacca delicatamente il nastrino del touchpad connesso alla scheda madre aiutandoti con un paio di pinzette a becco inclinato. Il nastrino del touchpad è connesso alla scheda madre mediante un connettore che si piega e si deforma. Per riattaccare il nastrino, la linguetta di plastica dovrà essere delicatamente reinserita nel suo alloggiamento.
-
-
-
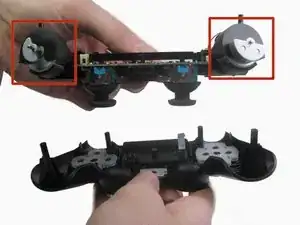
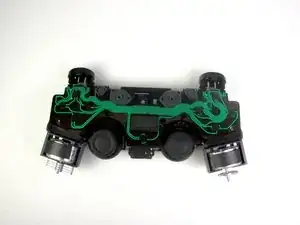
Sgancia la scheda madre dal resto della scocca frontale.
-
I motori della vibrazione sono a stento agganciati al resto della scheda madre, perciò per facilitare la separazione, cerca di fornire un adeguato supporto alle loro estremità.
-
-
-
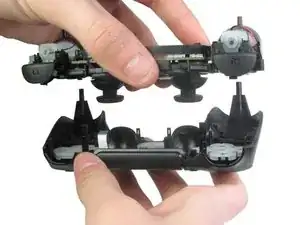
Se hai fatto tutto in maniera corretta, dovresti trovarti con queste tre parti, rispettivamente:
-
Modulo della scheda madre
-
Scocca anteriore
-
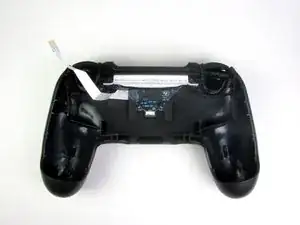
Scocca posteriore
-

Per rimontare il tuo dispositivo, segui le istruzioni nell'ordine inverso.

20 commenti
So my controller decided to stop charging (still stayed on until the battery completely dained) a couple weeks ago so I bought a new charging port and ribbon and replaced it put it all back together just for it to work the same not charging but on so I figured maybe it was the battery all along but this time I took my other new controller apart so I could test the battery by connecting it to the new controller to see if it will take charge which they would take charge on the new controller but when I took the new ones and put it in the old on it still wouldn't take charge I have no Idea what else to do everything else works it just won't charge even the light is still on but if I keep it connected to a USB cable it will stay on since the battery was dead but the battery status remains the same.
Same here except mine won't even work while plugged in. It just turns on and dies
there is a new and different version out (looks the same) different internals - anyone got one to show us? (Model = CUH-ZCT1E?)
Russ -
How do you put back the touchpad? That $@$* Is a &&^&^$^ paradox.
The top of the touchpad that has the groove has to be inserted at the part where the bottom of the touchpad is normally. Then you you move it up and you can wiggle it through the arc. After that it fits snugly like it supposed to.
Rick -
i too had this problem so i watched a video https://www.google.com/search?client=ope...
This saved my life on trynna put it together
Yo usé un Phillips #000, ya que el #00 quedaba grande y podía dañar el tornillo.
Adolfo Gomez Toledo -
A plain #0 works way better for me
Jennica Tapia -
I agree with Jennica, it's a #0 screw
Peeter -
to re-torque these PH00 screw... i found 19Ncm to be about the max. (since 27Ncm was too much)
Dreamcat 4 -