Introduzione
This guide will teach you how to remove and replace the LCD. The guide has nine steps and will take time to complete, but each step is relatively easy since the guide requires no advanced techniques.
Strumenti
-
-
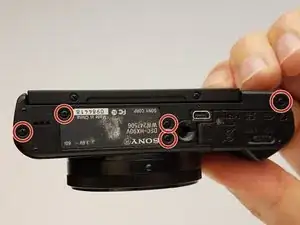
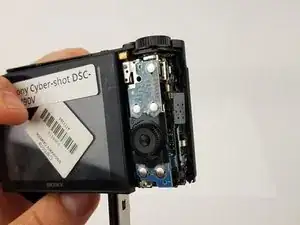
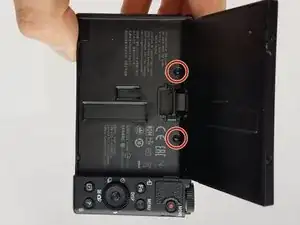
Place the device so bottom of the camera is facing up .
-
Remove the five marked screws with a Phillips #000 screwdriver.
-
-
-
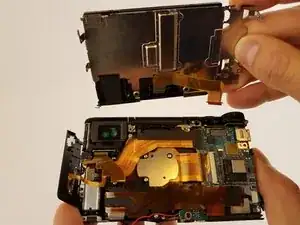
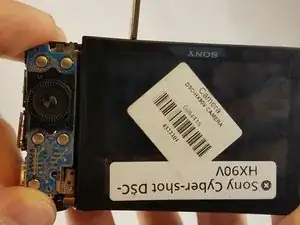
Disconnect the control board data cable by wiggling carefully with your fingertips. Set the control board to the side once it is disconnected.
-
-
-
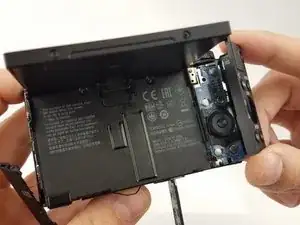
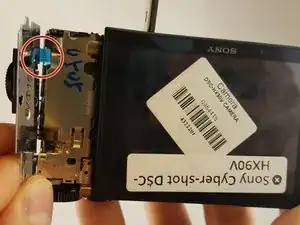
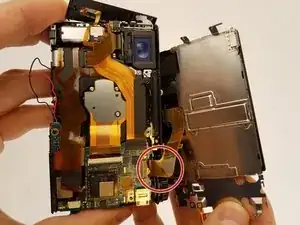
Orient the device so the lens is facing down.
-
Remove the two black M1.4 X 3.5 Phillips head screws using Phillips #000 screwdriver.
-
-
-
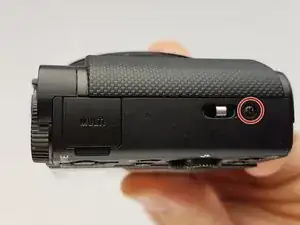
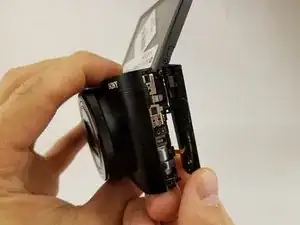
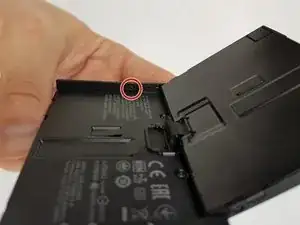
Orient the device so the lens is facing down.
-
Remove the black M1.4 X 3.5 Phillips head screw .
-


To reassemble your device, follow these instructions in reverse order.
19 commenti
The title says this is a lens replacement, but isn't it in fact an LCD replacement?
This is truly a terrible guide. There are numerous steps missing, steps in the wrong order and little or no description of where and how to apply any pressure to separate or remove parts. I’m glad I didn’t follow this guide as I quite likely would have ruined my camera, or at the very least caused more and quite possibly expensive-to-repair damage. I strongly urge ifixit staff to investigate this guide and remove it, or to at least strongly warn anyone who is contemplating following it.
David -
Hallo David,
mit dieser Anleitung habe ich schon mehr als 20 Displays gewechselt und es ist mir noch nie etwas kaputt gegangen. Es fehlt auch nichts was man hätte noch schreiben können. Wenn Du Angst hast etwas kaputt zu machen lass die Finger davon.
Hier rumkritisieren ist schon ein bisschen unverschämt, diese Übersetzung schreibe ich in meiner Freizeit! Du kannst ja eine neue bessere Anleitung schreiben aber vermutlich bist Du jemand der die Finger von solche Reparaturen lassen soll. So eine Reparatur erfordert Sachverstand, wenn es Dir mit dieser Anleitung nicht gelingt, fehlt Dir dieser.
Gruß Detlef
Entschuldigung,
nach dieser Anleitung habe ich schon 20Displays gewechselt ohne das etwas kaputt gegangen ist.
Wenn man sich dieses nicht zutraut oder 2 linke Daumen hat, Finger weg!
Not all screws are the same length so pay close attention to what exact screw came from what hole.
guywindsurfer -
The mini loudspeaker is under the tree little holes, and may fal out of position when handling. SO look how it is situated right after removing the bottom cover. It is connected by red and black wires. After I was done the speaker no longer functioned and there isn’t any obvious reason why not.
guywindsurfer -
Ce tutoriel est bien trop compliqué et délicat à réaliser!
Pour changer uniquement l'écran LCD, il suffit de démonter les 4 vis du cadre de l'écran orientable, déboiter ensuite délicatement le cadre de l'écran (à l'aide d'un petit tournevis plat), et décoller l'écran LCD de sont cadre en exerçant délicatement une poussée tout autour du cadre avec pouce et index. Attention il y a 2 nappes de connexion (une grande et une petite) à retirer en tirant délicatement entre pouce et index en exerçant un mouvement oscillant. Au remontage veiller à bien les ré-engager à fond. Mettre un peu de colle (type colle contact) pour fixer le nouvel écran LCD dans son cadre.
Jean-Denis RANCHOUP -