Introduzione

In this guide, you will go through the process of removing the camera's recording button, as well as its wiring. This involves removing a portion of the camera's shell, but can be accessed relatively easily.

  1. Iji2D2VEOH3PYuVM
    • Locate the slider labeled "BATT" and pull it back from the battery with your thumb.

  2. rWLvfV1crFurZDRo
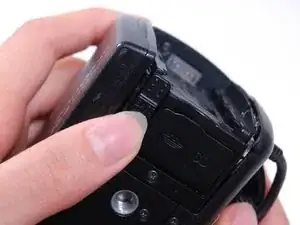
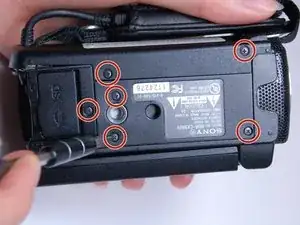
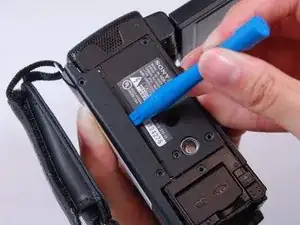
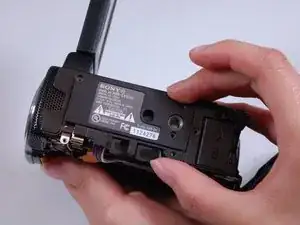
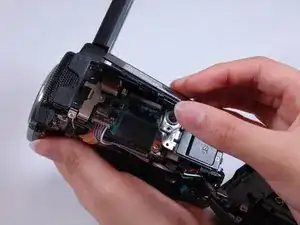
    • At this point, you should be able to remove the battery by simply lifting it from the camera.

    • The camera provided for guide-creation did not include a battery. However, the battery position should be the same.

  3. qxckaaRUZfUmS4Mc
    qxckaaRUZfUmS4Mc
    U4lIDbRw2aKuTXvR
    ER2nAkbDRy3qsAEq
    • Use the Phillips #00 head to remove the following 5.5mm screws on the left-hand side.

  4. rVeFFeTjwCBiOqfb
    • Use the Phillips #00 head to remove the following 5.5mm screws on the empty battery socket.

    In this Step 4, a fourth 5.5mm screw is under the lip near the battery contact

    MacGyverRick -

  5. uhtaPKBWtjERgoBe
    • Use the Phillips #00 head to remove the following 5.5mm screws on the bottom.

  6. bkiAcmewOqH2XBiM
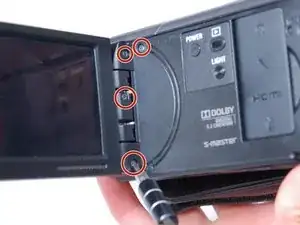
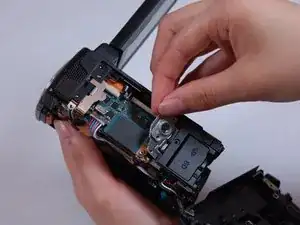
    • Fold back the hinging panel on the top of the camera located near the lens.

    • Use the Phillips #00 head to remove the following 5.5mm screws on the top under the hinging panel.

  7. gnScAAKy4DpfiwQy
    gnScAAKy4DpfiwQy
    lOi6eCNWr1N1QLwU
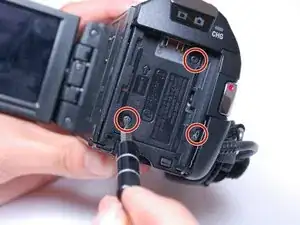
    • Slide back the cover for the DC and A/V ports on the right-hand side.

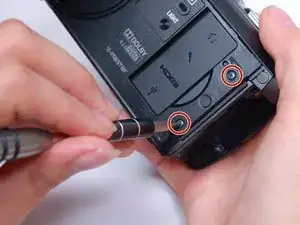
    • Use the Phillips #00 head to remove the following 5.5mm screws underneath the cover and on the right-hand side.

  8. IMK3ZRwABfnIumQ4
    • Use the plastic opener tool to loosen the casing on the bottom and the right-hand side.

    • At this point, the right-hand side should simply come off, although it will still be connected with internal wiring.

    • Be delicate with the wiring still attached to the side casing until you have access to removing them later.

  9. vaqvXSH5GalUUHev
    vaqvXSH5GalUUHev
    Jf2t6Mn1IDqOGKUd
    xUZdR2Yk1t3SDUMb
    • Carefully remove the bottom casing with your fingers.

    • Be careful not to loose the small metal stand-mount pieces that lay underneath the casing.

  10. 5nMwRSL1EtekYEpg
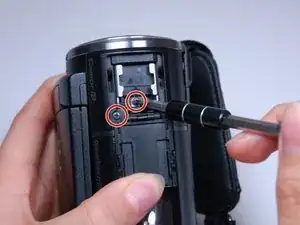
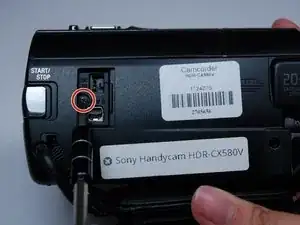
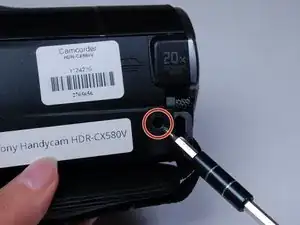
    • Look at the right side of the camera (the side with the recording button) while holding back the detached casing.

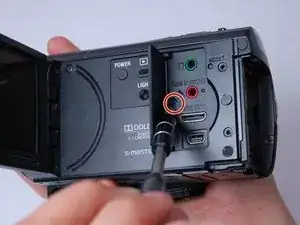
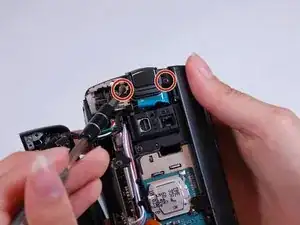
    • Use the Phillips #00 head to remove the following 5.5mm screws near the recording button.

  11. ZPNRpvdmIUkQBI2X
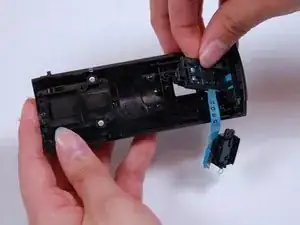
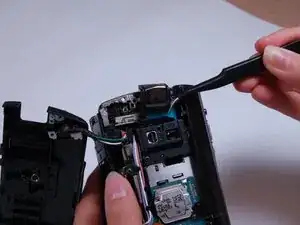
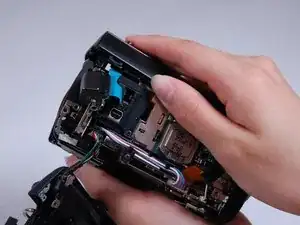
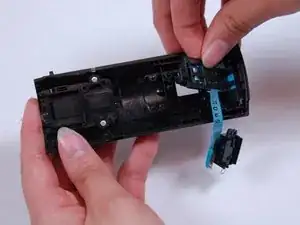
    • Use the curved tweezers to carefully detach the blue ribbon cable connector from the body of the camera.

    • The recording button and its blue ribbon cable connector should become detached from the body, but remain connected to the top casing.

  12. R6rNL3xXpwY1NJRY
    R6rNL3xXpwY1NJRY
    LNAVBVwrIfKWFSJT
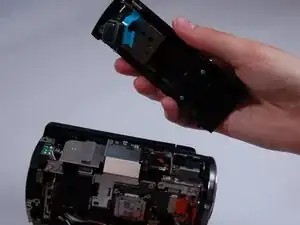
    • Pull off the top casing by lightly grabbing either side and pulling towards the back of the camera.

  13. IkVwUaCZiBDvUAjZ
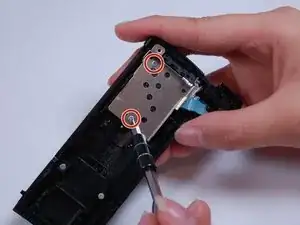
    • Use the Phillips #00 head to remove the following 5.5mm screws on the inside of the top casing.

  14. wOGMusPWK1KQbV1v
    • Carefully remove the metal frame from the top casing.

  15. cjguW4OkBxX33SSN
    • You are now free to remove the recording button, as well as its connection strip.

Conclusione

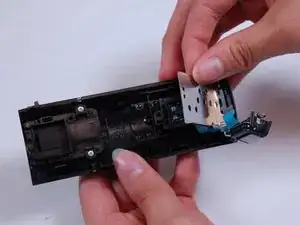
To reassemble your device, follow these instructions in reverse order.

Derek Fritz

Membro da: 21/03/17

378 Reputazione

0 commenti