Introduzione

This guide will show you how to locate and remove the fan inside a Sony Vaio SVE111B11L laptop.

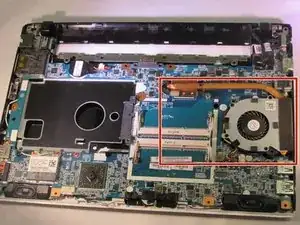
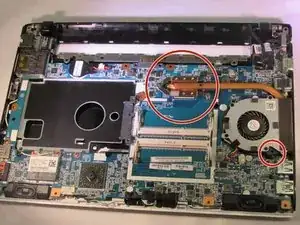
The fan is the laptop’s cooling system, a crucial component to any computer. Laptops especially need proper cooling, and an overheated computer can cause slowdowns, shutdowns, or even long term damage. Laptop fans tend to collect dust that hinders performance, and may occasionally need to be removed and cleaned.

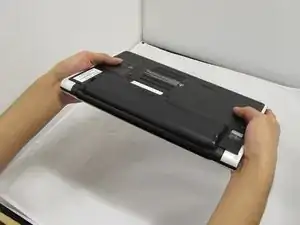
Disconnect the laptop from any external power source and remove the battery pack before disassembly.

  1. 65GkJVYnI533MYGB
    65GkJVYnI533MYGB
    JwKZVXOjCLKFmyAv
    • Remove the charging adaptor. Some charge may still be in the battery or computer. DO NOT touch connectors or copper yellow connector.

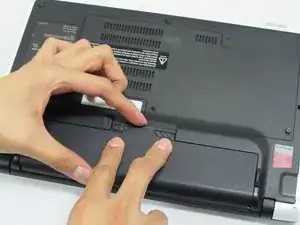
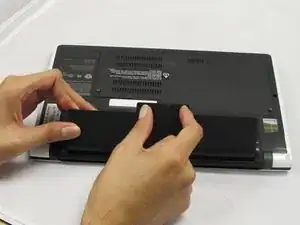
    • Locate the battery on the bottom of the computer.

    • Flip the computer so that the battery faces you.

  2. OniSTP2BVGJZScsx
    • Locate the two latches with the words “lock” and “release” on them.

  3. nDwk3SpwsRbopjRH
    • Push the latches towards each other and lift the battery to remove it.

  4. 2QSHoBkOFrNkxKkS
    • Remove the memory door on the bottom of the computer to access the screw for the keyboard.

    • The screws for the memory door do not come out.

    Incorrect picture for this step. Is should show removing the main cover on the bottom of the laptop to reveal the memory and hard drive

    Steve -

  5. Si2IcSubARPoR6cf
    • Remove the 6.7 mm screw that holds the keyboard assembly in place.

  6. 3jr3euQFU6cpCdwJ
    • Be careful not to break the keyboard wire connection.

    • Slide the wires out, away from the solder connections.

    • Flip the computer over and open it.

    Not sure what wires I'm supposed to slide out. Again, picture is no help.

    Steve -

  7. DBGcDdTXHWVjufmv
    DBGcDdTXHWVjufmv
    TxlaXDMmE1mgckfh
    IXXOHVmGmyDmko6I
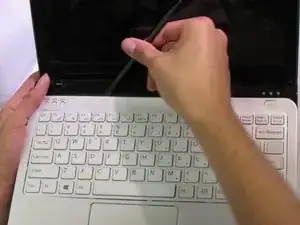
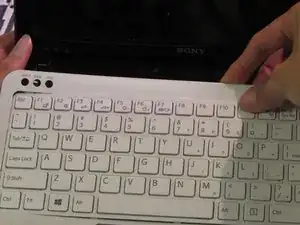
    • Gently pry the keyboard assembly from the screen side, using an opening tool. You will need to lift the keyboard about two inches.

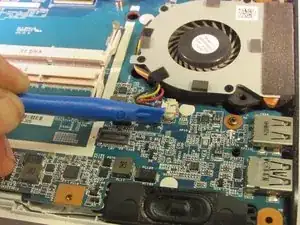
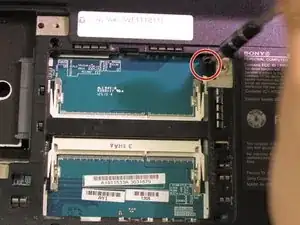
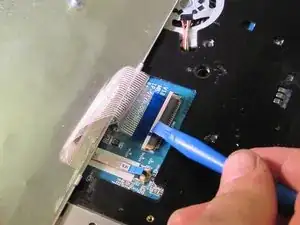
    • Using an opening tool, gently pull out and slightly up on the connector clip.

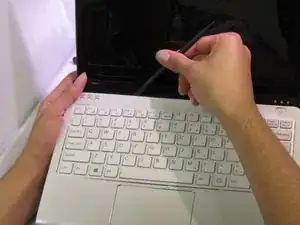
    • Gently lift the keyboard assembly up and out.

    I found that it was easier to remove the keyboard starting from the front edge (away from the screen) because the clips are shorter on this side. The only problem is that the cable is at the front so you have more danger of breaking it. Again, the picture is incorrect - don't try to remove the panel around the keyboard as shown, just go for the central keyboard unit.

    Steve -

  8. jJPahgMZcEa34Fs6
    • Locate the fan and heat-sink.

  9. LAeROVF1FNGOZjfR
    • Locate the wires and connectors, and gently unplug them.

  10. MJDlgdJwSINLZNFE
    • Locate and remove the 6.7 mm screws that hold the fan assembly.

  11. htGlibvVFip3lklv
    • Gently lift the fan assembly up and out.

Conclusione

To reassemble your device, follow these instructions in reverse order.

John Noll

Membro da: 29/09/16

819 Reputazione

Un commento

There are missing steps. For example - after removing keyboard assembly, there are 4 screws under it.

Keyboard assembly is not ment to be removed in way showed in pictures. There are melted plastic tabs to keep top cover in place. By prying that, you will broke them and top cover will not be possible to put back as before.

Only keyboard itself should be removed by prying it out, starting from bottom (thoucpad). Top of keyboard has larger “ears“ and they are hooked under top cover.

Gundars Pinka -