
Introduzione
This guide replaces the charging case battery in case it is damaged or doesn't charge properly. This is indicated by the LED in front of the case not lighting up when the case is opened while not charging, or the LED blinking red when the case should be charging.
Ricambi
-
-
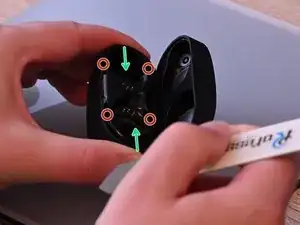
Use one hand to press together the short edges of the case (in the direction of the green arrows). This will create moderate gaps in the top rim on all four sides
-
With the other hand, insert a spudger or pick in each of the four gaps, and carefully lever up the inner plastic piece a little bit.
-
The clips in each of the four corners (location indicated by the red circles) aren't very tight and should be easy to release.
-
I used a metal spudger, but you should prefer a plastic pick as there's less chance of causing damage.
-
-
-
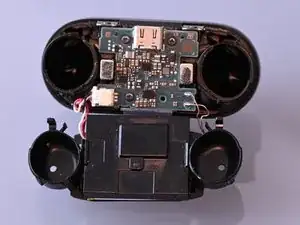
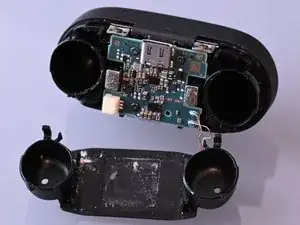
Once the clips have been released, you can lift out the inner assembly (which has the hinge and lid attached).
-
The bottom plastic piece holds the battery and the charging coil and is very loosely clipped to the top, release it and carefully fold it to the side.
-
These clips break easily, but that shouldn't be a big problem, as the bottom piece will be held in place by the outer shell later.
-
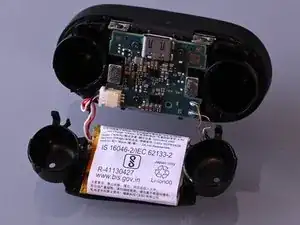
If you're able to, you may want to desolder the copper charging coil wires now, which greatly reduces the chance of further damage. You'll need to resolder them when finished.
-
-
-
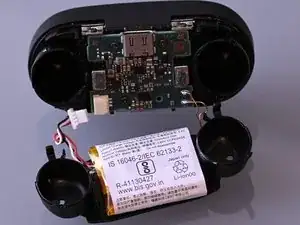
Above the battery is black plastic piece, which is now free. Lift it up and remove it. Make sure to remember the original orientation.
-
-
-
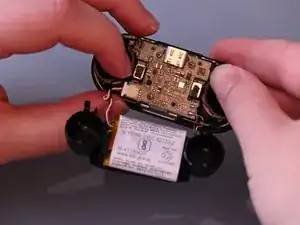
In case you want to access the underside of the PCB, unscrew the PH 0 screws holding the PCB.
-
However this isn't strictly necessary for just replacing the battery. It might give you more room however.
-
Note that the magnets attract the small screws, which can be annoying.
-
Carefully unplug the battery connector.
-
-
-
Now the battery is free. Carefully remove it from the bottom of the plastic frame, maybe applying some (moderate!) heat or isopropyl alcohol to loosen the glue if necessary.
-
Place the new battery in the same location and reassemble again.
-
To reassemble your device, follow these instructions in reverse order.