Introduzione
La tua batteria ha dei problemi e devi sostituirla? Questa guida ti mostrerà tutti i passi necessari per avere una batteria nuova sul tuo Nintendo 3DS XL in men che non si dica!
Strumenti
Ricambi
-
-
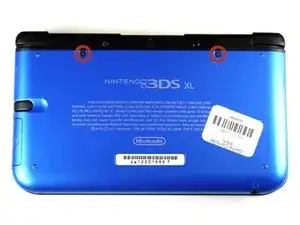
Svita le due viti Phillips #0 da 4.2 mm di lunghezza posizionate sulla parte in alto del retro.
-
-
-
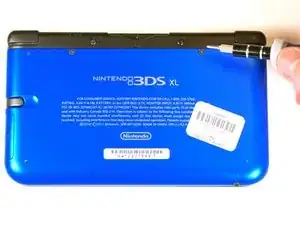
Tieni il dispositivo in modo tale che la cover sia rivolta verso l'alto.
-
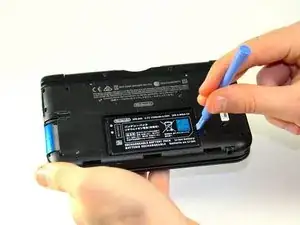
Usando uno strumento di plastica, rimuovi la cover cominciando dall'angolo superiore destro.
-
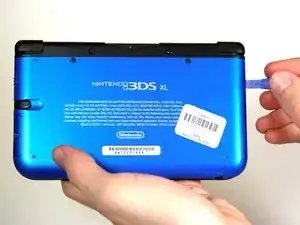
Tieni l'angolo sollevato così da evitare che si riattacchi.
-
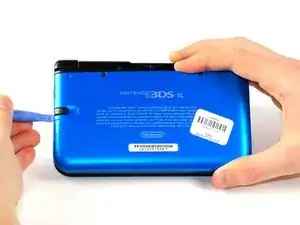
Fai attenzione alla parte sotto il compartimento del pennino. Fai leva sulla cover per rimuoverla se è ancora attaccata.
-
Rimuovi la cover dal tuo dispositivo e mettila da parte.
-
-
-
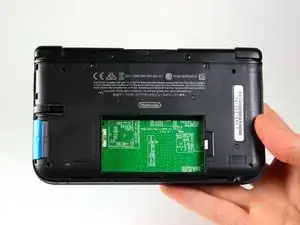
Inserisci lo strumento di plastica nell'apertura situata sul lato destro della batteria.
-
Solleva la batteria dal case inferiore.
-
Rimuovi la batteria e mettila da parte.
-

Per riassemblare il dispositivo, segui le istruzioni nell'ordine inverso.
5 commenti
Time estimate: 3 - 9 hours Difficulty: Very difficult ??????
More like 30-90 seconds, and that's if you have to search for a screwdriver.
机器无法开机怎么办?是电池的问题吗?
It should be noted that the bottom three clips on the bottom of the backplate can’t just be snapped in, they need to be slipped in, so when removing the backplate, it should be tiled away from the system and then pulled up from the bottom, and those three clips on the bottom should be the first clips in when you’re putting it back together, sliding them in with the backplate at an angle, and then the rest of the clips just snap in.
Nice tip. Ty.
Note: If your top or bottom screen was working before disassembly and doesn't work after reassembly, then it's likely that the connector is loose or dirty or damaged or not clipped or PLACED UPSIDE-DOWN. I had this issue with my Super3DS XL(2015) and it turns out that the reason why my top screen wasn't working after put together, was because I had the top LCD connector upside-down. After I correctly put the connector in, It worked again!
justjustintuber -
what type screwdriver do i use?!? its so small!!!!
Matthew -
I had success using a #00 Phillips head
Jake S -
Can't clip the front of the back cover back in
Macro Man -
I had trouble too, but got past it by slipping the bottom edge into the three indents first then easing the rest of the cover on!
Issu -
I found these were actually #00
Demosthien -
The screws in the 1st picture are stripped. What screwdriver head do I use?
Adric101 -