Introduzione
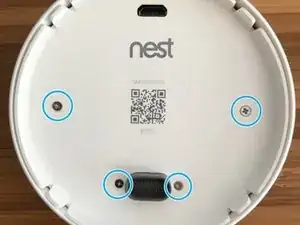
Strumenti
Ricambi
-
-
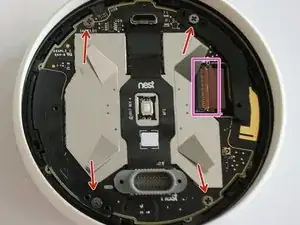
Scollega il PCB principale.
-
Rimuovi le 4 viti aggiuntive.
-
Scollega il cavo dello schermo.
-
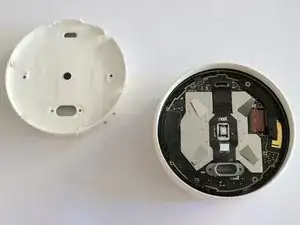
Estrai il PCB principale dal dispositivo.
-
-
-
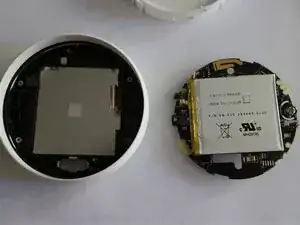
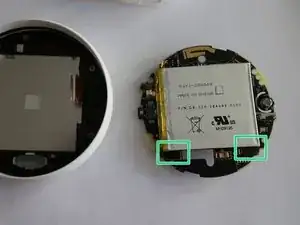
Il tipo di batteria è 284449. Questo indica che la batteria è spessa 2.8 mm e 44 x 49 mm lunga/larga. La capacità è di 2.1 Wh.
-
YEEY!! Adoriamo le linguette! Semplicemente tirale verso il basso per staccare la batteria.
-
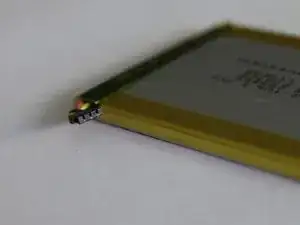
Ecco il connettore della batteria. Per scollegare la batteria, semplicemente tira il connettore verso l'alto.
-
Per riassemblare il dispositivo, segui le istruzioni nell'ordine inverso.

5 commenti
There are a lot of sellers out there (on Amazon, eBay, etc) that are claiming their batteries are “compatible” with the Nest E, but they are NOT truly compatible – they are underpowered. You’ll need to find a battery that clearly states that it provides 2.1Wh of power, not just 3.7V. Try searching eBay (I couldn’t find one on Amazon) for “authentic” or “genuine” Nest battery, and check the Wh rating. They’re out there, but can be hard to find. As always, check the seller’s ratings as well… many of those for sale are old and may not hold a charge if they’ve been discharged too long.
Bigh -
That is great advise, thank you! I’ve seen too many underpowered (1.4Wh) batteries sold with poor ratings. It’s hard to find a quality battery.
Thank you for this article. I used it to take out my Nest battery, which I thought was “unserviceable”. The step-by-step instructions were very helpful.
When I try to plug in the replacement battery it immediately gets hot along with the board. It's a model TL284443 not a TL284449 but it has the correct 600Mah and 3.7V. It's a LI-ion polymer battery.
J Money -
Apparently, the wires were soldered to the battery incorrectly so black was positive and red was negative. The wires were put into the connector in the correct color order but not current order.
J Money -