Introduzione

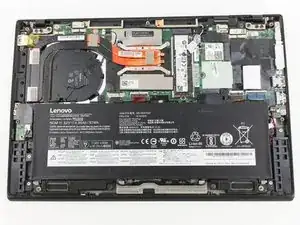
Questa guida darà istruzioni su come rimuovere la cover posteriore del Lenovo ThinkPad X1 Carbon 6th Gen. Questo potrebbe essere necessario se la cover è rotta e necessita di una sostituzione o se si necessita di avere accesso a qualsiasi componente interno.

Prima di cominciare, assicurati che il laptop sia completamente spento, e la batteria abbia una carica inferiore al 25%.


  1. NFtYMIq2pIVe1NLS
    NFtYMIq2pIVe1NLS
    f3HPZLtAIooGCgUh
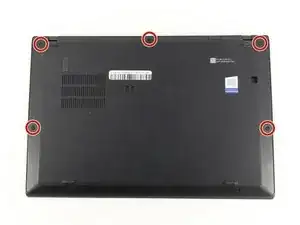
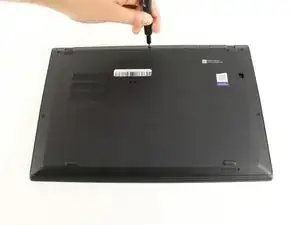
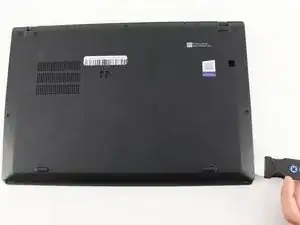
    • Usa un cacciavite Phillips #0 per rimuovere le quattro viti che tengono in posizione la cover posteriore del laptop.

    • Le viti non si tolgono completamente dalla cover posteriore. Svitale finché non saranno libere.

  2. HKMFZVKrjam3PWWH
    HKMFZVKrjam3PWWH
    6ZP1DMLSvgYbwIhX
    • Usa un Jimmy per alzare la cover dai pin localizzati.

    • Sebbene sia mostrato uno strumento di apertura metallico in foto, ti raccomandiamo di usarne uno in plastica per minimizzare i danni cosmetici.

    • Rimuovi la cover posteriore.

    • Se incontri della resistenza quando sollevi la cover, prova a svitare nuovamente le viti, in caso non siano ancora avvitate al dispositivo.

    I thank you for these instructions. They were quite helpful and I successfully replaced the fan. There is one thing however. Your instructions stated the following: "Be sure to pull on all of the cables at the same time."

    I disagree. One should never pull the wires. I was able to nudge the one part of the connector loose from the other part that it fit into." I then put the new fan in and gently and carefully pushed the connecting parts together.

    Otherwise, your instructions were clear and to the point. Thank you very much

    ALAN L SILBERLIGHT -

    The image shows prying the cover open at the bottom right. In fact, there are tabs securing the bottom edge to the frame. The cover needs to be pried open at the top edge. Once the top edge is released, the cover can be shifted slightly toward the top of the image to disengage the tabs at the bottom.

    This error, along with the similar error about removing the battery in step 4, suggests that the instructions were written with the laptop in the opposite orientation than what is shown in the images.

    EatCroc3 -

Conclusione

Per riassemblare il dispositivo, segui le istruzioni nell'ordine inverso.

Michael Megna

Membro da: 23/01/20

1268 Reputazione

0 commenti