Introduzione

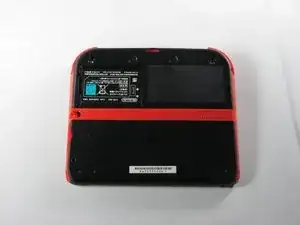
Ti insegneremo per prima cosa come rimuovere la batteria e il pannello superiore sul retro della console, per poi accedere al joystick per pulirlo o sostituirlo.

  1. wg4RTxdhgZNOVaab
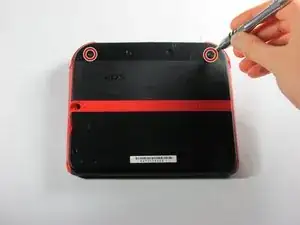
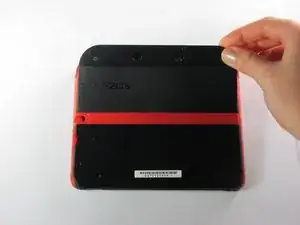
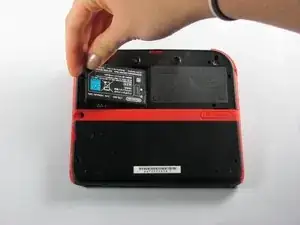
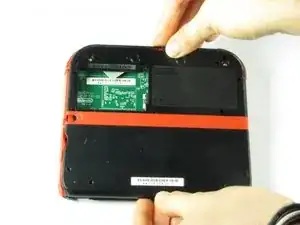
    • Rimuovi le due viti imperdibili che tengono il pannello superiore nel retro del dispositivo.

    • Le viti imperdibili non si staccheranno completamente dal pannello.

  2. cdb3AdyJTrNhIjrr
    cdb3AdyJTrNhIjrr
    okYxlIGDUBKBdGNP
    • Fai perno sulla parte inferiore e tira verso l'alto il pannello superiore per rimuoverlo.

  3. YA2mNvc2fLpeZ4NZ
    YA2mNvc2fLpeZ4NZ
    yjKMPFAO1SC1LncE
    HRaiAoWcVXEMByll
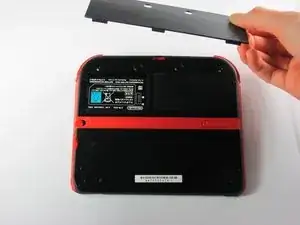
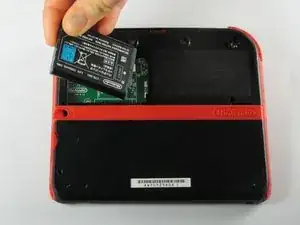
    • Rimuovi la batteria dal suo alloggiamento sollevandola dal lato più vicino al bordo esterno.

  4. vkEjnCVvCfkcXpKn
    • Rimuovi le 10 viti a croce che fissano il pannello posteriore.

    Can't take off the screw top left next to the battery. What type of screwdriver do I use and where can I find some?

    Little Mac -

    I used a husky with changeable heads, you could probably find one on amazon

    Minecrafter Pig -

  5. ona5d6XElywnV2F6
    • Il pannello posteriore è collegato alla scheda madre da un cavo piatto, perciò stai attento a non sollevare troppo il pannello posteriore dal tuo dispositivo.

    • Solleva delicatamente il pannello posteriore dal dispositivo.

  6. fVKP4KxbkT6Fggne
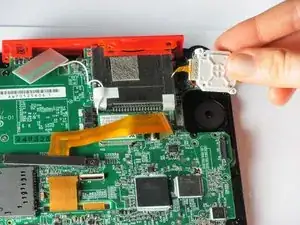
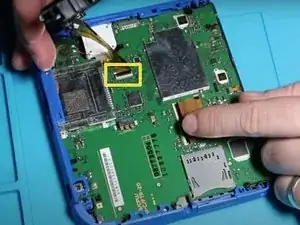
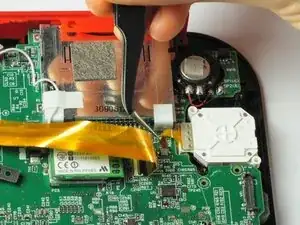
    • Usa la tua unghia o l'estremità piatta di un bastone di plastica per sollevare il connettore che fissa il cavo a nastro alla scheda madre.

    • Rimuovi il cavo dal connettore

    • Cogli l'opportunità di rimuovere i due pulsanti dorsali L e R, hanno dei cardini che potrebbero rompersi e delle molle che potrebbero schizzare via.

    You can also detach the cable from the motherboard safely by flipping up the connector on the motherboard. Just don't forget to reattach. Some will find this tedious but may save time if you know what you're doing with said connectors.

    Blackbeard -

    I agree, this is what the guide i followed said to do and since I was disconnecting all the other ribbon cables it made perfect sense to do it that way.

    Lin -

    pay attention: my 2ds dropped it's lens covers at this step

    Jos van Reenen -

    Likewise, I used a tiny drop of glue to put the lens back in place. Take care not to dirty the lens.

    Elliot West -

    The picture you have there has the camera lens ribbon installed upside down. The ribbon needs to be pointing down when you re-attach it not up.

    Rick Parrish -

    Agreed, ribbon cable looks upside down in picture

    Elliot West -

  7. OA3KY2vYVXvmDlIj
    OA3KY2vYVXvmDlIj
    xhqkQD6RicMmTXgP
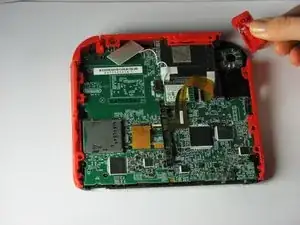
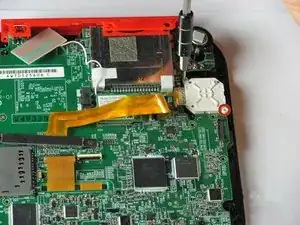
    • Rimuovi il pulsante dorsale nell'angolo in alto a destra tirandolo verso l'alto e verso l'esterno.

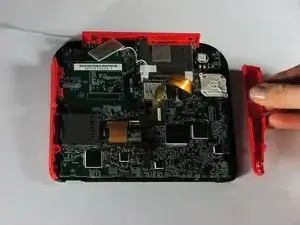
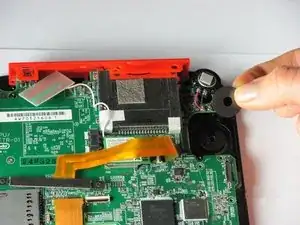
    • Rimuovi il pannello sul lato destro tirandolo in fuori.

    I recommend not removing the right trigger. I didn’t find it necessary and I hard a hard time getting the spring lined up again.

    Tyler Schommer -

  8. VqvqpHxnUj2YUAOW
    • Con delle pinzette solleva la leva di chiusura grigia sul connettore del cavo ZIF del joystick. Solleva perpendicolarmente alla scheda madre, dalla parte opposta di dove si trova il cavo.

    • Fai scorrere delicatamente il cavo fuori dal connettore.

  9. yxAc6pZGAtvbZiMg
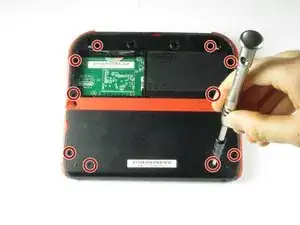
    • Rimuovi le due viti a croce che tengono la copertura del joystick, situate agli angoli dello stesso.

  10. PAeyOJ6nwJPS2x1P
    PAeyOJ6nwJPS2x1P
    adcYyWtwuAunNC1v
    • Rimuovi la copertura del joystick. Si dovrebbe staccare applicando una leggera forza.

    • Rimuovi la rondella del joystick sotto la copertura dello stesso.

    I completed the tutorial but my stick is now drifting by itself and I’m afraid to open it up again and try because the screws, it seems, are damaged from scratching it too much. It’s been like that for at least a year

    ImTHATGuy 500 -

Conclusione

Per riassemblare il dispositivo, segui queste istruzioni in ordine inverso.

Fina Beauchamp

Membro da: 12/01/15

2982 Reputazione

12 commenti

My ribbon cable is broke, Is there a way to fix it?Thanks.

Deez Smith -

When I put the circle pad back in, my 2DS thinks that I am holding up and right on it, when in reality it is in the neutral position. Please help.

CraftedGamer 1170 -

Use the calibrate option in system settings. Also make sure the cable is connected nicely.

Jilvenhong Dickinson -

Recalibrate it in system settings.

Artemy Matveev -

The guide fails to mention that the joystick ribbon cable is locked into the motherboard. You can use a spudger to lift the grey tab, leveraging upwards on the side opposite of the ribbon cable. The tab will pop up and should make getting the ribbon cable out (and back in) easier.

I followed this guide and ripped the ribbon cable while attempting to get it connected back to the system. If I had known the grey tab unlocks, I might not have ripped the cable by trying to force it back under the pins. My iFixit tweezers were also very sharp, and may have cut the ribbon cable. Would anyone be able to recommend something gentler for the ribbon cable?

Ryan G -

@ryango This looks like an oversight on the part of the guide author. I’ve updated the text with (hopefully) better instructions. Sorry it led to tearing your cable. :( That looks like a pretty standard ZIF connector, and once unlocked, it should disconnect and reconnect with minimal force. Personally when working with ribbon cables I prefer blunt-nose tweezers, but it sounds like your tweezers weren’t at fault here. Thanks for the heads-up, and better luck with your next repair.

Jeff Suovanen -

I replaced my analog stick, but it has the same problem, when i turn on the system, the cursor go crazy and then stops, i can move only left and right, no up and down with two different analog sticks…so, it’s not a analog problem, do u have any idea on how to fix it? thank you

Emiliano Tricase -

Try recalibrating it, I guess. After that, let me know how it is? I might find another possible solution.

INFJ Blog -

A bit nervous to try this, do I have to detach the ribbon cables?

INFJ Blog -

So mine doesn't have the gray tab. Any help with that?

jeff why not? -

I've found that a Phillips #000 Screwdriver works better.

Raymond Trinh -

Will iFixit be selling the parts for this repair ever again?

Noboru Garcia -