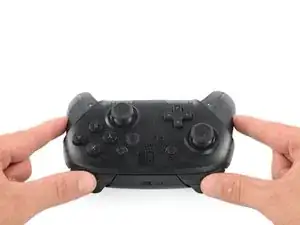
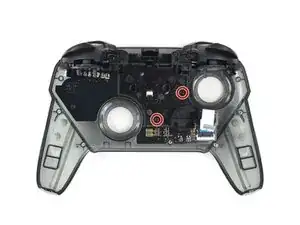
Introduzione
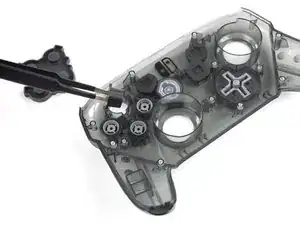
I pulsanti e D-Pad rappresentano l'interazione principe del controller Nintendo Switch Pro. I pulsanti possono richiedere una sostituzione se risultano non funzionanti. Controlla la nostra guida alla risoluzione dei problemi per maggiori informazioni.
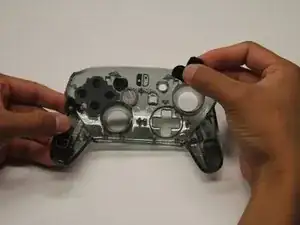
Durante lo smontaggio fai attenzione a spigoli appuntiti, ci sono alcuni pezzi di plastica esposta che potrebbero tagliarti.
-
-
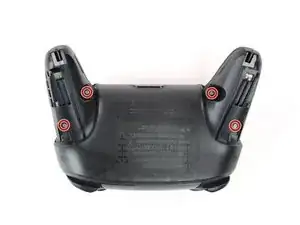
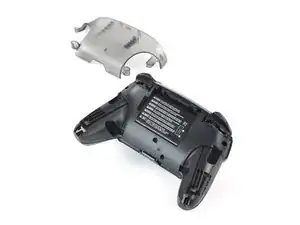
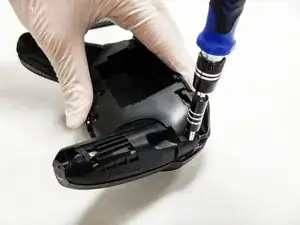
Usa un cacciavite JIS #00 per rimuovere le quattro viti argento da 6,8 mm che trattengono la copertura posteriore in plastica trasparente.
-
-
-
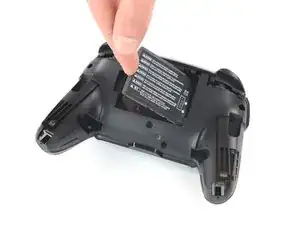
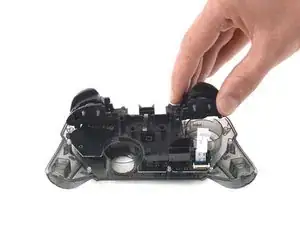
Rimuovi la batteria a ioni di litio facendo leva sul suo bordo sinistro con un'unghia o uno strumento per l'apertura in plastica.
-
-
-
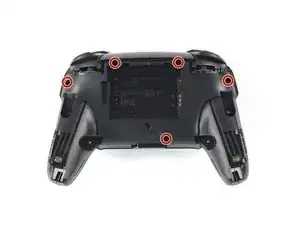
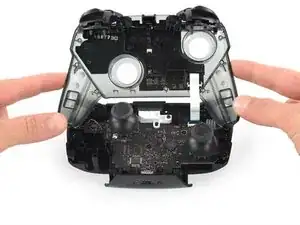
Usa un cacciavite a croce Phillips per svitare le cinque viti da 5 mm dal retro del controller.
-
-
-
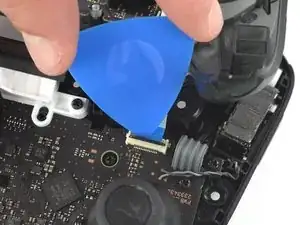
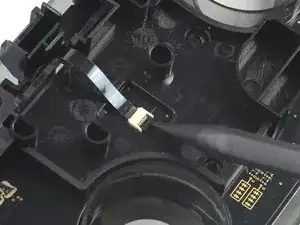
Usa la punta di un plettro per aprire l'aletta nera sul connettore ZIF spingendola verso l'alto.
-
-
-
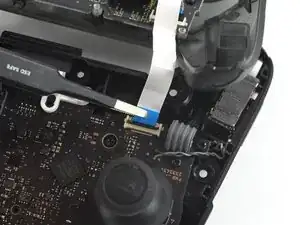
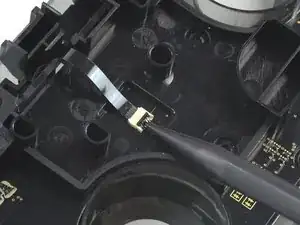
Usa le dita o un paio di pinzette a punta arrotondata per scollegare il cavo di interconnessione dal suo connettore.
-
-
-
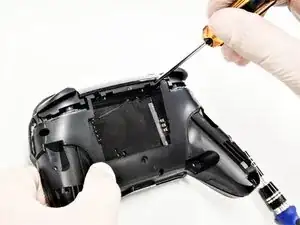
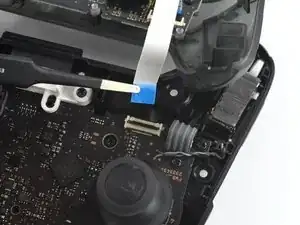
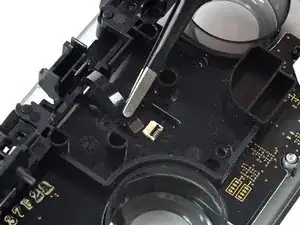
Rimuovi le due viti da 6.8 mm sulla parte superiore della scheda circuitale con un cacciavite Phillips.
-
-
-
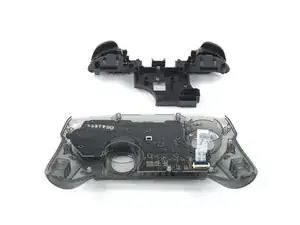
Usando un cacciavite Phillips rimuovi le due viti da 5 mm che tengono ferma la scheda circuitale.
-


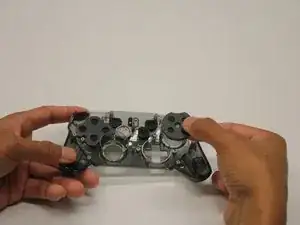
Per riassemblare il dispositivo, segui le istruzioni nell'ordine inverso.

3 commenti
On re-assembly, you may have trouble getting the top circuit board and shoulder button support structure to snap into place. It’s easiest to get the circuit board around the right analog stick hole, and push it all the way down until it is in place, then to secure the shoulder button support structure.
Make sure the “Home” button clear plastic light spreader (a clear irregular circle-shaped piece) is in place on top of the home button assembly, or it will give the home button a “sunken” appearance.
nclee -
Worked well, thank you. Had a gooey X button that needed to be cleaned.
What about the sync button? I've been scouring the Switch Pro Controller guide all day but there's nothing on how to remove the sync button! Mine is in really bad shape from having to use paperclips to press it but i can't find a guide to repair it anywhere.
faye kim -
Be carefull, these screws are super easy to strip even with the right tools.
Lukas Eberharter -
I tried editing these instructions after I had trouble with stripping screws, but it doesn't seem to take. The issue is that these are JIS and not Phillips screws. They are VERY similar looking but a Phillips head screwdriver will strip the screws.
Isaac Webb -
I tried using a Philips #00 screwdriver but it didn’t work
vincent ingrassia -