
Introduzione
Segui questa guida per sostituire l'SSD in un MacBook Air da 11" di metà 2011. Questo MAcBook Air usa un connettore proprietario e quindi non è compatibile con i comuni M.2 senza usare un adattatore.
Prima di iniziare questa riparazione, se possibile, esegui un back up del tuo SSD. Quindi prendi familiarità con la modalità recupero con internet o la creazione di una chiavetta USB avviabile per essere pronto ad installare MacOS sul tuo nuovo SSD e trasferisci tutti i tuoi dati.
Infine consigliamo fortemente di installare macOS 10.13 High Sierra (o successivi) prima di sostituire l'SSD originale del tuo MacBook Air. La maggior parte dei nuovi SSD richiedono dei driver aggiornati che non si trovano nelle versioni precedenti di MacOS.
Ricambi
-
-
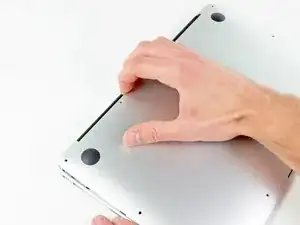
Infila le dita tra lo schermo e il case inferiore e tira verso l'alto per sganciare la cover dal MacBook Air.
-
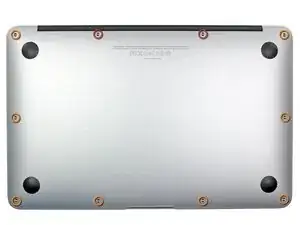
Rimuovi la cover inferiore e mettila da parte.
-
-
-
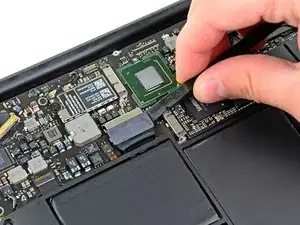
Usa la parte piatta di uno spudger per fare leva su entrambi i lati corti del connettore della batteria per scollegarlo dalla sua presa sulla scheda madre.
-
Piega il cavo della batteria lontano dalla scheda madre in modo che non faccia contatto accidentalmente con la sua presa.
-
-
-
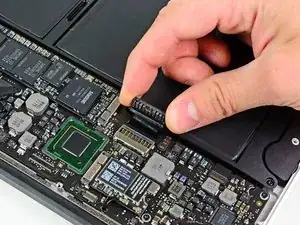
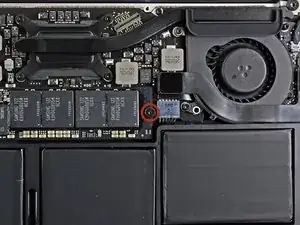
Usa uno spudger per sollevare l'estremità libera dell'SSD giusto il necessario per poterlo afferrare con l'altra mano.
-
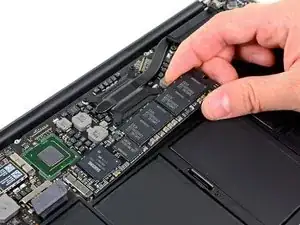
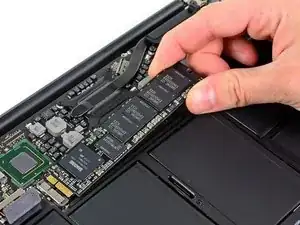
Sfila l'SSD dalla sua presa parallelamente alla scheda madre per rimuoverlo.
-
Per rimontare il dispositivo, segui le istruzioni in ordine inverso.

16 commenti
Note: if you're installing a blank SSD, you'll want to format it with Disk Utilities) before the OS X installer will recognize it.
Could not have been any easier, with this guide.
Thank you very much!
916sp -
is it possible to replace an 128 GB Solid State Drive with an 240 GB? (MacBook Air, 11", Mid 2011)
I recommend that one of the tools you obtain is a jeweler's loupe that mounts on your glasses. It makes things easier.
blairweaver -
This is not correct. You need the pentalobe tool at this point.
Duane Hellums -