Introduzione

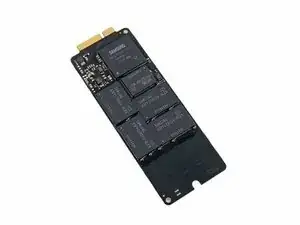
Segui questa guida per aggiornare o sostituire l'SSD in un MacBook Pro Retina da 13" di fine 2012. Questo MacBook Pro usa un connettore proprietario per la memoria, e quindi non è compatibile con i comuni SSD M.2 senza usare un adattatore.

Prima di eseguire questa riparazione, se possibile, esegui un back up dell'SSD originale. Quindi prendi familiarità con la modalità di recupero via internet o creare una chiavetta USB avviabile in modo da essere pronto ad installare MacOS e trasferire tutti i tuoi dati sul tuo nuovo SSD.

Infine, raccomandiamo fortemente di intallare MacOS 10.13 High Sierra (o successivi) Prima di sostituire l'SSD originale del tuo MacBook Pro. La maggior parte dei nuovi SSD richiedono dei driver aggiornati non presenti nelle versioni precedenti a High Sierra di MacOS.

  1. XxSVygoKg3BQZUeK
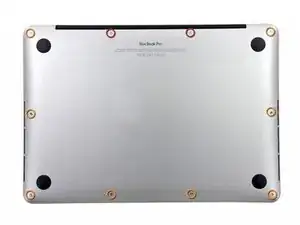
    • Rimuovi le 10 viti seguenti che fissano il coperchio inferiore al case superiore:

    • Due viti Pentalobe da 2,3 mm

    • Otto viti Pentalobe da 3,0 mm

    • Nel corso dell'intera procedura, tieni traccia di ogni vite e accertati che ritorni esattamente al suo posto per evitare di danneggiare il dispositivo.

    If don’t have one of those neat project mats, then you can use small pieces of flattened blu-tack to hold the screws. If you arrange them in the shape of your mac book cover, and put the screws down methodically, you can get a one-to-one mapping of the screws to the correct screw holes.

    Toby Thurston -

    Or you can use an ice tray where you put the screws and the parts in separate bays in the same order as they come in the instructions.

    timofej.se -

    This is great! I used a small magnetic white board, and wrote on it to identify the parts as I went. This whole process, from the fast shipment to the great instructions to the complete, high quality, tool kit has been great. I’m typing this comment on my resurrected laptop. Thank you! Sue

    Susan Greer -

    It would be a good idea if people recorded in the comments which screws go where so that, if someone lost their screw positions, they could recover them from the comments.

    Raymond Shpeley -

  2. TZjAGsfhlId3q36t
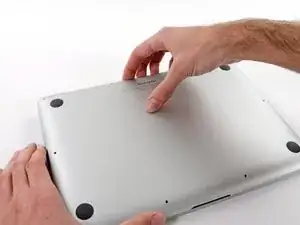
    • Infila le tue dita tra il case superiore e quello inferiore.

    • Con delicatezza, tira il coperchio inferiore per staccarlo da quello superiore.

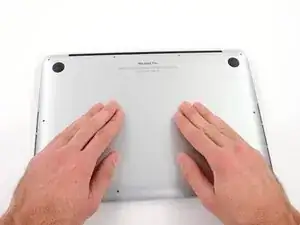
    • Rimuovi il case inferiore e mettilo da parte.

  3. SLwb4KCgFZKfLR2B
    SLwb4KCgFZKfLR2B
    3eGiEP35uex15jKd
    muPIBpQokGnUUXJP
    • Durante il rimontaggio, spingi con delicatezza il centro del case inferiore per riattaccare le due clip in plastica.

    • Il case inferiore è collegato a quello superiore con due clip di plastica in posizione centrale.

  4. oh6QmDClHy3Es55f
    • Rimuovi la copertura in plastica attaccata alla scheda dei contatti della batteria.

    The replacement cover doesn't seem to have the formed pads attached. I re-installed the original.

    Adrien -

  5. AvPUsRLbmXLZWSlb
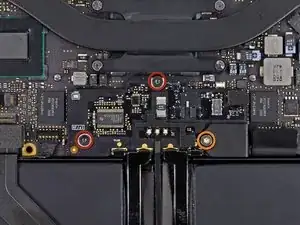
    • Rimuovi le seguenti viti che fissano la scheda del connettore della batteria alla scheda logica:

    • Due viti Torx T6 da 2,8 mm

    • Una vite a colletto Torx T6 da 7,0 mm

  6. eYeaxKQXRIv43WNX
    eYeaxKQXRIv43WNX
    INge1d6OYG2XdrMr
    • Usa delle pinzette per rimuovere il piccolo coperchio in plastica posizionato vicino alla parte inferiore destra della scheda del connettore della batteria.

    Is adhered to screw beneath, so lift firmly and slowly.

    Andrew -

    when doing this with metal tweezers as instructed in the video, it was difficult to get off and apparently while i was trying to do it, the tweezers went too far under and i believe made contact with the screw underneath? there was a zzz noise, an orange flicker and a little stream of smoke that came out. i freaked out and put everything back together to see if the laptop even still worked, it turned on and everything but died right away (i drained it before doing the repair anyway, so i was surprised it turned on at all).

    i finished the battery repair and did several other things while in there. i have charged it all the way as recommended and will use it later on to see how everything is, im hoping that it’s a okay, but could someone explain to me what happened and the possible consequences?

    Kait D -

  7. 3h3p5bF5gSsxU3H1
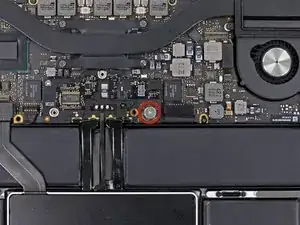
    • Rimuovi la vite a testa larga Torx T6 da 6,4 mm che fissa il connettore della batteria al gruppo della scheda logica.

    When reinstalling, be careful that the board lines up correctly and is completely seated in order for this screw to thread properly.

    Adrien -

  8. KnflDJ6YcW61sb3S
    KnflDJ6YcW61sb3S
    Y3LPyukbnPaH2Qua
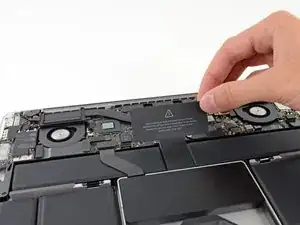
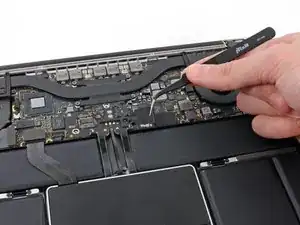
    • Solleva con delicatezza dalla scheda logica la scheda del connettore della batteria.

    • Si raccomanda di piegare poco i cavi della batteria, quanto basta per tenere la scheda sospesa sopra alla scheda logica, dove non dà fastidio.

    • Non ribaltate completamente la scheda e non piegati i cavi, perché questo potrebbe danneggiare la batteria.

  9. wBB3HYE4h4RPE1gv
    wBB3HYE4h4RPE1gv
    oUwSuUJp4RWM4RSK
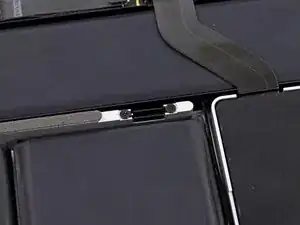
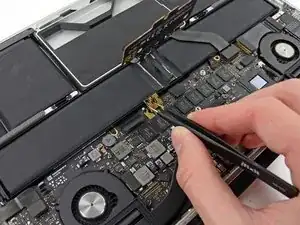
    • Afferra con delle pinzette l'interposer.

    • Interposer è il nome di un'interfaccia elettrica che collega una connessione elettrica ad un'altra. In questa riparazione è la scheda che connette la batteria alla scheda logica.

    • Solleval'interposer dalla scheda logica e rimuovilo.

    • La rimozione di questa scheda assicura che la batteria resti disconnesso durante la tua riparazione, evitando del tuo computer possa accidentalmente accendersi. È anche una buona idea allontanarlo in modo che non possa ricadere inaspettatamente.

    How can I remove interposer I m not able to remove it

    Raunak -

    you must lift it absolutely vertically, or it fouls against the locator pin in the corner- you can easily get the impression that it won’t come over the end of this pin- almost like it’s rivetted in. it isn’t. get a good grip on it with the tweezers in the centre hole & one of the sides, & lift it STRAIGHT up.

    duncan rmi -

    I would recommend to use plastic tweezers in order to reduce risk of damage.

    Martin Sippel -

    Second that. If you have thin heat shrink tubing, form some over the tweezer tips. If the tubing is thin and small enough in diameter you’ll see the serrations of the tweezer tips.

    Raymond Shpeley -

    wat is the model this SSD

    thierry.wilow -

  10. VjHPHC5XpI5lyEU2
    VjHPHC5XpI5lyEU2
    YLwqCMl14OpjFG6c
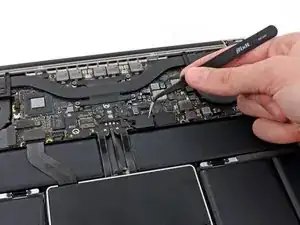
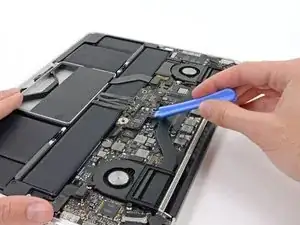
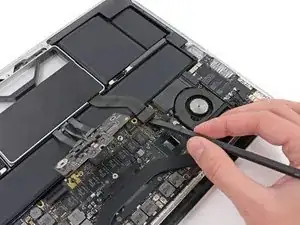
    • Usa la parte piatta di uno spudger per sollevare il connettore del cavo dell'SSD dalla sua presa sulla scheda madre.

  11. MUtvMWqeoeVRNXgU
    MUtvMWqeoeVRNXgU
    1MmiJVae2W62kGCd
    i6Vtm3oAeyeI34BK
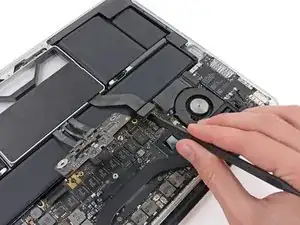
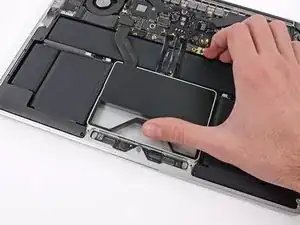
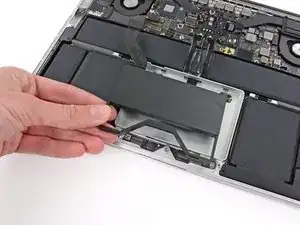
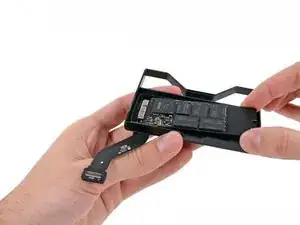
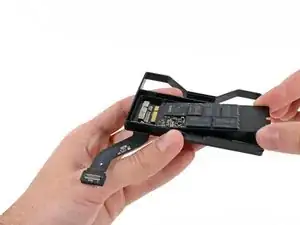
    • Usa le dita per piegare la molla in plastica sul carrello dell'SSD, liberando i due ganci sul bordo anteriore del dispositivo.

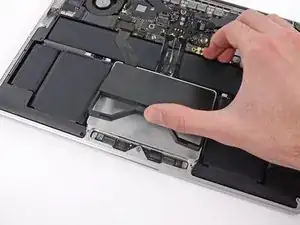
    • Mentre tieni premuta la molla in plastica, inclina il gruppo dell'SSD fuori dal suo alloggio.

  12. XNPcBcAJFlwmMOW3
    • Rimuovi il gruppo dell'SSD dalla copertura superiore.

  13. bnHSZLCMEdST1Uh1
    • Svita la vite Torx T5 da 2,9 mm che fissa l'SSD al suo carrello.

  14. mJmLhQUw3uMNrOkr
    mJmLhQUw3uMNrOkr
    5J5PTAGiQZlhAwOl
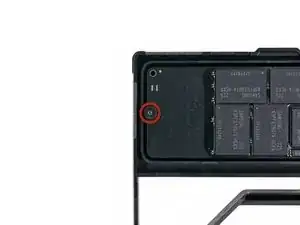
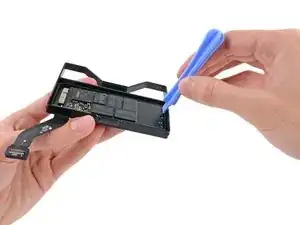
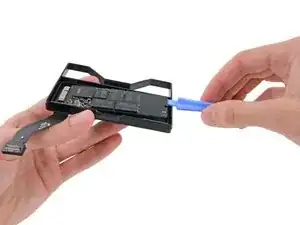
    • Infila il bordo di uno strumento di apertura in platica tra l'SSD e il suo carrello, dalla parte opposta al lato della presa.

    • Fai leva sul lato opposto a quello della presa sull'SSD.

    • Solleva l'SSD solo il necessario per prenderlo dai bordi con le dita. Sollevarlo di più potrebbe danneggiare l'SSD o la sua presa.

  15. FXSmWRFFRG1BBvja
    FXSmWRFFRG1BBvja
    IdDkqa4yg2sTXgWB
    • Sfila attentamente l'SSD dalla sua presa sul suo carrello.

  16. LbyL4wbx2LKNADgb
    • Resta solo l'SSD

    I want to buy external usb casing for this SSD card, could you please tell us if this is mini PCIe mSATA or something else.

    Sulman -

    A most excellent step by step. I now need to figure out how to grant permission for my backup Air to read my removed Pro SSD files. Perhaps a link from here to that would be helpful.

    Richard Lacher -

Conclusione

Per rimontare il dispositivo, segui le istruzioni in ordine inverso.

Walter Galan

693768 Reputazione

9 commenti

I followed the guide and was able to upgrade my wife's MacBook from 128GB to 240 GB!

One thing I noticed was that when I removed the plastic clip in step 6, it left behind a glue dot on the screw head I had to remove in step 7. I wasn't sure why my screwdriver kept rotating until I realized the clear dot was covering the screwed! Then I tweeze the dot off, and put it in the recess on the underside of the clip and all was good.

Everything went to the letter after, until it came time to restart and initialize the new disk. It turns out the old disk had some directory damage, so when it was copied to the new internal SSD, then the Mac wouldn't boot from it until I did a couple FSCK and Repair Disk fixes.

dazifixit -

Vignesh,

Here is an option to recover your data and get a tiny speedy external SSD drive for 28.85

https://eshop.macsales.com/item/OWC/MAU3...

david -

Sam,

The 2012 MacBook Pro uses an PCI Express Mini Card connection between the logic board and the SSD.

"Some notebooks (notably the Asus Eee PC, the MacBook Air, and the Dell mini9 and mini10) use a variant of the PCI Express Mini Card as an SSD. This variant uses the reserved and several non-reserved pins to implement SATA and IDE interface passthrough, keeping only USB, ground lines, and sometimes the core PCIe 1x bus intact.[11] This makes the 'miniPCIe' flash and solid state drives sold for netbooks largely incompatible with true PCI Express Mini implementations."

Source: http://en.wikipedia.org/wiki/PCI_Express...

david -

I fully agree, Especially as it turned out to be a little tricky to get the connector back in his position properly. Don't think there is a higher risk of damage through electric shock or so. Next time I will for sure skip it ;-)

Timpetou -

Aren’t steps 4-10 completely unnecessary?

Wade Murdock -

That’s what i thought too!

Evert Maris -

I also agree. There is only one connection to the SSD cable. No other connectors to the SSD means other connections don't need to be removed. The only reason would be to limit any power spikes when removing the SSD cable itself, but that could also happen when removing the power connector in steps 4 thru 9 as well ¯\_(ツ)_/¯

Removing the main power connector in my experience can be tricky and cause unintended damage. In one repair I damaged the trackpad connections and in another MacBook repair damaged the power connector itself as they can also be fragile. So the less connectors removed the better. This is not the first time that too many steps have been included in these procedures. i.e.: Battery replacement procedures require speakers be removed in one case that are also not necessary to remove.

I appreciate the effort in developing these procedures, thanks, they are very valuable.

aljimenez -

كينجستون ان في1 500 جيجا NVMe PCIe SSD (SNVS/500G) https://www.amazon.eg/dp/B091BCQK7B?psc=...

Is it compatible for macbook pro late 2012?

mahmoud yussef -

nvme crucial P5 Plus can install or not? thanks

eddie diorama -