Introduzione

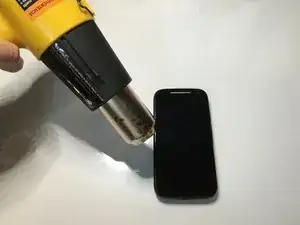
Segui questa guida per sostituire la scheda madre del tuo Motorola Moto E 2° Generazione.

  1. vSEJAHYjTlZBPKOC
    • Spegni il dispositivo prima di cominciare la riparazione.

    • Usando la pistola termica, applica del calore lungo i lati dello schermo per allentare l'adesivo. Il telefono deve risultare caldo, ma non da non riuscire a toccarlo.

  2. kLamGKmEOyFNs3GM
    kLamGKmEOyFNs3GM
    aggUQx2wdMDFwIiY
    qpGKGDZ26pRW3mRX
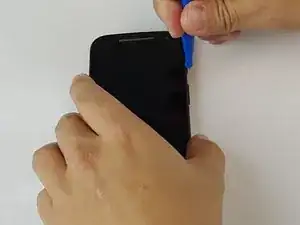
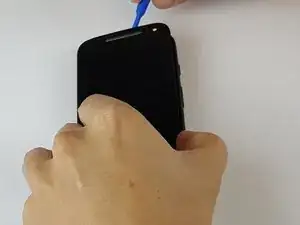
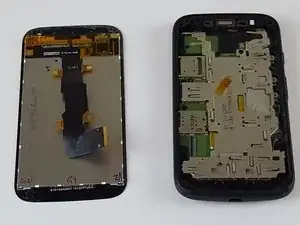
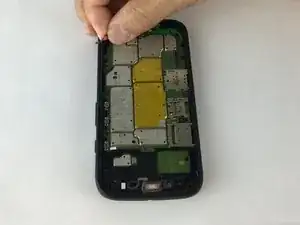
    • Usando un piccolo strumenti di apertura in plastica, fai leva e scorri lungo tutto il perimetro del telefono, cercando di alzare lo schermo delicatamente.

    • Lo schermo è tenuto fermo da nastro biadesivo localizzato sui lati.

    Do not lift the screen too far or you may tear the LCD connection flexi. Check next images to see where it is, bottom and opposing side to the buttons

    MW Wilson -

  3. fGl22FZMPjdO4UJv
    fGl22FZMPjdO4UJv
    PTEVageZVB2TYToY
    uMn4q6XjCl5htfdw
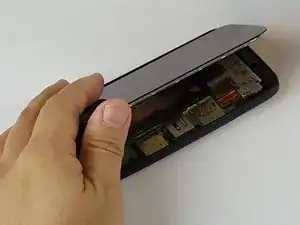
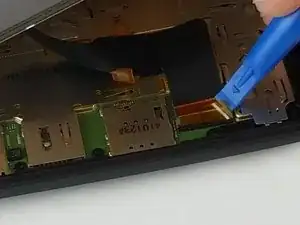
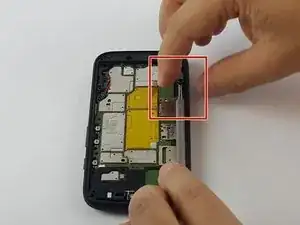
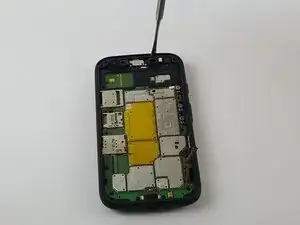
    • Quando lo schermo non sarà completamente staccato dalla scocca, alzalo delicatamente e identifica il connettore dello schermo.

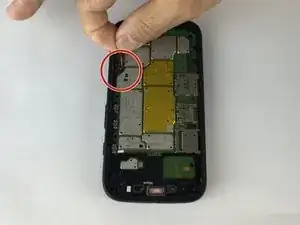
    • Usando lo stesso strumento di apertura in plastica, rimuovi con cautela il nastro giallo dal connettore.

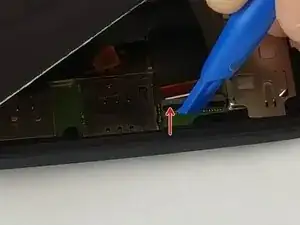
    • Ora con attensione scollega il blocco nero del connettore alzandolo nella direzione della freccia rossa.

    • Non staccare la parte grigia del connettore.

    • Infine fai scorrere il cavo dello schermo fuori dal connettore. Tale azione dovrebbe risultare facile, in caso contrario assicurati che il blocco nero sia completamente rimosso.

    Very well put together. Worked fine for me.

    A guitar pick will work as well as the plastic tool, but it might be a little harder to work with.

    Jon Gregory -

  4. 4cuqeG3P1W3TPZE4
    4cuqeG3P1W3TPZE4
    W6qcrwwmoNPwXNGH
    5rbTrEsHPG2gINNE
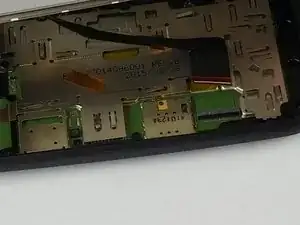
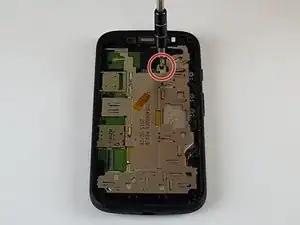
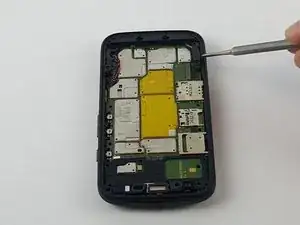
    • Ora che hai rimosso lo schermo, rimuovi la schermatura in alluminio dalla scheda madre.

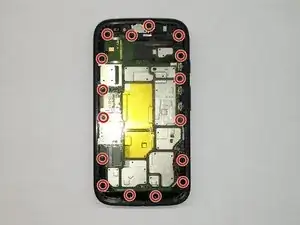
    • Svita la singola vite da 4 mm posizionata in alto con un cacciavite Torx T4.

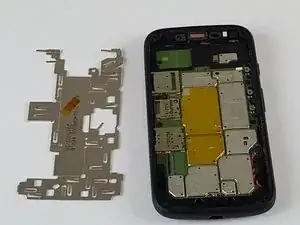
    • Dopo averla rimossa, rimuovi con delicatezza la schermatura in alluminio dalla scheda madre.

    • Usa una tavola magnetica per tenere organizzate le piccole viti che potrebbero andare perse.

  5. VFVxrNushQoFPjRx
    VFVxrNushQoFPjRx
    fPst6DM1Dyq6kLSS
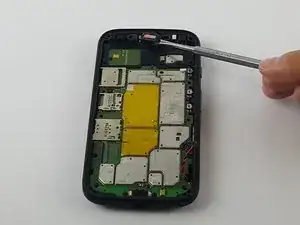
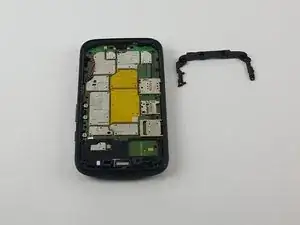
    • Usando lo spudger metallico, facendo molta attenzione, rimuovi l'altoparlante facendo leva sul lato destro e poi dal fondo.

    • L'altopalante è tenuto in posizione da nastro biadesivo e da clip alla scheda madre. Fai quindi molta attenzione.

    You can see a plastic clip on the right, so I understand the justification for prying on the right first. However, when I tried prying on the right, it separated the two halves of the speaker, ruining it. There was also a pad of foam, double sided tape under mine.

    Paul K -

    If you see in the other side the plastic clip is smaller , I was able to release this clip (the left side one) and in the bottom part of the speaker you can see a little gap when i put my pointy metal spudger and help the speaker slowging going up, it fells a little hard to push because of the magnet in it.

    Jose Carlos -

    I found I did not need to remove the speaker. I was able to (just barely) reach the screw behind it without removing it. After removing all of the other screws, I loosened that one a little bit at a time while gently prying the motherboard out of the case. Eventually it was all the way removed and I was able to take out the motherboard.

    David -

    Great tip about not removing the speaker. I, too, managed to remove that screw behind the speaker. I didn’t even need to pry out the motherboard while doing it.

    Keith R -

    Is the T4 Torx bit the one with the hole in it?

    Lynette -

    I think you may be referring to a security torx bit. These screws just need standard torx bits, although a security one should work too. Lookup torx on Wikipedia and impress/bore your friends for evermore.

    Keith R -

    Sir need track diagram for this………… speakers track might be cut….

    Harsh Kadam -

  6. xeVApjLjmNGCUgZr
    • Rimuovi le sedici viti da 4 mm usando un cacciavite Torx T4.

    • Usa una tavola magnetica per tenere organizzate tutte le viti che rimuovi.

  7. DqCfv5JUUXFHVMSJ
    DqCfv5JUUXFHVMSJ
    OQWnJ4F4ZiFQtGiD
    RTdbEHbZJ4RZDHN6
    • Ora rimuovi la scocca in plastica nera a forma di C.

    • Usando lo spudger di metallo, solleva con delicatezza l'angolo destro come indicato e fai leva finché non sarà rimosso dalla scheda madre.

  8. HdXfweQbEHy1qVwZ
    HdXfweQbEHy1qVwZ
    u4B5cAbI5T6dMBwO
    • Delicatamente rimuovi il connettore della batteria. Dovrebbe togliersi con molta facilità.

  9. V4RBPICUwDo62pis
    V4RBPICUwDo62pis
    TbqfsACnu4frv1TQ
    oiKcqZWi3RChjpc1
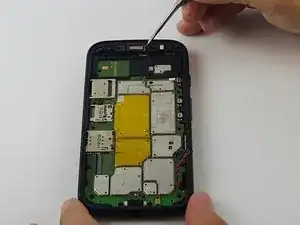
    • Dopo che hai scollegato il connettore della batteria dalla scheda madre, inserisci lo spudger metallico nell'apertura dell'altoparlante. Solleva la scheda madre abbastanza da inserire il tuo dito tra la stessa e la scocca.

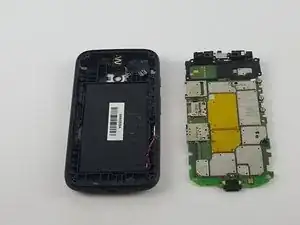
    • Ora sfila semplicemente la scheda madre dal sopra fino alla parte inferiore dal case del telefono.

Conclusione

Per riassemblare il dispositivo, segui le istruzioni nell'ordine inverso.

Andre Romualdo

Membro da: 08/02/16

3765 Reputazione

5 commenti

La verdad la dificultad no es difícil debería ser dificultad media fue muy fácil quitar la pantalla con las herramientas adecuadas sin necesidad de la pistola de calor, gracias por sus guías siempre son muy buenas.

Alejandro -

Hello,

Do you have any links to buy a motherboard or other stuff for this phone ? Like sim card reader or antenna ?

Thank you !

Pat LORY -

probably mentioning something about the ribbon cable being tight in step 2 of the guide. I was careful in removing the screen but not careful enough :-(

Chris Collier -

this motherboard cost ????????????????????????

ashhar.yaantra1 -

Display light problem help

sonukumar -