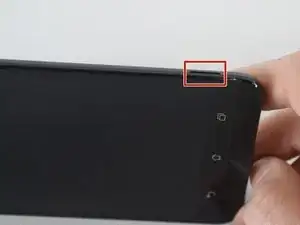
Introduzione

La sostituzione della scheda madre richiederà un bel po' di tempo. Prima di sostituire la scheda madre, è necessario scollegare l'intera antenna e togliere la batteria.

  1. C3L6upWbjkClFYPJ
    C3L6upWbjkClFYPJ
    nASL2SQDOAxBTTps
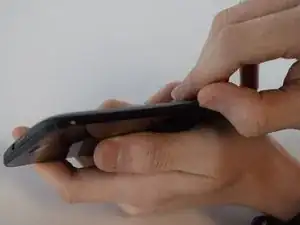
    • Usa la tua unghia per sollevare delicatamente la cover posteriore. Tenendo l'unghia sotto la cover, fai scorrere il dito attorno a tutti i bordi finché la cover non si stacca completamente.

  2. de4lQIDJqyZvM6FT
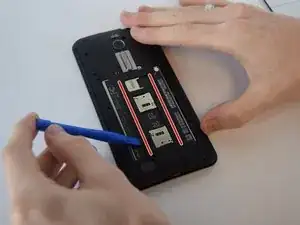
    • Rimuovi le tredici viti nere e l'unica vite argentata dal frame posteriore con un cacciavite a croce Phillips misura 00.

    • Le viti nere sono lunghe 2,8 mm.

    • La vite argentata è lunga 5,5 mm.

    • La vite nera posta a fianco della fotocamera e del flash è coperta da uno sticker. Può comunque essere facilmente rimossa senza badarci, inserendo il cacciavite che dovrebbe aprirsi la strada verso la testa della vite senza problemi.

    The screw next to the camera with the sticker on (top middle on screen) was T4 not J00

    Matthew Hew -

  3. HuZYmC3Na4Ga3TLi
    HuZYmC3Na4Ga3TLi
    U2YBWIndlHUFpB42
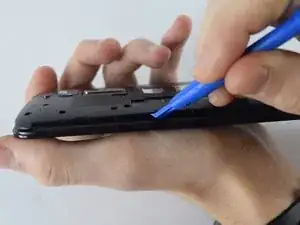
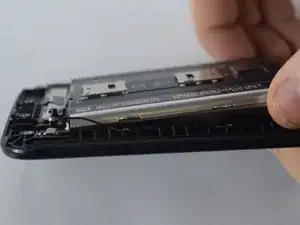
    • Usa un attrezzo di apertura in plastica per sollevare il frame in plastica e scoprire così la scheda madre e la batteria.

    • Le parti evidenziate di questo frame sono tenute in posizione da due strisce di biadesivo, facilmente rimovibili inserendo al di sotto l'attrezzo in plastica e sollevando delicatamente.

  4. Fk4MxSSmAoFOaZPR
    • Annota bene la posizione dell'altoparlante in modo da riposizionarlo correttamente durante il riassemblaggio.

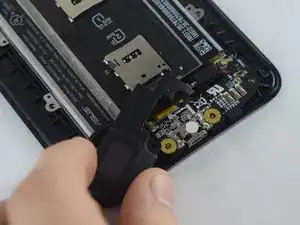
    • Rimuovi l'altoparlante dal suo incastro. Dovrebbe venir fuori facilmente dato che a questo punto non ha più nulla a mantenerlo ancorato.

  5. vb6U6sOlOHTjvUMm
    vb6U6sOlOHTjvUMm
    HdScmWYE6AHPDaDp
    • Utilizza un attrezzo di plastica per sollevare delicatamente entrambe le estremità dell'antenna.

    • Rimuovi con cautela il filo dell'antenna dai supporti di plastica lungo il lato. Prendi nota della loro posizione per il rimontaggio.

    • I collegamenti dell'antenna possono essere facilmente piegati. Assicurati di sollevare il cavo da sotto come mostrato in figura.

    It is very important to lift it form underneath... The connector on the motherboard is very fragile.

    Guile -

    Is there any way to actually replace the port? It got ripped off mine.

    Matthew George -

    I am wondering how to repair it, it got ripped off as well.

    matthewdukes -

    Hello Guile,

    I ripped the connector of gsm antenna on the other side (mainboard side) is there any way to fix it? It May be connect another contact point?

    Emrah AKBIYIK -

    same problem...solutions?

    Francesco Marra -

    Same problem any solution?

    cecythebest -

    Same problem too... :(

    Emrah AKBIYIK -

    Is this wifi antenna?

    Dan Ramzi -

  6. TNajJFNo4LHZ6HiI
    TNajJFNo4LHZ6HiI
    2QYeIYuvZNRlGSMd
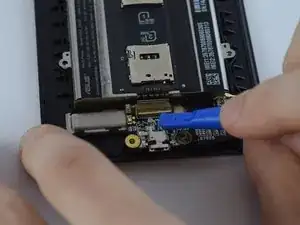
    • Utilizzando l'attrezzo di apertura in plastica, sblocca il cavo a nastro che collega la batteria al circuito stampato facendo leva sulla linguetta gialla.

  7. nxwOrGT2LVVtxcWI
    • Utilizzando un utensile di plastica per l'apertura, solleva delicatamente il motore a vibrazione dal suo supporto.

    This image is too dark and there is no marker to identify the vibration motor.

    Amanda Radakovich -

  8. 3cc4GnCPrVPjwEAE
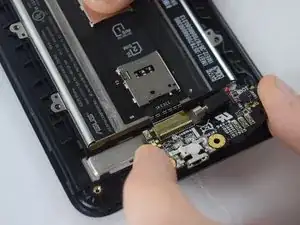
    • Rimuovi delicatamente il circuito stampato dal telefono estraendolo delicatamente dal fondo del telefono.

    There´s some adhesive tape holding the ribbon cable on to the flat connector, it needs to be carefully raised before this board can be removed.

    Manny Faulborn -

  9. J5rZDRBolDVsbxJE
    J5rZDRBolDVsbxJE
    SIitnxqp3f1RmcHK
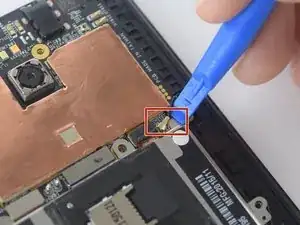
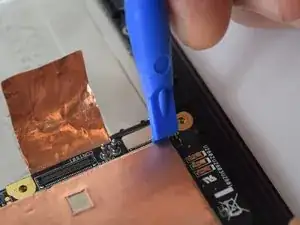
    • Usando l'utensile di plastica per l'apertura, scollega i cavi a nastro dai loro connettori facendo leva delicatamente verso l'alto.

    Suggest rotating the phone in your hand to better access the ribbon cables?

    Amanda Radakovich -

  10. fCNaUhEcg21Zkrqm
    • Rimuovi con cautela il pacco batteria dal telefono con la mano. La batteria è incollata con una striscia di adesivo sul lato superiore, per cui potrebbe essere necessaria una certa forza.

    • Ci sono delle fragili linguette sul lato sinistro e destro della batteria, fai attenzione a non romperle.

    The battery is glued in placed by a strip of adhesive on the top side so some force may be necessary. In my case the strip of adhesive is on the long right side of the battery.

    stavbin -

  11. kCsDMNubc4OMTJwb
    kCsDMNubc4OMTJwb
    RZDVgnrloC36iQJQ
    lTACW13dQJhrDT1K
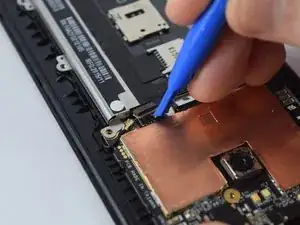
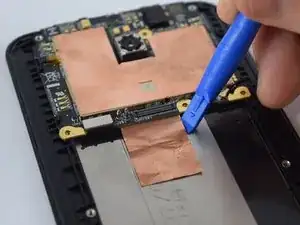
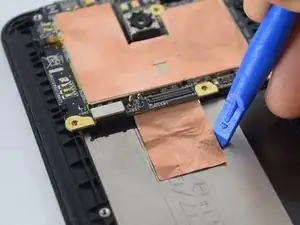
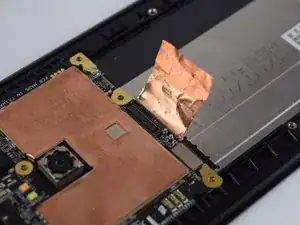
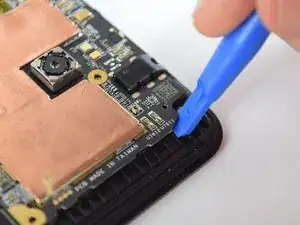
    • Usando un attrezzo di plastica per l'apertura, solleva la striscia termica di rame dal corpo del telefono infilando l'attrezzo in uno degli angoli superiori del foglio di rame e facendolo scorrere lentamente lungo i bordi.

    • Fai attenzione a non strappare il foglio di rame.

  12. 1IVSVua6r6jSiGZE
    1IVSVua6r6jSiGZE
    WFC3jLmFshXdWKjB
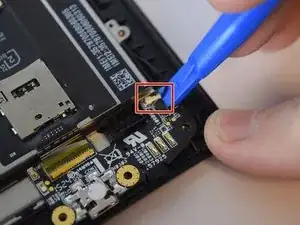
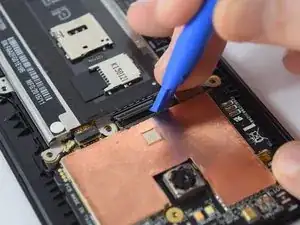
    • Utilizzando un attrezzo di plastica per l'apertura, scollega il cavo a nastro indicato in figura.

  13. iqHaEfyNiFZ2cHAG
    iqHaEfyNiFZ2cHAG
    1ARTMSePNDbOGhZQ
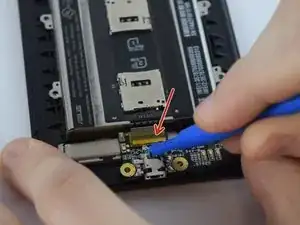
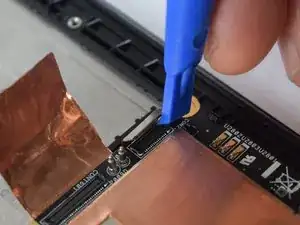
    • Utilizzando un attrezzo di plastica per l'apertura, scollega il cavo del display dal lato della scheda madre infilando con cura l'attrezzo sotto il cavo del display e tirandolo delicatamente verso l'esterno.

    The cable should not be pulled that way… you could damage it (I learned it the hard way). Pull up the metal shielding first then un-hatch the locking mechanism inside…

    tri5kmark -

    Yes. I destroyed a motherboard like this. I guess that is what I get for listening to only one instruction.

    Paul Graham -

  14. p6nRAhNDHZ3TYPTB
    p6nRAhNDHZ3TYPTB
    TBidVfIgCbAaE1Wy
    jEBGfQZLuReGMJ3h
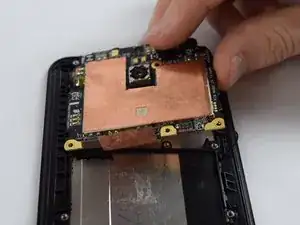
    • Ci sono quattro fermi in plastica nera, due per ogni lato, che mantengono della scheda madre in posizione. Per estrarla, infila uno spudger sotto un angolo della parte alta della scheda madre e solleva con cautela verso l'alto senza far troppa forza per estrarre questo lato della scheda madre dai fermi di plastica.

    • Fai attenzione a non rompere i fermi di plastica nera, in quanto sono necessari per rimettere a posto la scheda madre.

    In the model Z00D there are only two clips.

    Arfor Houwman -

  15. 6AIjpAhxkmWeLtOl
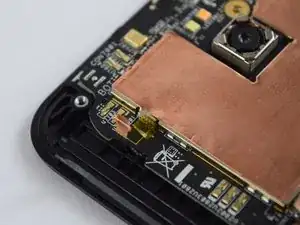
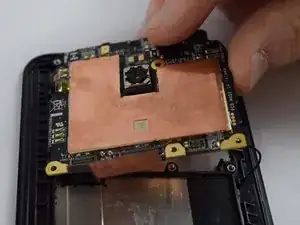
    • Una volta che un lato della scheda madre è fuori dai fermi di plastica nera, rimuovi l'intera scheda madre dal telefono.

    • La scheda madre dovrebbe uscire facilmente una volta che un lato di essa è liberato dai fermi di plastica nera.

Conclusione

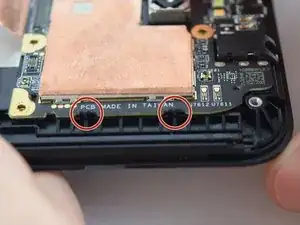
Inserisci una nuova scheda madre e rimonta il dispositivo seguendo queste istruzioni in ordine inverso.

Eduardo Nodarse

Membro da: 10/02/16

4797 Reputazione

20 commenti

Hi!I

After replacing the complete appliance front but the unit turns on but nothing appears on the screen, what may have happened?

horacildo -

Check if the screen ribbon cable is firmly attached to the motherboard. If it is you may have a faulty motherboard replaced or a faulty screen

Nathan The Neko -

Thanks this helped a lot, Download Asus full firmware here: https://www.droidtechie.com/official-ful...

Sam Peter -

Is there any place where I can order just the audio jack?

Sergio Lapunov -

Is there a reliable source to buy a motherboard you can suggest? I need to replace the audio jack. Thank you for the neat guide.

sriram010689 -

I want to buy asus zenfone 2 audio jack part..... Plz help me how to get my order

Ngams -

On my unit the problem is not the audio jack itself but the soldering point that is broken. I contacted Asus for the part and they don't want to sell it...

Mathieu Chabot -

i want to buy zenfone 2 ze551ml motherboard please please help me where i can get it at low cost............ please inform me it`s urgent....

Gourav -

how much is the board of asus zenfone 2? I accidentally drop mine in the sea while on vacation and my phone is shorted 100% and they said I have to replace the board and with that I also have to loose my files and pics. everything. thanks

Precy Ann Serafica -

Hi i need a motherboard for asus ZenFone 2 z00ad how can i bye it.?

Arpan Maiti -

hi..

how to identify the UEM of Asus 2 and Asus 6?

Ryan Villamil -

i want to buy zenfone 2 ze551ml motherboard please please help me where i can get it at low cost............ please inform me it`s urgent....

Manoj Dhakre -

Dopo che si e sostituisce la scheda madre ce bisogno di: installare i drive r il sistema operattivo?

Sandro -

Quando viene acceso per la prima volta Dopo che ho installato la scheda madre cosa si deve fare?

Sandro -

Hi i want to purchase Asus Zenfone laser 2 motherboard kindly help me.

+919838587378

Zinga Lala -

hello Guys, I had to reset my Asus Zenfone 2 laser because of auto restarting which couldn’t reach the principle manager system. now I cannot access google account and phone manager. all my access stop at the setting, please kindly assist.

lankeu -

Where we can get new motherboard of Asus zenfone 2 laser ze550kl

sujeet sinha -

Hello will you help me were to asus zooad touchscreen bodyhousing.email mme rommeldp89@yahoo.com

Rommel Dela Peña -

Please help me were to buy asus zooad touchscreen and bodyhousing email rommeldp89@yahoo.com

Rommel Dela Peña -

Is there any site where I can order Power IC for Asus Zenfone 2 Laser? or Motherboard for Zenfone 2 laser 3G/32G?

ener_30 -