Introduzione

  1. WXntIOVb5NEQugib
    WXntIOVb5NEQugib
    bWBlJvmSsjO2yfKK
    HvlkqipFULhkkLcp
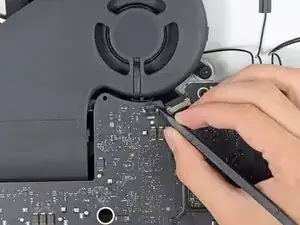
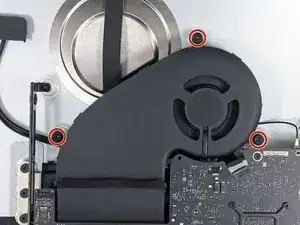
    • Usa l'estremità a punta di uno spudger per scollegare i connettori dei cavi dalla presa nella scheda logica.

  2. Z66SnPhtc1WsoMGO
    Z66SnPhtc1WsoMGO
    AhwZbYEBS1AGM1Wo
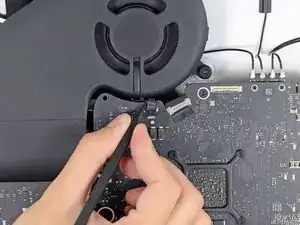
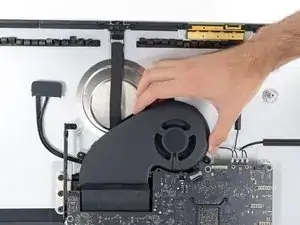
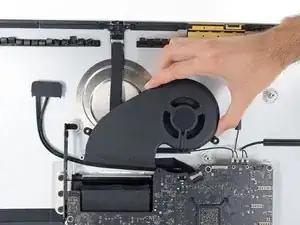
    • Distacca parzialmente il nastro adesivo nero che connette la ventola al condotto di scarico.

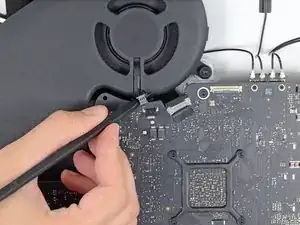
    • Lascia il nastro sul condotto di scarico: ti basta solo esporre la giunzione per liberare la ventola.

  3. hF2H1iMMxroidbUv
    • Rimuovi tre viti Torx T10 da 12,4 mm che fissano la ventola al case posteriore.

  4. ZwiHFeKlBBGMNqw3
    ZwiHFeKlBBGMNqw3
    D3khYG2esIDlKZMa
    • Rimuovi la ventola dall'iMac.

    Use a piece of tape around the antenna cables to keep them in the same order, makes reassembly a little easier.

    Walter Hayden -

    On reassembly, start the fan power connector into its socket while you slide the fan in.

    ebay -

    I left the antennas attached to the wifi card and removed the wifi card with wires attached. I accidentally broke one of the connectors on the wifi card and had to replace the entire card....

    S. Baxter -

Conclusione

Per riassemblare il dispositivo, segui le istruzioni in ordine inverso.

Andrew Optimus Goldheart

Membro da: 17/10/09

502162 Reputazione

0 commenti