Introduzione

  1. YnlnA4A5cB5hX4bZ
    • Gira il dispositivo a testa in giù. L'anello a D sarà a sinistra della cassa guardando la cassa come mostrata nell'immagine.

  2. ZUHnoi6e5ScLc2F3
    ZUHnoi6e5ScLc2F3
    OkRGCmfcoZTBaGXy
    • Solleva il manico dell'anello a D e svitalo.

    • Rimuovi l'anello a D.

  3. OyrdPMyALqWWKtr2
    • Qualsiasi riparazione eseguita da questo punto in poi invaliderà la garanzia del dispositivo.

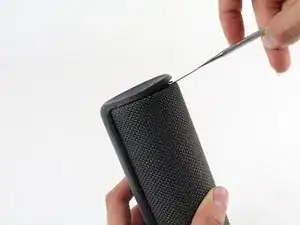
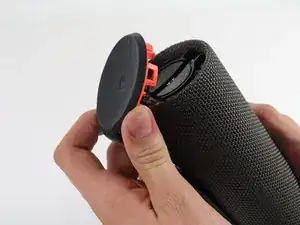
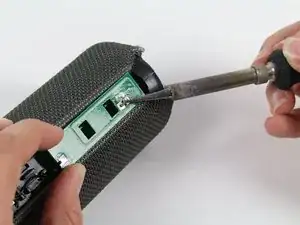
    • Tenendo la cassa dritta, infila uno spudger in metallo tra la copertura e la cassa. Fai leva delicatamente per rilasciare i ganci, in quanto si rompono facilmente.

    This part is not easy. The main risk is to broke the plastics clips.

    Optrolight -

    Use a heat gun (or hair dryer on high) first around the edges before attempting to pry it open. There are six tabs: one directly in line with the charging port; one approx 3/4 inch to the left and right of that tab; one centered against the back of the volume control "panel", and one approx 3/4 inch to either side of that one. So when prying, try to insert your spudger in between those spacings in order to not push on the tabs directly.

    Lotus Flower -

  4. TRBvaJSG5KNCXfBf
    TRBvaJSG5KNCXfBf
    YgLS3FBs1yFpqRr3
    q5EWYjOYvNlkvTRv
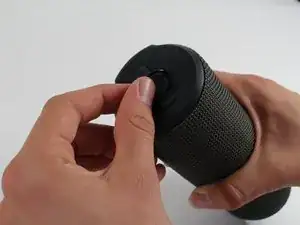
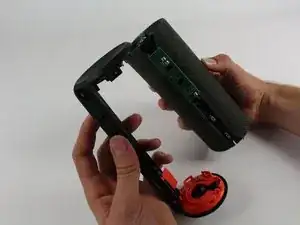
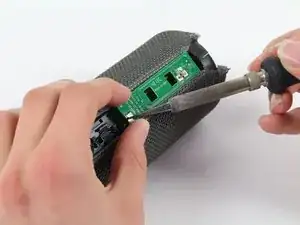
    • Trova la parte della copertura che copre i tasti del volume. Infila lo spudger in metallo sotto questa parte e fai leva su tutti i ganci come nel passaggio precedente.

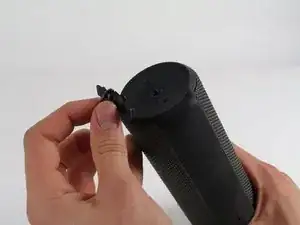
    • Ripeti questa procedura per la parte inferiore della copertura ed aprila con lee dita.

  5. aMJOLjlFTeG4bRwn
    aMJOLjlFTeG4bRwn
    SRjRlgjeJnVEeduA
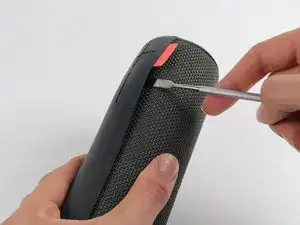
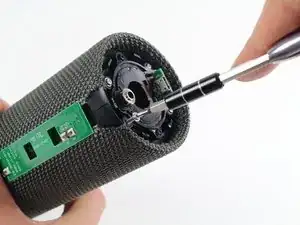
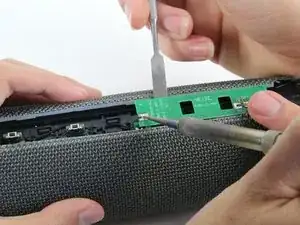
    • Usando un cacciavite a croce JIS J0 svita le quattro viti argento da 9 mm.

    • Fai lo stesso per le due viti nere da 7 mm.

  6. oPqssBfC6ZDxmFKj
    oPqssBfC6ZDxmFKj
    jDQTlFMRdUksISIn
    vWZ6ZlueCYCy5Ppk
    • Questo passaggio richiede l'utilizzo di un saldatore. Ricordati di stare attento in questo passaggio in quanto potresti bruciarti facilmente.

    • Usando un saldatore, dissalda i due contatti del pannello dei tasti.

    Great instructions here guys - just one comment from myself - underneath the plate there is glue holding it down as well as the solder joints. Be sure to heat it up slightly prior to lifting out otherwise the capacitors and other components get stuck in the glue.

    Jamie Horn -

    bei mir sieht der blootooth-adapter anders aus. da muss ich nix löten, er ist klein und liegt nur in einer passenden mulde, aus der er herausgehoben und in die er wieder abgelegt werden kann. meine typbezeichnung ist S-00122.

    thomas propp -

    Definitely start with the middle one, has 2 solder hinge points that took me a couple minutes to heat up, wiggle and finally lift up. One that side lifted, was much easier to go back to the edge hinge, heat up and just gently pull off.

    Michael Arvan -

    It is importante to note that there are two large solder hinge points and for the midle to pin point. Easy to desoldering but not easy to soldering after battery replacement.

    Optrolight -

  7. UsBekJvobsb4OAY1
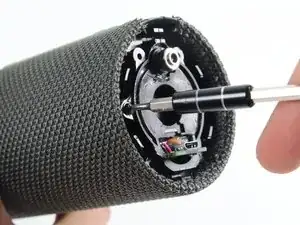
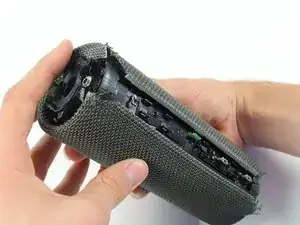
    • Dopo aver scollegato il pannello dei tasti, rimuovilo, ed ora il tuo dispositivo dovrebbe essere come nell'immagine.

Conclusione

Per rimontare il tuo dispositivo, segui le istruzioni in ordine inverso.

Jose Cruz Arinaga

Membro da: 01/10/15

1003 Reputazione

0 commenti