Introduzione

Usa questa guida per sostituire l'adesivo del tuo Apple Watch Series 3 e quindi sigillarlo nuovamente.

Questa guida mostra procedura sulla versione standard, solo GPS dell'orologio, ma la versione cellulare/LTE è simile. Le differenze più rilevanti sono illustrate nel testo.

  1. wIiq5lswvMYsA2Y4
    wIiq5lswvMYsA2Y4
    VJsHTleEx6RTiRed
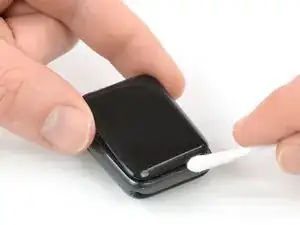
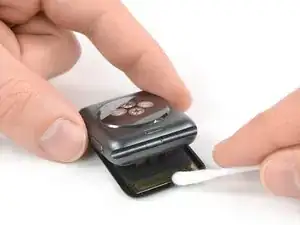
    • Applica un po' di alcol isopropilico (>99%) su un cotton fioc oppure usa un panno adesivo di pulizia per rimuovere delicatamente i residui di adesivo dalla parte superiore della guarnizione del Force Touch.

    • Per rimuovere l'adesivo sul lato dove corrono i cavi del display, piega verso il basso lo schermo e, facendo molta attenzione, spingilo lontano dal telaio per avere abbastanza spazio in cui lavorare.

    I bought 6 adhesive strips expecting to foul up some. I tried following this procedure on three of the sets, but on each set I ended up with one corner not quite long enough to seat properly. On the fourth set I altered the procedure and it finally worked the first time.

    1. Take off the screen. Yes I know, but do it anyway.

    2. Take off only the blue adhesive around the periphery. Do not remove center area.

    3. Place sticky side on force gasket. Seems small, but fit perfectly.

    4. Remove entire inner rectangular portion of adhesive strip

    5. Replace screen

    6. Re-Attach battery

    7. Follow rest of procedure

    marilyntlinton -

    The isopropyl alcohol can only remove so much of the old adhesive. After the first pass with the q-tip use an iFixit Opening Tool to carefully scrape off the old adhesive. There is always some left on the case.

    Vangelis Angelakis -

  2. jFMwhVbsjjMuCVvW
    jFMwhVbsjjMuCVvW
    1mCf23ywCiVEnLgV
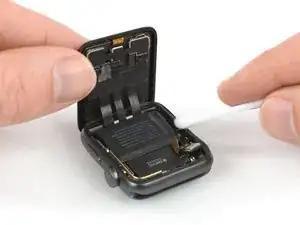
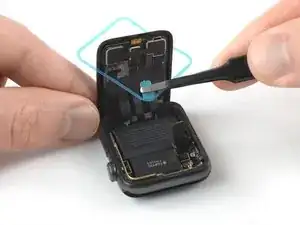
    • Gira al contrario l'Apple Watch in modo che il display sia disposto di piatto a faccia in giù mentre sollevi il case.

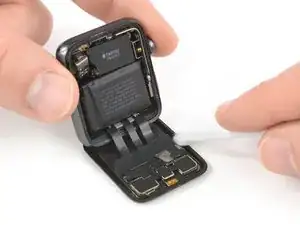
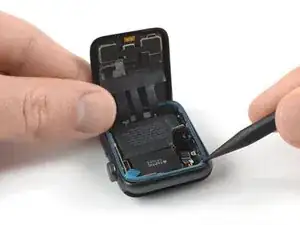
    • Rimuovi i residui dal retro del display.

  3. BtXkDJKjAKTgFJWe
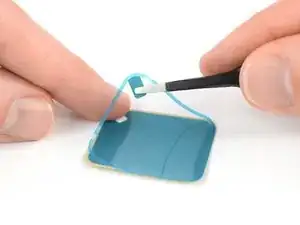
    • Usa delle pinzette per rimuovere dalla carta di supporto l'adesivo sostitutivo insieme alla sua pellicola protettiva azzurra.

    Be sure to buy two, three or even more replacement adhesive strips, because depending on the batch or brand, most of them can’t be separated easily, they deform and then they are next to useless.

    @iFixit - Guys check the adhesives you are sending to people. The Tesa ones are simply a nightmare to use.

    Vangelis Angelakis -

    Agreed! The strip is EXTREMELY challenging to get off the paper/plastic it comes in - I recommend a very sharp ‘Xacto’, or scalple blade to trim the paper & plastic film (carefully) to allow for the very thin & easily damaged strip from the packaging - let alone getting it place. Vangelis’ adice is sound advice. I had to order two more… (wish me luck)

    Jeff Goodall -

    Thank you both for the heads up! The Tesa brand adhesive was super finicky (my tab broke off pretty early on) but was able to recover with minimal deformation with a blade to remove the unnecessary plastic.

    Felipe Agurto -

  4. 52XXcTZMFSoJb5Jq
    52XXcTZMFSoJb5Jq
    EPHlBmyNNTdZbVlt
    • Tieni la parte adesiva sostitutiva in diagonale per farla passare attorno al display.

    • Piega lievemente in avanti il display in modo da poter allineare la guarnizione con il telaio.

    • Posiziona la parte adesiva sostitutiva al di sopra della guarnizione del Force Touch e usa l'estremità appuntita di uno spudger per spostarlo e quindi premerlo in posizione.

    Den Klebestreifen zu positionieren ist extrem schwer. Teils wegen unzureichender Passgenauigkeit des Klebestreifens, teils weil er ja schon einseitig klebt. Es ist auf jeden Fall hilfreich das AppleWatch-Gehäuse vorher zu fixieren. Ich werde diese Methode nicht ein weiteres mal anwenden, sondern das nächste mal flüssigen Kleber aus der Tube (E-8000 oder vergleichbares) verwenden.

    BjoernImNetz -

    These things are garbage! I’ve replaced the adhesive on 4-5 Apple watches with various cheap Amazon adhesive products. The tab came off on two different ifixit adhesive kits. The first one the white backer would come all the way off the adhesive, so it was worthless. The second one either stretched or was made too long.

    Don’t waste your money. Quality is poor

    the.thams -

  5. IaQ5FKdniTocbJer
    • Ricollega la batteria come hai visto nella guida di riparazione da cui arrivi.

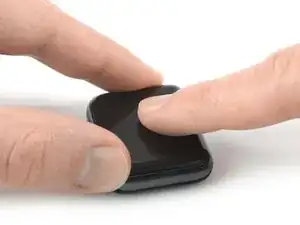
    • Rimuovi la pellicola protettiva dall'adesivo.

    Don’t expect the adhesive strip to follow the edges of the watch’s case. If you try to fit it on the edges on one side, you may end up coming up short on the other, as the above image illustrates. Just try to place it slightly off the edges. It will be ok.

    Vangelis Angelakis -

  6. OQC3QNrcOcuJL1vp
    • Allinea lo schermo e premilo con fermezza sull'adesivo.

    • Per migliorare la qualità dell'incollaggio puoi usare un iOpener per scaldare il display. Quindi applica della pressione per qualche ora (posizionarlo sotto uno o due libri pesanti potrebbe essere una soluzione).

    Buy two clamps, thank me later. Books are good but trust me the clamps are way better. Also expect the screen to wobble ever so slightly after, since the adhesive seems to be a bit elastic in nature.

    Avoid hot or even warm showers to avoid causing the screen to detach from the adhesive.

    Vangelis Angelakis -

Tobias Isakeit

Membro da: 31/03/14

116550 Reputazione

7 commenti

My adhesive gasket I ordered from you doesn’t not look like the one you use. I don’t see how it could work either.

Ryan Hoover -

My adhesive was larger than the rim so it had about 5-6 mm bump of extra plastic when I got it in the edge all around. Need it to be sealed so I didn't want to cut anything. Fail.

Kevin Male -

Yes mine was also larger than the adhesive seal that is advertised here.

Nicholas Goldsworthy -

We believe this adhesive kit does not work all the time. there is still risk that with slightly water in-contact during activity, screen may slightly raised again. I think using glue E-8000 after wiping the edges of the watch with isopropyl is a good idea for long term safety.

iRepairMan -

The Tesa adhesives that you sent are simply aweful. The cuts aren’t deep enough to safely remove the replacement adhesive with the blue protective film from the backing paper. Plus when you actually manage to do so, the adhesive’s dimensions are a bit short for the Series 3 42mm model.

Vangelis Angelakis -

I agree that the adhesive is too small for the series 3 case. Also as noted, you need to use the blade from the kit to carefully go all around cutting the thin strip away from the center piece. Remove the center piece completely first! Putting it in place with the back side backing removed is very difficult! I think if there is a next time that I will remove the backside backing after I have put it in place. Going over the lens and past the cables is impossible without it touching something.

Because of these issues I think I would call this install difficulty HIGH.

Bill Auerbach -

Gasket too big for 42mm watch. Useless.

tom.mckerrow -