Introduzione

Usa questa guida per sostituire l'altoparlante del tuo smartphone Huawei P10. Quando rimonterai il tuo telefono, applica del nuovo adesivo dove necessario.

  1. 5kZSF1VgiLHUdyyv
    5kZSF1VgiLHUdyyv
    mQihCqm5GGlSDcKL
    jVG1EPmTTIdtTHi5
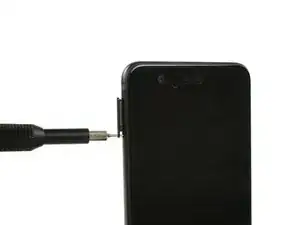
    • Spegni il tuo telefono prima di eseguire qualsiasi operazione.

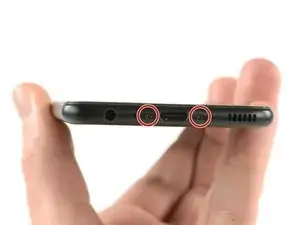
    • Svita le due viti Pentalobe P2 sul fondo.

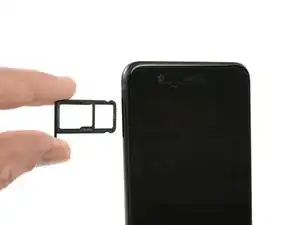
    • Rimuovi il vassoio della scheda SIM.

    Das Honor 9 hat an der Unterkante keine Schrauben.

    Wie ist das Honor 9 zu öffnen?

    Michael Tuschek -

    Vielleicht beantwortet diese Anleitung deine Frage ;)

    Tobias Isakeit -

    Hi, my P10 does not have screws, just two tiny holes. Do I push in here to unfasten? Einar, Norway

    Einar Ryvarden -

    Hi Einar Ryvarden,

    in case you bought a used or refurbished phone, someone might have forgotten to put them back in. Since you have holes at the bottom edge next to the charging port this is likely. You can try to start with step 2 and see if you can lift the phone assembly (don’t forget to remove the SIM tray first). As far as I know there is no version of the regular Huawei P10 with no screws. However you there are none in the P10 lite and in the P10 plus, maybe one of the opening procedures for those phones might help you.

    Dominik Schnabelrauch -

  2. dafShavrRqe1bsKB
    dafShavrRqe1bsKB
    K4uhwPOLpW1gekMx
    oLwmeu5Ptyq4gnEs
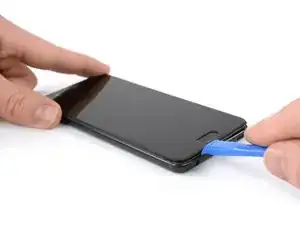
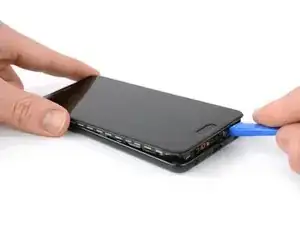
    • Inserisci uno strumento di apertura in plastica tra il display e il case iniziando dalla parte inferiore del tuo telefono.

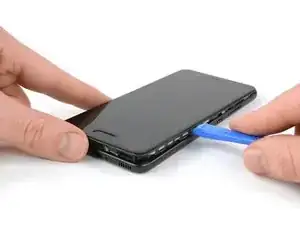
    • Stacca con delicatezza dal case il display insieme ai suoi componenti.

    • Dopo aver staccato la parte inferiore, usa lo strumento di apertura per aprire le clip presenti su entrambi i lati.

    Hi! I cannot find a way to insert the plastic opening tool. Any suggestions on how I can create a gap to start. Everything seems quit rigid.

    Also, where will I find your reply.

    vbr/lars.skoldebring@gmail.com

    lars.skoldebring -

    Hi Lars, you might want to use a suction handle to lift the display and create a small gap to insert the plastic tool. If you don’t have a suction handle you can “build” a handle with tape that you stick onto the display in a shape similar to this —> __∏__ (also you may want to edit your post and remove your email address ;) )

    Tobias Isakeit -

    Hi,

    I’m stuck at this step for about two hours… There’s nothing I can do to open the case. Tried all kinds of opening tools and a suction handle. There is no gap at all between the display and the body. How can anything be inserted into a gap that practically does not exist? Please help.

    Mark Movshovich -

    Sorry to hear that. You could try and lift the display by using a suction cup and pull to create a small gap for a tool to get in.

    Tobias Isakeit -

  3. OHcFOOMU1RUU6Qbl
    OHcFOOMU1RUU6Qbl
    HVkOQd4iCx212VAM
    • Aspetta ad aprire completamente il telefono. Il cavo dei pulsanti del volume e dello standby è ancora connesso alla cover posteriore.

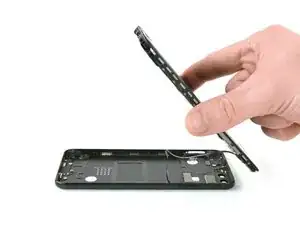
    • Apri parzialmente il telefono allontanando le estremità superiori.

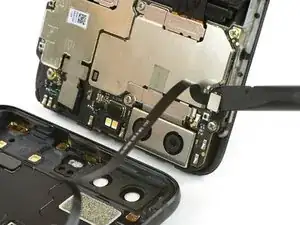
    • Usa uno spudger per disconnettere il cavo flessibile dell'accensione e del volume.

    The cable is for the standby and volume buttons, not for the fingerprint sensor!

    JaL -

    Thanks JaL, of course it is.

    Tobias Isakeit -

  4. WUKpybyHSNougxDd
    WUKpybyHSNougxDd
    4e2tZywLIVrUspeO
    TZsdIFAkjGWknOZC
    • Rimuovi la vite a croce Phillips #00.

    • Rimuovi la piastra metallica con delle pinzette.

    • Utilizzando uno spudger, scollega il cavo flessibile della batteria.

  5. mtMulDFTUNRBM1gP
    mtMulDFTUNRBM1gP
    UXlZouTpVUoZBcar
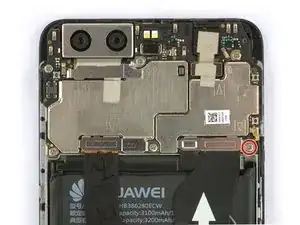
    • Rimuovi le quattro viti a croce Phillips #00.

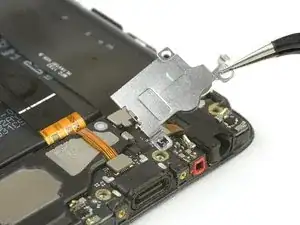
    • Usando delle pinzette, rimuovi la piastra metallica.

  6. tuqwqH2EGbF6WAuW
    tuqwqH2EGbF6WAuW
    jC6VobkWbgBVEbaW
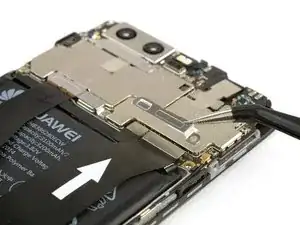
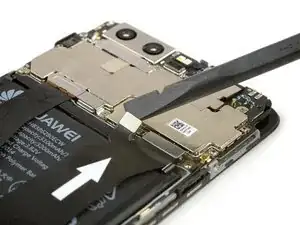
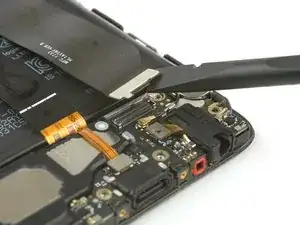
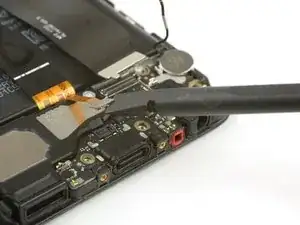
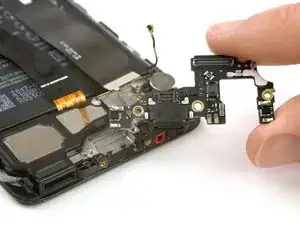
    • Con uno spudger, scollega il cavo flessibile principale.

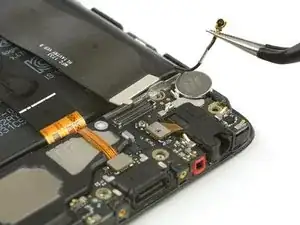
    • Usa delle pinzette per scollegare il cavo di antenna e tirarlo fuori dal morsetto che lo tiene sulla scheda di ricarica.

    Warum soll das Antennenkabel gelöst werden? M.E. schafft dieser Schritt nur ein Risiko das Antennenkabel/den Stecker zu beschädigen.

    Jan Bühler -

  7. NXexRrcuTdeEKwmU
    NXexRrcuTdeEKwmU
    DRA5arbKTOTqcFkU
    • Usando uno spudger, scollega i cavi del jack cuffie e dell'altoparlante.

    Ist das entfernen der Kopfhörerbuchse nötig? M.E. nicht - es besteht vielleicht ein geringes Risiko, diese beim Display entfernen zu beschädigen, aber vermutlich wird man diese eher lösen als beschädigen.

    Jan Bühler -

  8. OmjdngNnjOcOuXND
    OmjdngNnjOcOuXND
    RbiYdCBgkFpQuEAJ
    • Non danneggiare i componenti della scheda di ricarica mentre la rimuovi.

    • Usa uno spudger per estrarre la scheda di ricarica.

    • Rimuovi la scheda di ricarica.

    Use the correct angle when putting the (new) charging board back. At the top of the charging board it must be underneath the edge.

    Raymond -

    I didn’t remove the charging board (I didn’t look precisely enough and thought I had to remove the head phone socket which I put back again as it can stay in place) and it didn’t interfer.

    Jan Bühler -

    Please also include that their might be a small piece of tape over the microphone on the new PCB.

    My mic was not working "on ear" but it was working when on speaker.
    Found that small piece of tape by comparing the 2 boards, removed the tape and problem solved.

    Frederik Dewolf -

  9. YCyISjxTNJenogQF
    YCyISjxTNJenogQF
    clop1yCLHK6MsvfN
    • Inserisci lo spudger a una profondità massima di 1,6 mm per evitare danni.

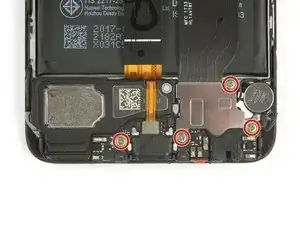
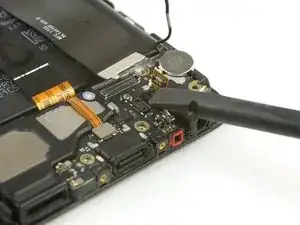
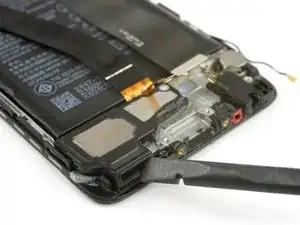
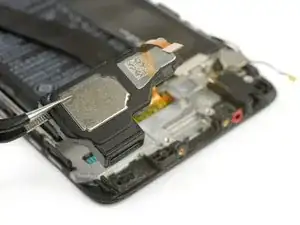
    • Usa uno spudger per estrarre delicatamente l'altoparlante. C'è dell'adesivo sottostante, quindi può opporre un po' di resistenza. Puoi usare un iOpener per ammorbidire la colla.

    • Rimuovi l'altoparlante.

    • Quando rimonterai il telefono, applica del nuovo adesivo dove necessario.

    Welchen Klebstoff sollte man hier verwenden?

    Funk Phenomenon -

    Hallo Funk Phenomenon,

    um den Lautsprecher wieder anzubringen kannst du vorgeschnittene Klebestreifen bestellen. Solltest du hierfür keinen Anbieter finden, kannst du Streifen aus doppelseitigem Klebeband heraus schneiden.

    Dominik Schnabelrauch -

Conclusione

Per rimontare il tuo dispositivo, segui queste istruzioni in ordine inverso. In fase di rimontaggio, applica del nuovo adesivo dove necessario.

Dominik Schnabelrauch

Membro da: 23/11/16

200687 Reputazione

0 commenti