Introduzione
Usa questa guida per sostituire il tuo altoparlante. Sostituire l'altoparlante richiede la rimozione della scheda madre.
-
-
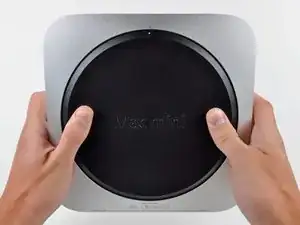
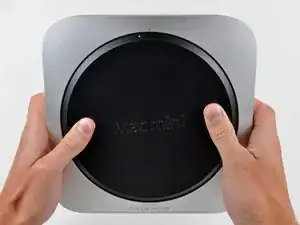
Posizionare i pollici negli incavi nel coperchio inferiore.
-
Ruotare il coperchio inferiore in senso antiorario finché il puntino bianco dipinto su di esso non è allineato con il cerchio in rilievo sul case esterno.
-
-
-
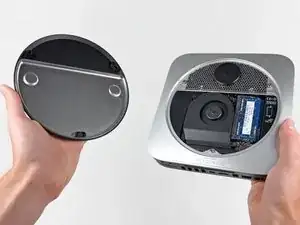
Inclinare il Mac mini abbastanza da sganciare il coperchio inferiore dal case esterno.
-
Rimuovere il coperchio inferiore e conservarlo altrove.
-
-
-
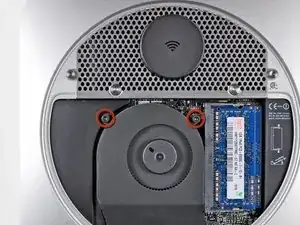
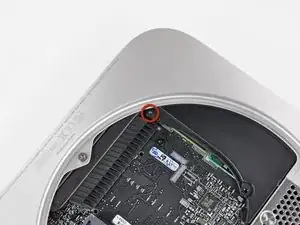
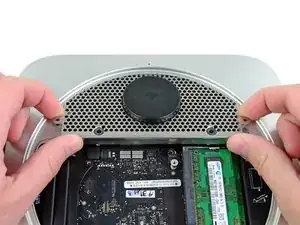
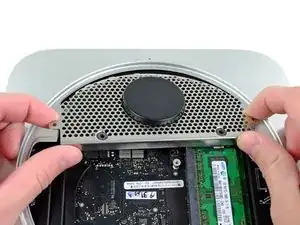
Rimuovere le due viti Torx T6 da 11,3 mm che fissano la ventola alla scheda logica, in prossimità della piastra dell'antenna.
-
-
-
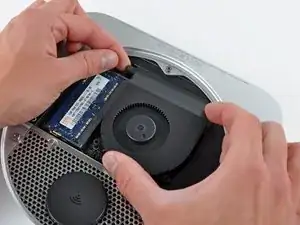
Sollevare la linguetta della ventola più vicina alla memoria RAM più vicina al distanziatore fissato al case esterno.
-
-
-
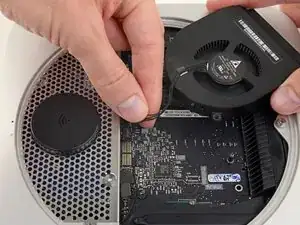
Sollevare la ventola dal Mac mini affinché sia possibile accedere al connettore.
-
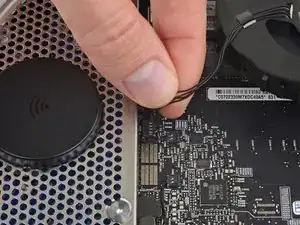
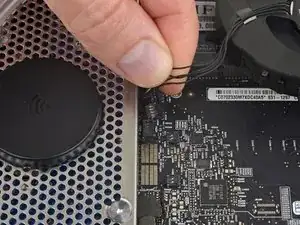
Prendere insieme tutti i cavi e tirali delicatamente verso l'alto per scollegare la ventola dalla scheda madre.
-
Rimuovere la ventola.
-
-
-
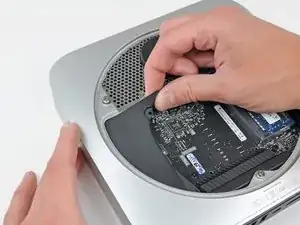
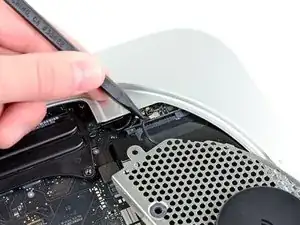
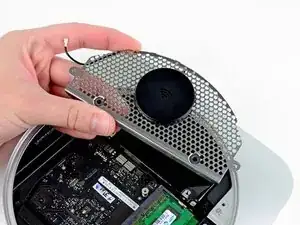
Sollevare la mascherina dall'estremità più vicina alla piastra dell'antenna.
-
Ruotare la mascherina fuori dal case esterno e rimuoverla dal Mac mini.
-
-
-
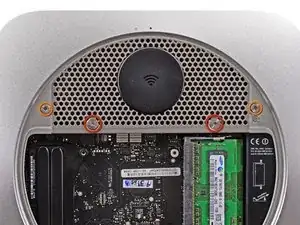
Rimuovere le viti seguenti, che fissano la piastra dell'antenna al Mac mini:
-
Due viti Torx T8 da 6,6 mm
-
Due viti Torx T8 da 5 mm o viti esagonali da 2 mm (vanno bene entrambi i cacciaviti)
-
in fase di montaggio:
-
-
-
Sollevare delicatamente la piastra dell'antenna dall'estremità più vicina alla memoria RAM.
-
Estrarre con attenzione la piastra dell'antenna dalla montatura rotonda nel case esterno.
-
-
-
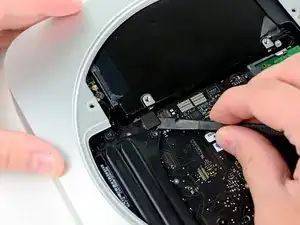
Mediante la punta di uno spudger, scollegare con attenzione il connettore dell'antenna dal rispettivo connettore femmina sulla scheda AirPort/Bluetooth.
-
-
-
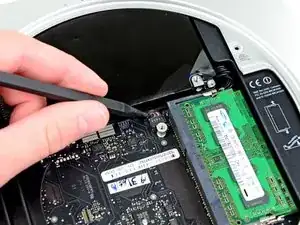
Utilizzare l'estremità piatta di un inseritore per scollegare il connettore del disco rigido dal connettore femmina sulla scheda logica.
-
-
-
Mediante la punta di un inseritore, scollegare il connettore del cavo del sensore infrarossi dal connettore femmina sulla scheda logica tirandolo verso l'alto.
-
-
-
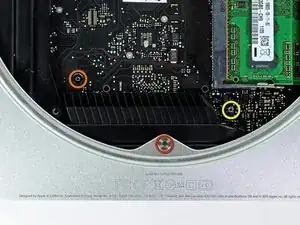
Rimuovere le tre viti seguenti:
-
Una vite Torx T8 da 5 mm o vite esagonale da 2 mm (vanno bene entrambi i cacciaviti)
-
Una vite Torx T6 da 16,2 mm
-
Un distanziatore Torx T6 da 26 mm
-
-
-
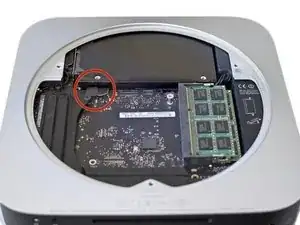
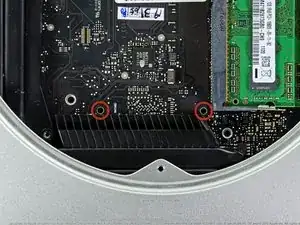
Infilare lo strumento per la rimozione della scheda logica del Mac Mini nei due fori evidenziati in rosso. Verificare che avvenga il contatto con il lato superiore del case esterno sotto la scheda logica prima di procedere con l'operazione.
-
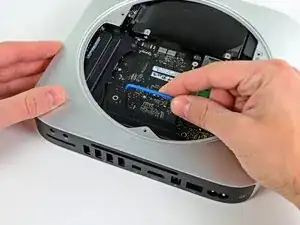
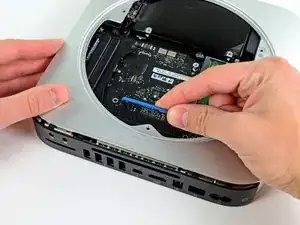
Tirare con attenzione l'attrezzo verso la scheda I/O. La scheda logica e il gruppo della scheda I/O dovrebbero scorrere leggermente fuori dal case esterno.
-
Rimuovere l'attrezzo per la rimozione della scheda logica per Mac Mini.
-
-
-
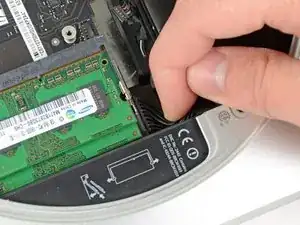
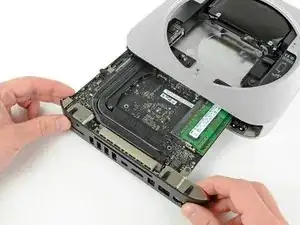
Estrarre il gruppo della scheda logica/scheda I/O dal case esterno affinché sia possibile accedere al connettore dell'alimentazione.
-
Utilizzare le dita per scollegare il cavo C.C. in ingresso dalla scheda logica.
-
Tirare il connettore del cavo di alimentazione verso il lato anteriore del Mac mini.
-
-
-
Rimuovere con attenzione il gruppo della scheda logica dal Mac mini, facendo attenzione ai cavi che potrebbero incastrarsi.
-
-
-
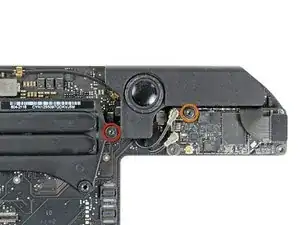
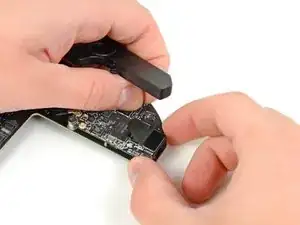
Rimuovi le due viti seguenti che assicurano l'altoparlante alla scheda madre:
-
Una Torx T6 da 3,5 mm
-
Una Torx T6 da 3,7 mm
-
-
-
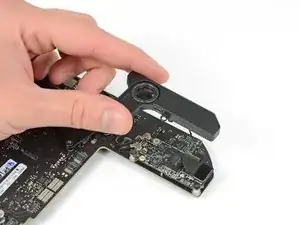
Alza con cautela i cavi dell'altoparlante per sollevare il connettore dell'altoparlante estraendolo dal suo zoccolo sulla scheda logica.
-
Solleva l'altoparlante e rimuovilo dalla scheda logica.
-
Per riassemblare il tuo dispositivo, segui queste istruzioni in ordine inverso.

Un commento
good heavens, I’d rather get me a new mini. Congrats to every one that replaced the speaker.
This took a lot of force on my Mac mini. A lot.
nh3 -
I agree. It took a crap ton of force from my thumbs to twist the bottom off.
sleeve -
I accidentally broke the little things that hold the cover to the case. Is there a cheap replacement to the cover? Those clips are held onto it very weakly.
Jacob Halton -
Don't just use your thumbs... Use your whole palm to twist it, with maybe a thumb in one of the recesses, applying slight downward pressure.
markbart -
Wish I would have read this comment before I did it!
I found that what markbart said works best. one palm one thumb (and my knees) My thumbs would do it. It was a bit at a time.
Same difficulty getting it back on.
Would be handy if this (difficulty) was mentioned in the guide
Also would be nice to mention the safe practice of pressing the power button for a few seconds after disconnected to rid the system of any residual power, working in a clean static free environment & they say on the crucial website to touch a metal surface of the machine before touching the RAM
Nancy -
I think it depends, I have seen some that are very difficult to open and some super easy. But I see them everyday. I wish there was a tool that fit in the holes.
Justin Weathersbee -
When seating the bottom RAM chip you may have to apply a little extra side force to get it to seat properly. I put in the new RAM and just got a beeping sound upon starting. I then put the old RAM back in and got the same result.
Here is the solution I found on the Apple discussion board.
"Take a small flat head screwdriver and after you put the memory in slot 0, put the screwdriver between the top of the mac mini and the memory then turn the screwdriver a little to exert pressure on the memory into the slot. Do it on both sides of the memory."
This worked for me.
littlemas2 -
I remember this when I was changing my memory ... I realized (after opening) that more you push, more force it take to open the cover. As you push down you force the cover "to rub" the casing and possibly other things inside. If you "lightly" hold the cover it comes right off ... Remember: less is more! :-)
Have fun!
Radek -
We found it hard to use the thumbs but if you put the casing on a carpet and one person is holding the case while the other is using his palm of one hand to turn the cover it comes off quite smoothly and without much downward pressure.
Alexander -
If you're upgrading to an SSD, before you even take this first step, I'd recommend putting the SSD into an external drive case, using USB and format the SSD first before trying to swap your existing hard drive or implementing a fusion drive. The external drive case will come in handy later so you can use the old drive as extra storage anyhow.
Once that SSD is internal, the Mac errors out during the formatting process. Once it was formatted externally, then installed inside the Mac again, there was no problem.
Orange Girl -
The first time I did this it hurt! The second time my mac mini 2012 had been running so was warm. VERY EASY WHEN WARM. No fun when cool!
Nancy -
Forget about those 2 circle indents. if you consider the 2 marked dots (open and close) as position 12 o’clock, place your thumbs at 11 and 1 o’clock on the outer rim of the cover and rotate from that position.
juicer52 -
No way was I getting the back off. So I made a tool. Took a large wrench longer than the Mac mini. Superglued 2 rubber feet on the wrench at the same location as the thumb indents. Put the Mac on the ground, between my knees and used my body weight to turn the cover. Worked like a charm.
Mark -
Hey dos anyone know if that can lead to the 3 beep RAM problem? I just got a Mac mini witch has the 3 Beeps when started. its not the RAMs them self because thy work in other Macs so if this could lead to thee 3 Beep problem it would make it more Ez because I don't have to Re solder the RAM Port. (This Mac mini was Running over 10 years and after it got turned of for the first Tim it started to have this problem) I think because of Over heading.
Arvid000 -