
Introduzione
Usa questa guida per sostituire la vecchia batteria del tuo Apple Watch Series 2.
Nota: se la batteria è gonfia, prendi adeguate precauzioni.
-
-
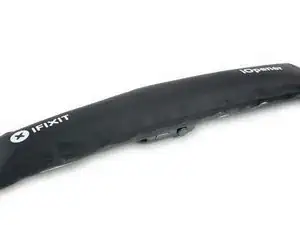
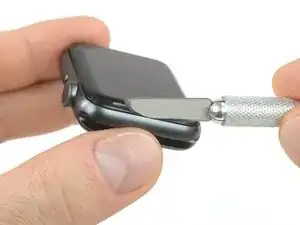
Prepara un iOpener (oppure usa un asciugacapelli o una pistola termica) e scalda il quadrante dell'orologio finché non è lievemente troppo caldo da poter essere toccato.
-
Lascia l'iOpener sull'orologio per almeno un minuto per scaldare completamente lo schermo e ammorbidire l'adesivo che lo fissa alla scocca.
-
-
-
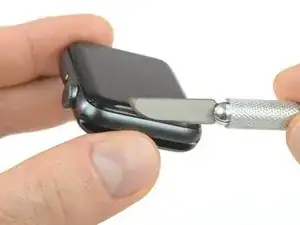
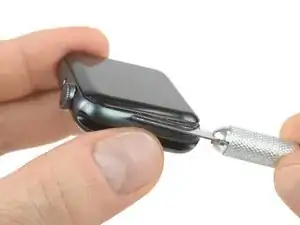
Infila il bordo di una lama curva nella sottile fessura tra il display e il case esterno. Inizia sul lato corto del display, vicino alla Digital Crown.
-
Premi fermamente esattamente verso il basso nella fessura.
-
Una volta inserita la lama, torcila per sollevare lievemente il display.
-
-
-
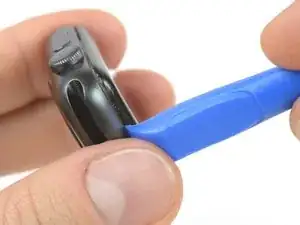
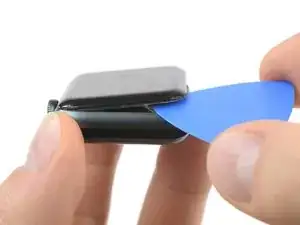
Una volta che hai aperto una piccola fessura con la lama curva, rimuovi la lama stessa e inserisci nella fessura la parte più sottile di uno strumento di apertura.
-
Spingi nella fessura lo strumento di apertura, ruotandolo e usando il pollice come fulcro per sollevare ancora un po' il display.
-
-
-
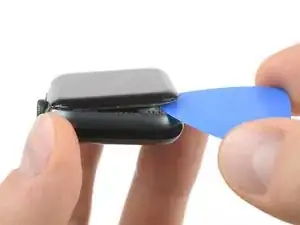
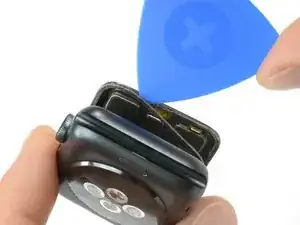
Inserisci un plettro di apertura sotto il display e separa con delicatezza dal display la guarnizione del Force Touch.
-
Fai scorrere il plettro lungo il display per separare l'adesivo tra la guarnizione del Force Touch e lo schermo.
-
-
-
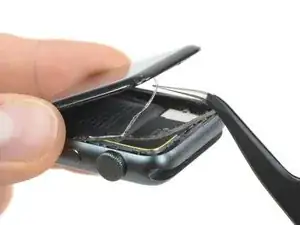
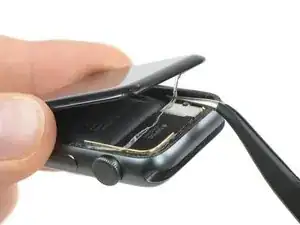
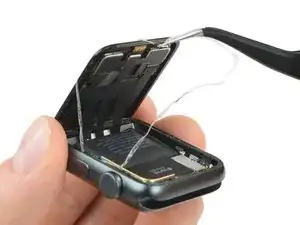
Apri il display a un angolo di circa 45° e usa delle pinzette per staccare l'adesivo tra lo schermo e la guarnizione del Force Touch.
-
Fai passare l'adesivo attorno e dietro ai cavi del display per toglierlo completamente.
-
-
-
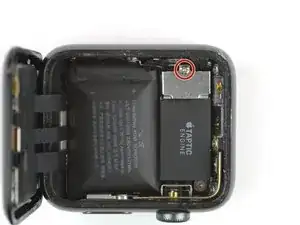
Usa un cacciavite Y000 per rimuovere la vite tri-wing che fissa la cover metallica del connettore della batteria.
-
Rimuovi la cover.
-
-
-
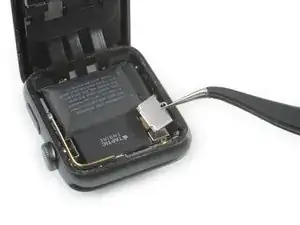
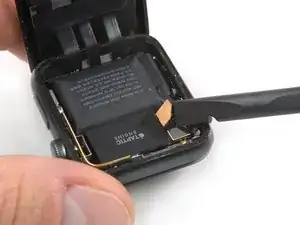
Scollega la batteria facendo leva con l'estremità di uno strumento di apertura per alzare il connettore.
-
Dai una leggera piegatura al connettore per essere sicuro che non possa fare contatto accidentalmente.
-
-
-
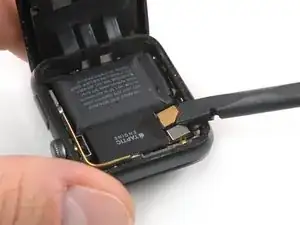
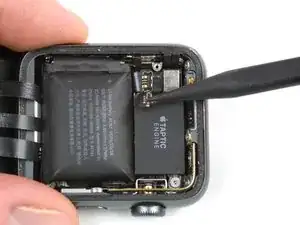
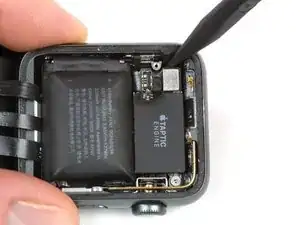
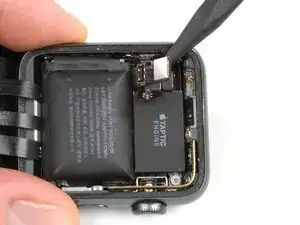
Con il connettore della batteria messo in modo che non possa interferire, inserisci la punta di uno strumento di apertura sotto la piastra del connettore della batteria, elemento che fa parte della batteria stessa.
-
Solleva la piastra del connettore della batteria fuori dal suo alloggiamento.
-
-
-
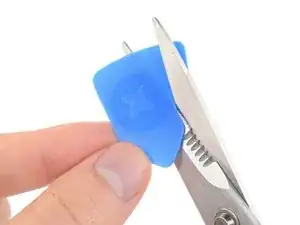
Usa delle forbici per tagliare uno dei plettri di apertura in modo che abbia più o meno la stessa larghezza della batteria. Cerca di non lasciare nessun angolo affilato.
-
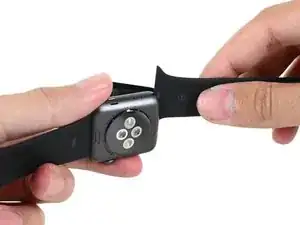
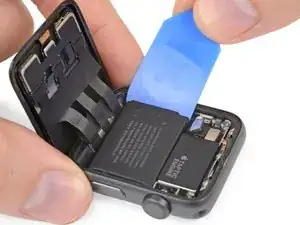
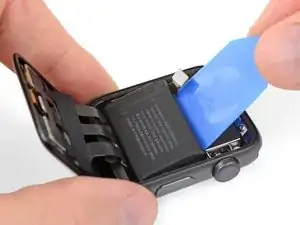
Inserisci il plettro appena modificato tra il bordo della batteria e la custodia dell'orologio, sul lato opposto alla corona digitale.
-
Esercita una pressione costante e continua facendo lentamente leva sulla batteria per separarla dall'adesivo che la fissa in posizione.
-
-
-
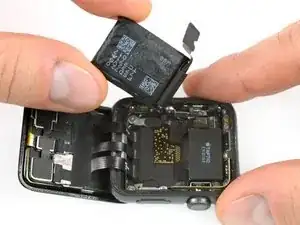
Rimuovi la batteria.
-
Se è possibile, prova riutilizzare l'adesivo originale per fissare la batteria. In alternativa prova con un pezzetto di nastro biadesivo come il Tesa 61395 o con un'applicazione di adesivo liquido come l'E6000.
-


Una volta installata la nuova batteria, continua dal passo 10 della Guida per guarnizione Force Touch per richiudere l'orologio e completare la riparazione.

19 commenti
Ordered the kit and replaced the battery, no dice! I believe the components in my watch failed victim to thermal breakdown since the battery got so hot. After the battery replacement my watch acted the same. It got real hot again, so I am not sure what is actually wrong with the watch. I think it is time for a new one.
These directions were easy to follow. The screwdriver in the kit didn’t work at all. luckily I have a good kit with the right tip. If you are confident and able, this procedure should take about 2 hours. Thank you IFIXIT for providing this product an the easy to follow instructions.
Success! Following this guide and the gasket replacement guide saved having to buy a new watch. Like Thomas mentions in his review, the screwdriver was difficult to use. I eventually got it to turn the tiny screw by holding the watch from the bottom rather than just pressing down with the driver from the top.
A question: should I reset my watch after replacing the battery? Or will whatever throttling WatchOS put in place reverse itself?
Yay it worked! Was supposed to wait for my boyfriend to do it but got impatient and gave it a go.. easy peasy even with my baby having a hissy fit inbetween ?
Verify your model. The back of the Cellular model just says GPS, so be sure to check the groves where the watch band goes to determine you model. I made the mistake of just reading the back of the device and since I’d been gifted the device didn’t know it was cellular. Cellular has a different type of touch force gasket, different screen, and different battery connections.
Ryan Holt -
From what I just read on Apple, the only differences in watch series 3 is 38mm and 42mm.
mcr4u2 -
As a consumer all you need to know are 38mm and 42mm
Michael Adoga -
The back will say GPS LTE if it’s the cellular version. If it doesn’t say LTE it is only the GPS version. The displays are different whether or not it is LTE(cellular).
themepark -
This alternative method only reboots the watch.
Gregg Stanley -