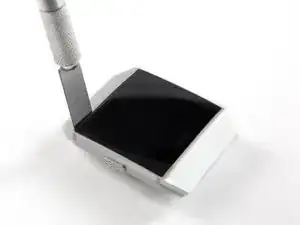
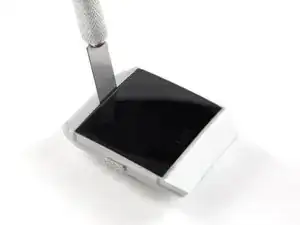
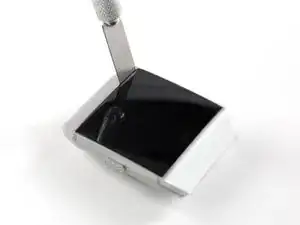
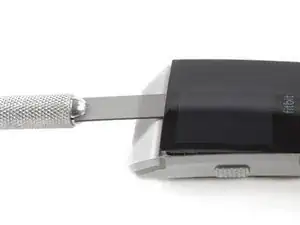
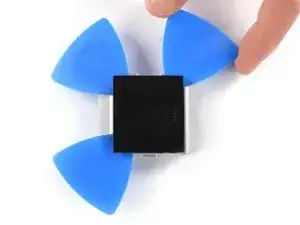
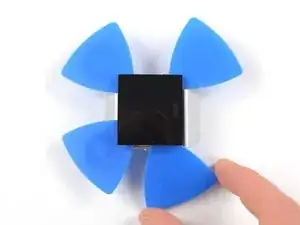
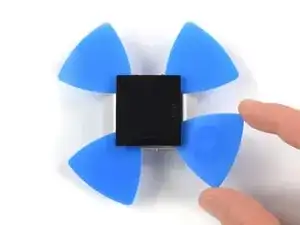
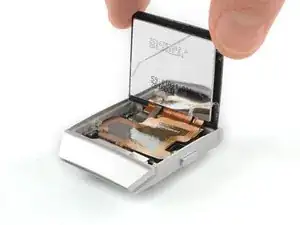
Introduzione

Segui questa guida per sostituire la batteria esausta nel tuo Fitbit Ionic.

Se la tua batteria è gonfia, prendi le precauzioni appropriate.Per la tua sicurezza, scarica la batteria al di sotto del 25% prima di smontare il tuo telefono. Questo riduce il rischio di pericolosi eventi termici se la batteria viene danneggiata accidentalmente durante la riparazione.

Ti servirà dell'adesivo di ricambio per riattaccare i componenti durante il rimontaggio del dispositivo.

  1. j3U2pxnNpNDc1XgL
    j3U2pxnNpNDc1XgL
    5LVAPNxPV53ZiZkS
    • Prima di iniziare, rimuovi il tuo Fitbit Ionic dal caricatore e spegnilo.

    • Sentiti libero di attaccare o staccare il cinturino se necessario per avere più controllo durante le riparazioni.

  2. 5GlxOPlV3YAer1HX
    • Scalda un iOpener e appoggialo allo schermo per almeno due minuti per ammorbidire l'adesivo sottostante.

    • L'adesivo del Fitbit Ionic è molto resistente. Potresti dover riscaldare l'iOpener e ripetere questa procedura più volte finché l'adesivo dello schermo si ammorbidisce abbastanza.

    Hair dryer on low took about 25 minutes directly blasting on the device, then used the ifixit metal spudger blade with rubber handle in the velcro kit pack

    disgustipated -

    Thanks for sharing your experience!

    Adriana Zwink -

  3. NieMBxeN4NRFTkGt
    NieMBxeN4NRFTkGt
    KUiscVfXSQxE2oVM
    KC5SWFtTAdOIqEgk
    • Infila un rasoio con una lama piatta nella piccola fessura tra la cassa dell'orologio e lo schermo.

    • Taglia l'adesivo sul lato superiore del Fitbit Ionic.

  4. 6PATXUSPhy2IiRBA
    6PATXUSPhy2IiRBA
    qTDImfYExkgJANJn
    • Usa un rasoio con una lama piatta per sollevare il bordo superiore dello schermo e creare una piccola fessura.

  5. vAQbyryoEfv3oGJK
    vAQbyryoEfv3oGJK
    WOmQ4JnQNBGeRv5N
    JPseNP3M2P1iv5RJ
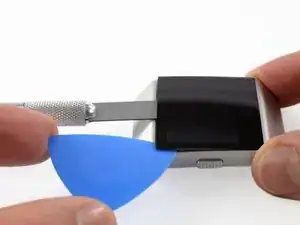
    • Infila due plettri sotto gli angoli in alto a destra e sinistra.

    • Lascia i due plettri infilati lì sotto per evitare che l'adesivo si reincolli.

    • Rimuovi la lama del rasoio.

  6. StNV63ipPBPKipVl
    StNV63ipPBPKipVl
    nwaKXnDhTB64JH3J
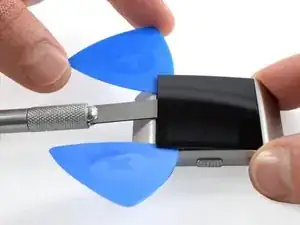
    • Infila un terzo plettro sotto l'angolo in alto a destra e fallo scorrere sotto il bordo destro dello schermo.

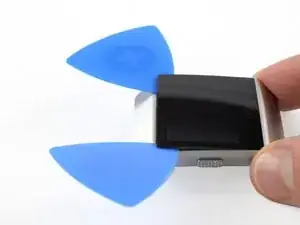
    • Lascia il plettro sotto l'angolo in basso a destra per evitare che l'adesivo si reincolli.

    • Se il taglio diventa troppo difficile, scalda di nuovo e riappoggia l'iOpener.

  7. D2l3JKJmNNPL1Eea
    D2l3JKJmNNPL1Eea
    HFw6GLx5AiQhjrRR
    • Infila un quarto plettro sotto l'angolo in alto a sinistra e fallo scorrere sotto il bordo sinistro dello schermo.

    • Lascia il plettro infilato sotto l'angolo in basso a sinistra per evitare che l'adesivo si reincolli.

    • Non rimuovere ancora del tutto il gruppo dello schermo: è ancora collegato alla scheda madre.

  8. WpSZM6JYYAIIZtbM
    WpSZM6JYYAIIZtbM
    MZnOEPQTOgA6owrA
    • Piega attentamente il gruppo dello schermo in direzione del bordo inferiore.

  9. XTBDedGgDIpxWRgM
    XTBDedGgDIpxWRgM
    OFAiOLwgCKNiVuIi
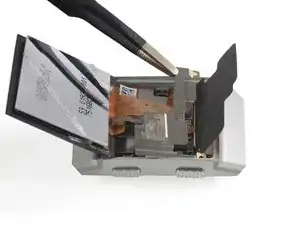
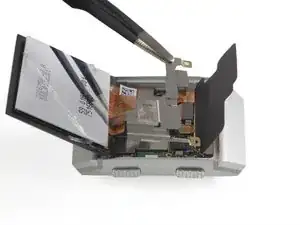
    • Usa la parte piatta di uno spudger per rilasciare e sollevare l'antenna NFC leggermente incollata.

    • Piega attentamente l'antenna NFC in direzione del bordo superiore dell'orologio.

    Il semble qu'il y ait confusion : <vers bord “superieur" > et non "inférieur” .

    Plusieurs cas relevés

    Bernard Tremblay -

    Bonjour Bernard ! Merci pour vos différentes remarques ! Vous êtes un lecteur attentif et éclairé. Nous avons adapté le texte d’origine et/ou les traductions en français. iFixit étant un wiki modifiable par tous, n’hésitez pas à modifier vous-même la prochaine fois que vous remarquez quelque chose.

    Claire Miesch -

  10. BlrwAVditIYrEqaY
    BlrwAVditIYrEqaY
    BMVHPuX1a164PbVM
    • Piega attentamente il gruppo dello schermo sul bordo superiore dell'orologio.

    • Stai attento a non tirare o piegare troppo i cavi: sono ancora collegati alla scheda madre.

    Plutôt que “replier" il vaudrait mieux dire “basculer vers le haut" puis ajouter <en soulevant délicatement la nappe de connection de l'écran qui reste connectée (qui est maintenant libérée) >

    Bernard Tremblay -

  11. joWotNmdRQSCgXeh
    • Svita la vite Torx T2 da 3,65 mm nell'angolo in basso a sinistra.

  12. EkPjtVgDpGAP1SFI
    EkPjtVgDpGAP1SFI
    wu15rrJN6mCU3kWG
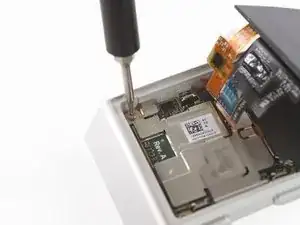
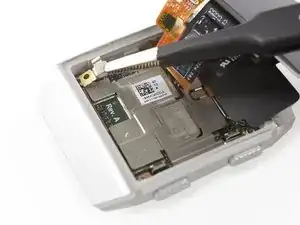
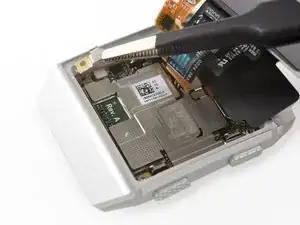
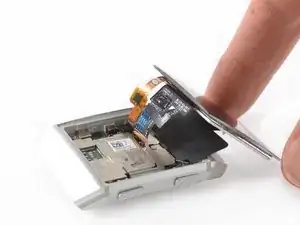
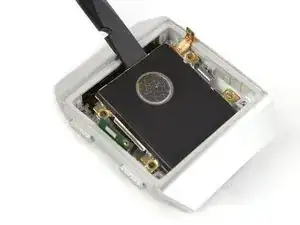
    • Usa un paio di pinzette per rimuovere la protezione in metallo che copre il cavo a nastro della batteria.

    The pointy tweezers in the ifixit kit are easier to work with the shield than the ones pictured here.

    disgustipated -

  13. Nr3Gontf2NNHSQiL
    Nr3Gontf2NNHSQiL
    rVT4vyJDl5ptCCDu
    • Usa uno spudger per sollevare e scollegare il cavo a nastro della batteria.

  14. sPGBGLbjcUAL6A1R
    sPGBGLbjcUAL6A1R
    FvMovOjhi3weQOPl
    • Ripiega il gruppo dello schermo nella sua posizione originale.

    Plutôt “basculer” l'ensemble écran dans la position précédente, en bas.

    Bernard Tremblay -

  15. oyLVU2EBIgImxGKq
    • Svita le due viti Torx T2 da 3,65 mm dal bordo superiore dell'orologio.

  16. pg3GuBLN5ViAlnGB
    pg3GuBLN5ViAlnGB
    tVXtEHqMQHQfKuXE
    • Usa un paio di pinzette per rimuovere la copertura in metallo.

    Theres a lip on the right side that goes under the frame, and another lip that goes under the nfc antenna where you need to slightly turn the nfc antenna a bit to get the left side of the shield away.

    disgustipated -

  17. JIbLQiq2tOpKFCbB
    JIbLQiq2tOpKFCbB
    KaNMqpGP5MHWJvgU
    • Usa uno spudger per sollevare e scollegare l'antenna NFC.

    • Rimuovi l'antenna NFC.

  18. BRDnviyJ5HRJY3bx
    BRDnviyJ5HRJY3bx
    i6AnUbSWj4K2VNJU
    1uT3TD6YPBQ2IXWh
    • Usa uno spudger per sollevare e scollegare i due cavi dello schermo dalla scheda madre.

  19. RirGpTJchWGUjWdM
    • Rimuovi il gruppo dello schermo.

    • Se possibile, accendi il tuo Fitbit Ionic e prova la tua riparazione prima di applicare il nuovo adesivo e richiudere il tutto.

    The comment “turn on your Fitbit…” is out of sequence at best - battery is out, etc. However the “Remove the display assembly” is correct.

    John Swartz -

    When reassembling and prior to gluing the screen, turn the device on with all components attached. Verify screen function, button function, nfc function, and HR monitor function.

    disgustipated -

  20. RAPkXS2GOnsAH1je
    • Svita la vite Torx T2 da 3,65 mm.

    The two Torx screws were removed in step 11.

    John Swartz -

  21. 5js1nCBJOJG2C1UP
    5js1nCBJOJG2C1UP
    gnYc6H4C4YRG1HPi
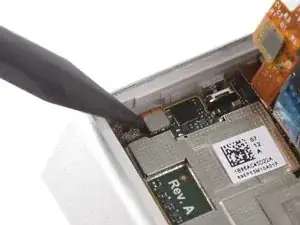
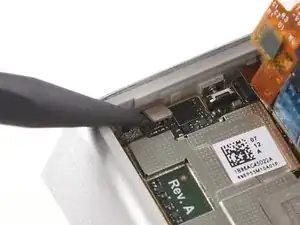
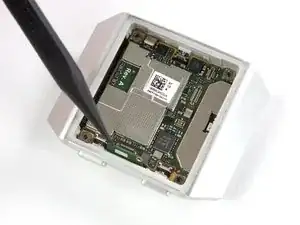
    • Usa uno spudger per sollevare e scollegare il sensore del battito cardiaco dalla scheda madre.

  22. jnSMsAFLn5RsYfPa
    jnSMsAFLn5RsYfPa
    coEXOlHeWfBYyfdU
    ZllMwxmHAojN5RXP
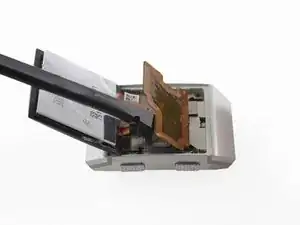
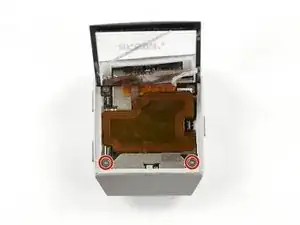
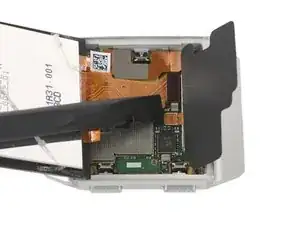
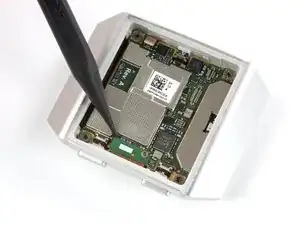
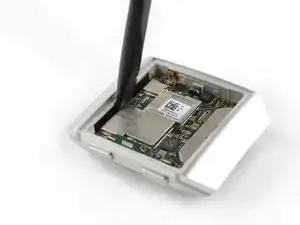
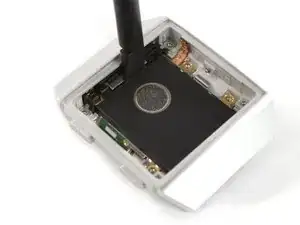
    • Infila uno spudger nella fessura tra la cassa dell'orologio e il bordo superiore della scheda madre.

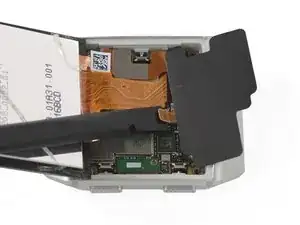
    • Usa lo spudger per sollevare la scheda madre.

    • Evita di danneggiare i cavi della batteria e del sensore del battito cardiaco durante la procedura di rimozione della scheda madre.

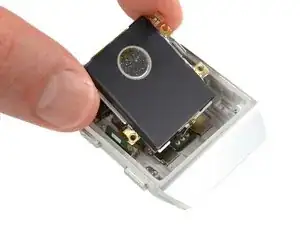
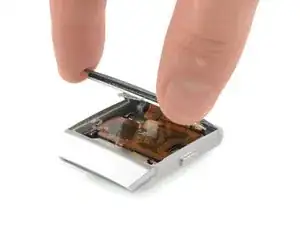
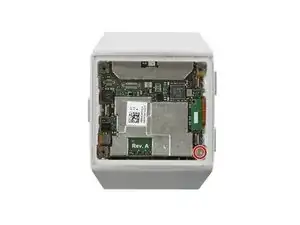
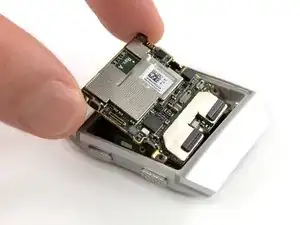
    • Rimuovi la scheda madre.

  23. GmPMXIkrIR1sITNr
    • Svita le quattro viti Torx T2 da 1,8 mm.

  24. SsNPGULF3RjLHTUa
    SsNPGULF3RjLHTUa
    NKGwNo4aPnm2oUEK
    UufiJyT6lskBUDOs
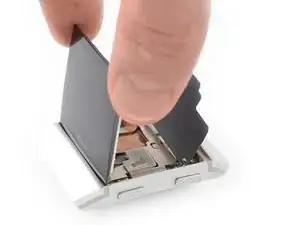
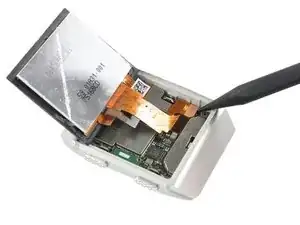
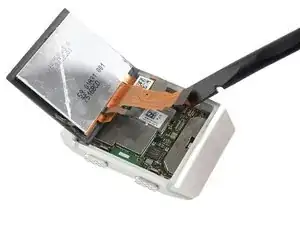
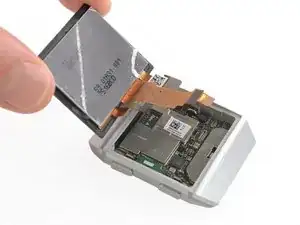
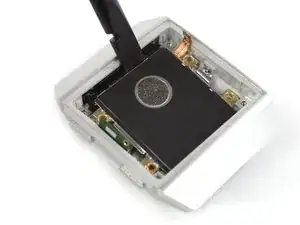
    • Infila la parte piatta di uno spudger tra la cassa dell'orologio e la batteria nel bordo superiore del tuo Fitbit Ionic.

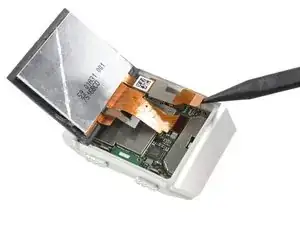
    • Usa lo spudger per sollevare la batteria.

  25. IQoRnjiPCoZvCpQF
    • Rimuovi la batteria.

Conclusione

Per rimontare il tuo Fitbit Ionic, segui le istruzioni in ordine inverso.

Se possibile, accendi il tuo dispositivo e prova la tua riparazione prima di applicare del nuovo adesivo e richiudere il tutto.

Per prestazioni ottimali, calibra la tua nuova batteria installata: Caricala fino al 100% e lasciala sotto carica per almeno altre 2 ore. Poi usa il tuo dispositivo fino a scaricare completamente la batteria. Infine carica la batteria fino al 100%.

Porta i tuoi rifiuti elettronici a un riciclatore certificato R2 o e-Stewards.

La riparazione non è andata come previsto? Prova delle soluzioni di base ai problemi, oppure rivolgiti alla nostra comunità Risposte per trovare aiuto.

Adriana Zwink

Membro da: 18/12/19

47656 Reputazione

14 commenti

This guide is very detailed and pretty accurate. Thank you for posting it!

Does anyone know how crucial the ‘Calibration’ procedure noted at the end article is?

I replaced my battery and it drains so quickly - during the course of a few hours.

But I didn’t try leaving it on the charger for 2 hours after 100% is reached. Trying that now.

Monte87 -

Und woher bekommt man die Batterie?

k.krah -

From iFixit.com - they are back in stock now.

Monte87 -

Sehe keine Battery im Shop.

Gibt es einen Link?

k.krah -

The new battery part is linked at the top of this page.

Here is the link: [prodotto collegato mancante o disabilitato: IF384-004]

- regards

Monte87 -

The battery drains so quickly - just like the old battery that I am replacing.

It charges up to 100% but then loses about 1% every 5 minutes. Could there be a short circuit somewhere?

This was all sealed up by factory until I needed a new battery.

Monte87 -

Hi @monte87 unfortunately I’m overwhelmed with this problem. Maybe you can contact the troubleshooting website of Fitbit directly. I hope someone there can tell you more about your problem.

Adriana Zwink -

ONE SOLUTION -

I examined my Ionic case under high magnification and discovered that the bottom has a clear plastic lens covering the sensors. Over time, this lens layer has worn thin and actually cracked enough to allow water or sweat to infiltrate the bottom of the pebble.

This must have caused a short or damaged the sensors because every new battery I tried drained quickly.

I have put all of my parts (Screen, battery, Main board, shield, etc.) into a new case complete with sensor array and now I am seeing excellent battery life!

Monte87 -

Thanks for helping resurrect my Ionic!

Don Jenkins -

Amazing guide! I was able to replace my ionic’s battery and it’s working again, thanks!

The symptoms my ionic had: the watch worked only when it was plugged into the charging cable. As soon as I remove the charging cable it shut down. Ionic did show that it’s charging when it was connected to the charger but it failed to charge even after I left it charging for more then a day. I tried soft/hard factory resets, replacing charger, replacing battery and nothing helped. So I decide to buy a battery and replace it myself and it finally resurrected my watch :)

Because fitibit didn’t have the battery available, I ordered HSABAT IONIC 500mah from ali. I’ll try to leave a comment after I use it for some time. At least my ionic is holding a charge right now :)

Andrii -

A couple of tips:

- You DO need a technician's razor with a flat! I’ve tried multiple plastic tools and even a knife - I couldn’t detach the screen. Partially, because the gap is so narrow. It’s very easy with a flat blade!

- (DO IT AT YOUR OWN RISK) I didn’t have an iOpener so I put my watch in a ziplock, put it in a cup, poured hot water (~100C) and left it for ~3 minutes. It was very easy to detach the screen with the technician's razor with a flat, and it simply popped out! my screen is still working and there no cracks :)

Andrii -

Thank you for your feedback and sharing your experience! I'm glad your repair went well.

Adriana Zwink -

Wow @andrii that is a very creative way to heat screen glue! I guess the only catch is you are heating up the entire unit - not just the area of concern…

But very clever!

Monte87 -

Is there anybody who would provide the service to post out to them fix and resend back , I have a spare watch in excellent condition with a good screen and good battery I would like to swap them over to my original Fitbit Ionic looking for somebody who could do this for me ,07703190950. ozzy64@btopenworld.com

ozzy64 -