
Introduzione
Per poter rimuovere la batteria, ti servirà un cacciavite a croce Phillips #0. Questa guida ti mostrerà come rimuovere la batteria e la copertura del GamePad.
Strumenti
Ricambi
-
-
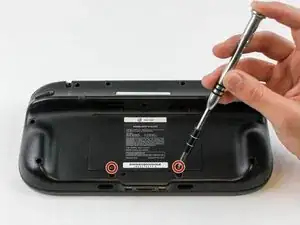
Appoggia il GamePad a faccia in giù e svita le due viti da 4,7 mm con un cacciavite a croce Phillips #00.
-
-
-
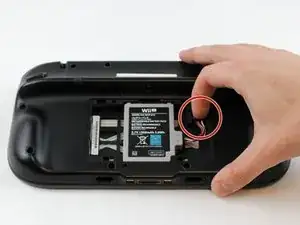
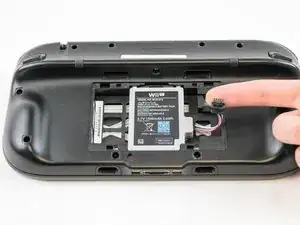
Con le dita, premi sul connettore della batteria e tiralo all'indietro.
-
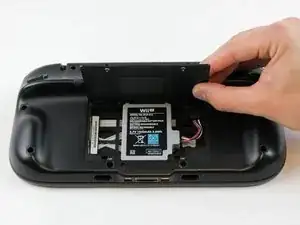
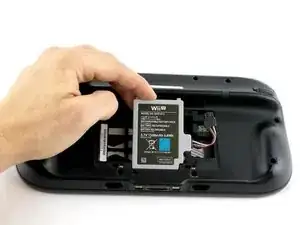
Rimuovi la batteria dal suo alloggio.
-
Per rimontare il tuo dispositivo, segui le istruzioni in ordine inverso.
3 commenti
I'm trying to put in the new battery, but the connector won't snap in even with larger amounts of force. The original battery, on the other hand, snaps right in.
I have the same issue. The connector on the new battery does not snap in. Does anyone know how to fix this issue and ger the connector to snap into place?
Encom -
It takes a significant amount of pressure (in my opinion) to get the ifixit wii u gamepad battery to snap into place. When I successfully installed this battery, I laid the wii u gamepad screen down with the top of the gamepad facing me. Then I took the flat end of my ifixit spudger, and while pressing down on the battery connector at a 45 degree angle, I pushed the battery connector into the port. You'll be able to tell when the battery is connected all the way. However, this battery does NOT make a snap or click sound to let you know it's connected all the way.
Link to the spudger I used: Spudger
RakmanII -
tried to unscrew the 10 Tri-Wing size Y1 screw with my iFixIt toolkit
unfortunately the tool is too “fat” and short, it cannot reach 4 screws on the corners of the gamepad.
having the iFixIt toolkit and needing to purchase an additional slim screwdriver it’s a shame…
Antonello Iannone -