Introduzione

Segui questa guida per sostituire la batteria del tuo smartphone Huawei Mate 8.

  1. FPx6tr1SmACZCQLl
    FPx6tr1SmACZCQLl
    nV32foKH1fC3wQpp
    • Spegni il telefono e rimuovi il vassoio della scheda SIM.

  2. MoPkyf5rJ1B6BDgK
    • Rimuovi le viti Torx T2 dal fondo del telefono.

  3. 2AIKFEMfSFQObbBo
    2AIKFEMfSFQObbBo
    GEZbwKnoJkZJmYmu
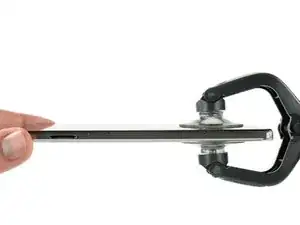
    • Applica un iSclack o una ventosa sulla parte inferiore del tuo telefono per separare il gruppo display dal case posteriore.

  4. nUkTUM4bAdfaScSX
    nUkTUM4bAdfaScSX
    j5FJXOAmFYNNasFl
    jHXPyaXbBMkd66un
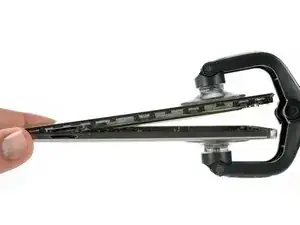
    • Usa un plettro di apertura per sganciare completamente le clip, liberando il telefono.

    • Non aprire ancora completamente il case posteriore. Il cavo del lettore impronte digitali è ancora connesso alla cover.

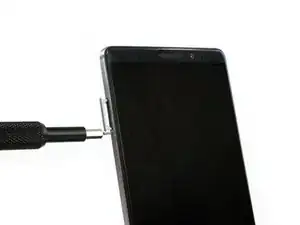
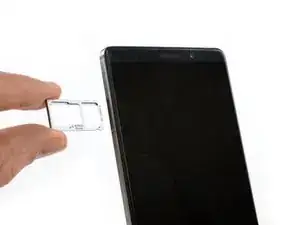
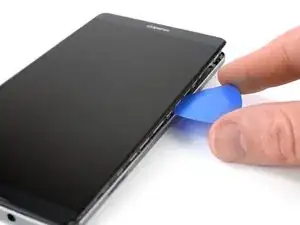
    • Apri il telefono a libro dal lato della scheda SIM.

    • Disconnetti il cavo del lettore impronte digitali con uno spudger.

  5. IVnKFFI2pYjFIGHs
    IVnKFFI2pYjFIGHs
    VjsdpGOfXllTC4Vr
    QaXBXHUyrByqcm6a
    • Rimuovi l'indicatore danneggiamento da liquidi.

    • Svita la vite Phillips #00 che tiene in posizione la staffa metallica.

    • La staffa metallica è fissata saldamente. Se provi a toglierla senza tenerla premuta su un lato, può rompersi facilmente.

    • Rimuovi la staffa metallica con uno spudger.

  6. K6orOuC2D6Rd4wDj
    K6orOuC2D6Rd4wDj
    1UuljImJHcSoWvB5
    2fGFVt4LOXi16CVI
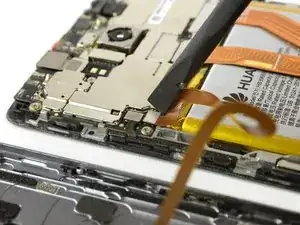
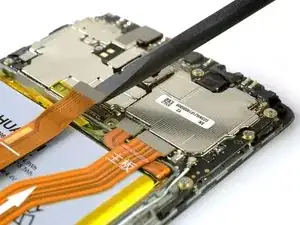
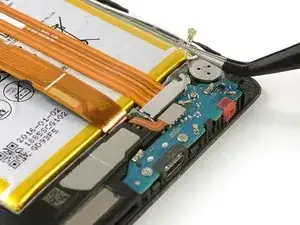
    • Utilizza l'estremità piatta di uno spudger per disconnettere i cavi del display, di interconnessione della scheda figlia e della batteria.

  7. k4FNj21sCTTJhxXb
    • Svita la vite a croce Phillips #00 che fissa la piastra del cavo di interconnessione.

  8. YsSDABtcvNYWUN2G
    YsSDABtcvNYWUN2G
    VHrupamIvFWGy2EJ
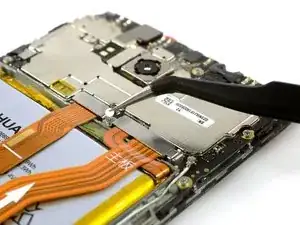
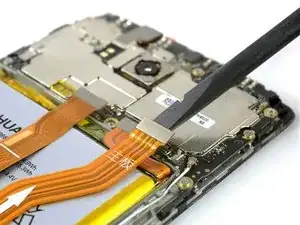
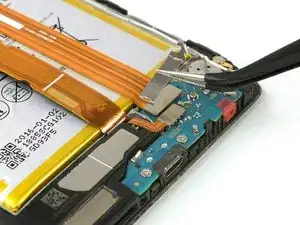
    • Solleva il connettore coassiale dal suo zoccolo per consentire l'accesso alla staffa del cavo di interconnessione della scheda figlia.

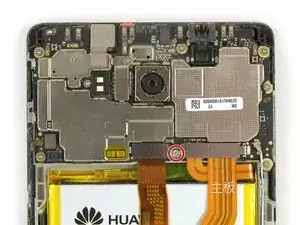
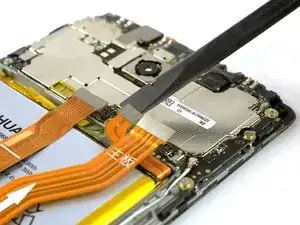
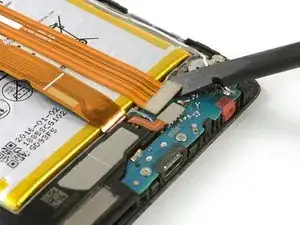
    • Togli la piastra metallica.

  9. esX2tEyJIi5UfMTS
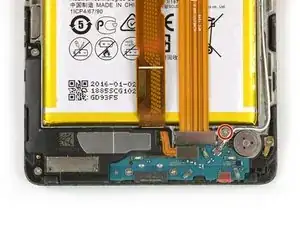
    • Disconnetti il cavo di interconnessione con uno spudger.

    • Rimuovi il cavo di interconnessione.

  10. VGdDI3wIg13GpYnl
    • La batteria è incollata da due strisce adesive. Una è dotata di una linguetta di estrazione, l'altra no.

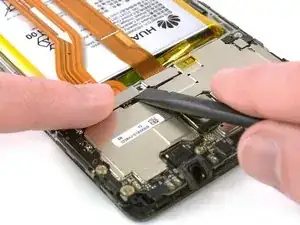
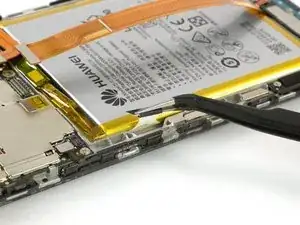
    • Afferra saldamente la linguetta di estrazione e stacca la striscia adesiva tirando sulla linguetta mantenendola a un angolo ridotto.

    • Se la striscia si rompe, avvolgila un paio di volte attorno alle punte di una pinzetta e continua a tirare.

  11. KW2vFPuJwBR6Vjxj
    KW2vFPuJwBR6Vjxj
    vWPG2QbHY1SCGSvt
    FFPyAxKEAXiMnRpj
    • Non piegare né perforare la batteria: il danneggiamento della cella può causare un incendio.

    • Riscalda un iOpener e disponilo sul telefono per circa un minuto per ammorbidire l'adesivo rimasto.

    • Inserisci delicatamente l'estremità piatta di uno spudger per separare tutto l'adesivo rimasto nella parte superiore della batteria.

  12. xiJFSRPgsCOSViyh
    xiJFSRPgsCOSViyh
    H5GFqYN4TNvvFXFL
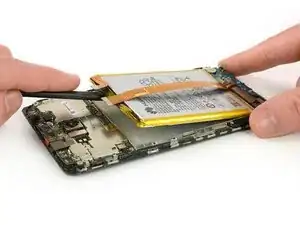
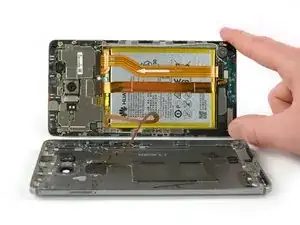
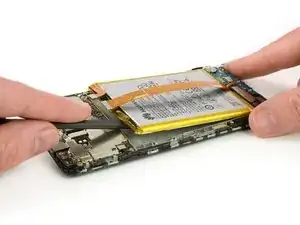
    • Solleva l'estremità superiore della batteria per staccare la cella stessa dalla striscia adesiva rimasta.

    • In fase di rimontaggio applica delle strisce adesive estensibili, del nastro biadesivo, o un adesivo pretagliato per tenere ferma la nuova batteria.

    • Non reinstallare mai una batteria che è stata piegata o danneggiata in fase di rimozione.

Conclusione

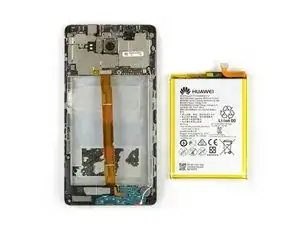
Per rimontare il tuo dispositivo, segui queste informazioni in ordine inverso e applica del nuovo adesivo dove necessario.

Dominik Schnabelrauch

Membro da: 23/11/16

200687 Reputazione

7 commenti

great guide changed my battery in under 30 min thank you @schnabel

george austin -

Hi George,

nice to hear and i hope your phone works well!

Dominik Schnabelrauch -

Thank you for an excellent guide! Clear instructions and great pictures. I followed the steps and it worked flawless. One comment regarding Step 4 - I had greater luck opening from bottom side up rather than from left to right.

Jim My -

Thanks for you guide, Easy and complete. Perfect

Jonathn -

Thanks for the great guide! It took some effort to open the phone and to remove the old glue. Also with my old eyes (60 years) I could hardly see the tiny screws an connectors, even with my reading glasses on so it took me 2 1/2 hours to finish, but succeeded after all! Never did this before, so it is doable without experience, but you do need the tools. A looking glass would be helpfull too :)

Tom Hogendoorn -

Just done my Huawei Mate 8. Getting it open was a bastard, even with the IsClack - heated a wheat bag (just too hot to hold) and put it on the back of the phone for 60 secs - then the isClack could do its work. Battery was very difficult to remove - used bute force and ignorance ! Not easy to remake connections, specially the co-ax. To my surprise, it worked - the replacement battery was at 60%. Total time (not counting the break for lunch before starting to put it back together) - 2.75 hours - but then, I am 88years old - if I can do it, anyone can.

Mike Scragg -

was able to replace the battery with the phone seeming to work fine, but i am unable to put the cover back on fully. the top part doesn’t seem to want to fit back into the cover. somewhat afraid to try and force it, but not sure what is preventing it from closing. any suggestions? the sim card slot won’t sit all the way inside; if it did i wouldn’t be concerned.

thanks for the guide !

eden rose -