
Introduzione
Usa questa guida per sostituire la batteria dello smartphone Huawei P8.
-
-
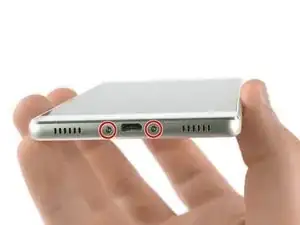
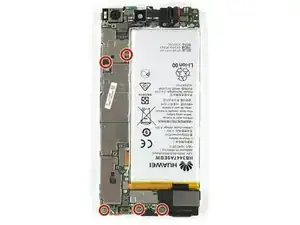
Rimuovi le due viti Torx T2 posizionate sul fondo, vicino alla porta micro USB del dispositivo.
-
-
-
Svita le due viti a croce Phillips #00 che tengono in posizione la fotocamera anteriore e le piastre dei connettori del display e della batteria.
-
-
-
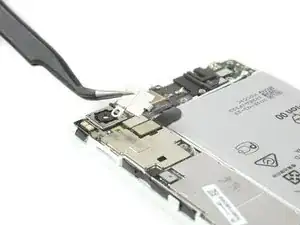
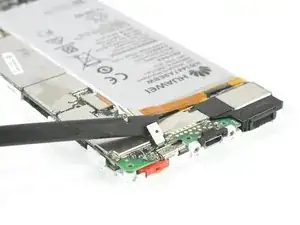
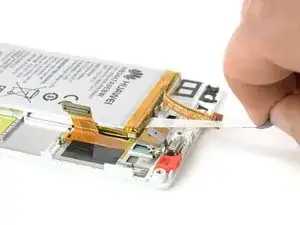
Usa delle pinzette per rimuovere la piastra che copre il display e il connettore del cavo flessibile della batteria.
-
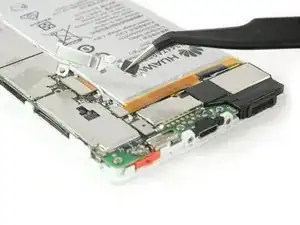
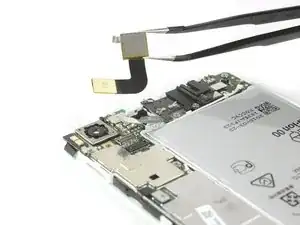
Scollega il connettore del cavo flessibile della batteria con uno spudger.
-
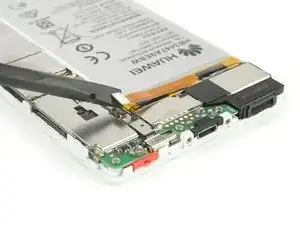
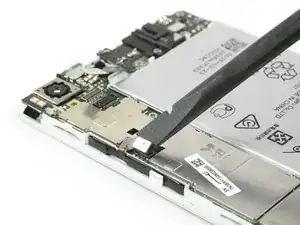
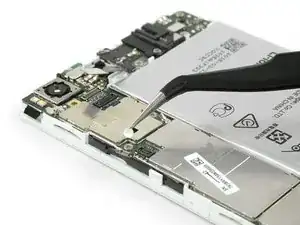
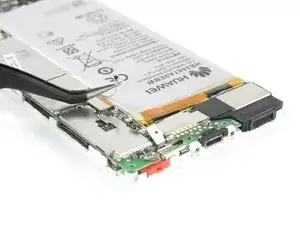
Rimuovi la piastra che copre il connettore del cavo flessibile della fotocamera anteriore.
-
-
-
Scollega i connettori dei cavi flessibili del jack cuffie e della fotocamera anteriore.
-
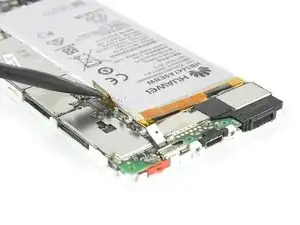
Rimuovi la fotocamera anteriore.
-
-
-
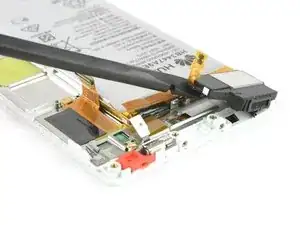
Usa uno spudger per scollegare il cavo dei pulsanti accensione/volume e piega il cavo perché non interferisca.
-
Rimuovi l'indicatore del contatto da liquidi.
-
-
-
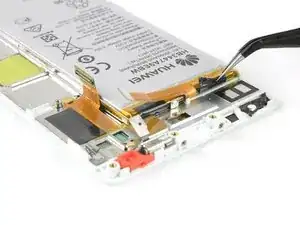
Stacca il connettore del cavo flessibile del motore di vibrazione.
-
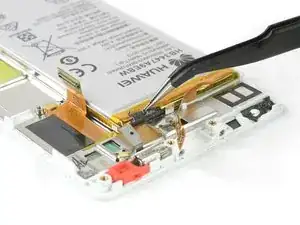
Disconnetti il cavo dell'antenna.
-
-
-
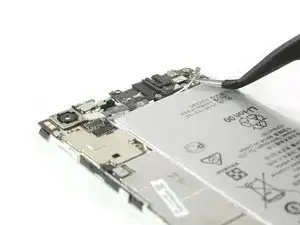
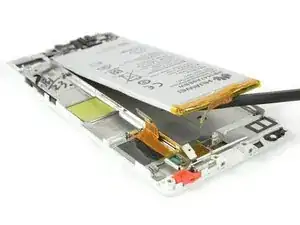
Stacca dalla scheda madre, usando uno spudger, il connettore del cavo flessibile del display.
-
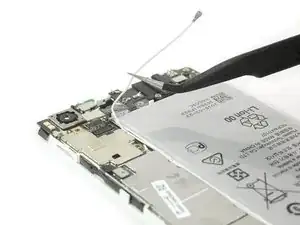
Con delle pinzette, disconnetti e rimuovi il cavo dell'antenna.
-
-
-
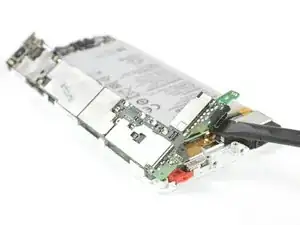
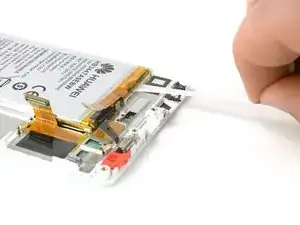
Libera con cautela il cavo flessibile dell'altoparlante.
-
Se il cavo risulta difficile da staccare, scalda il gruppo altoparlante con un iOpener o una pistola termica.
-
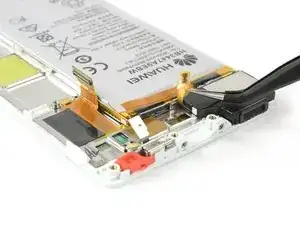
Solleva il gruppo altoparlante con uno spudger e rimuovilo.
-
-
-
Libera la parte terminale della prima striscia di estrazione adesiva per poter esercitare una buona presa su di essa.
-
Per liberare la batteria, tira la striscia adesiva con un movimento lento e regolare.
-
-
-
Libera la parte terminale della seconda striscia di estrazione adesiva.
-
Tira la striscia adesiva con un movimento lento e regolare.
-


Per rimontare il tuo dispositivo, segui queste istruzioni in ordine inverso.

9 commenti
Really helpful guide. Only hiccup was that on my handset the screws holding the casing together (Step 2) were Torx 2 rather than pentalobe, possibly a regional variation. I opted not to remove the loudspeaker (Step 10) as the ribbon cable was firmly stuck down and I worried it would break. This meant I could only cleanly remove the adhesive pad in line with the charging port. I was able to prise out the battery using spudger and screwdriver to scrape the other pad from the phone body. All now reassembled and working properly!
Overall a very helpful guide . I also had torx screws in mine . The torx screws are tiny , so make sure you have the right screwdriver before starting . We didn’t bother removing the loudspeader assembly either (Step 10) . You can just prise up the ribbon cable (carefully) . Add heat if necessary . Now to the biggest problem . Removing the old battery from the phone . What a nightmare ! It’s really stuck down .We took our time using a hairdryer (no heat gun) , and a flat head screwdriver , and went from one end to the other prising it off gently . It still took about 20 minutes . Saying that . Don’t rush it , as it’s the final stage . Also . If you do use a flat head screwdriver then don’t twist it , as you might damage the casing . Just slide it underneath it applying heat . Total time to remove the old battery was 90 minutes , but about 50 of those were spent just getting the first 2 screws out . 20 minutes to put the new battery in and reassemble . Make sure all flex connectors are properly reseated .
Paul -
My P8 battery has completely died on me. I cannot believe that to replace a battery, we have to now go to these lengths to do it. There must be a mountain of mobile phones, where the only issue with them is a flat battery. Surely, this cannot be allowed to continue. I know why the manufacturers want to make it hard to simply replace a battery, because it sells more mobile phones. But think of all that wasted technology, where a phone may have lasted just over a 24 month contract before the battery is done.