Introduzione

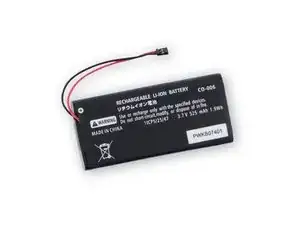
Questa guida ti mostrerà come sostituire la batteria del tuo controller Joy-Con.

Ci sono alcune piccole differenze tra i controller Joy-Con destro e sinistro. Questa guida è applicabile ad entrambi.

  1. GYJsbHVfPWpAmiyt
    • Rimuovi le quattro viti tri-wing Y00 dal pannello posteriore del Joy-Con.

  2. FXAuJg1LRQAmhBwg
    FXAuJg1LRQAmhBwg
    P1ZuDWxeLUetpbNa
    BmCSyChoCZ5mcSll
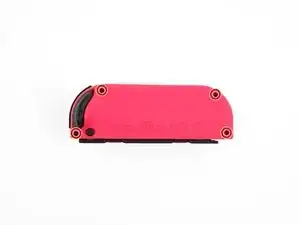
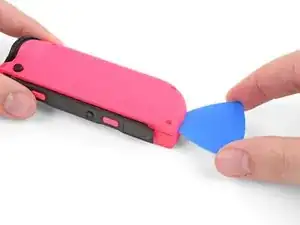
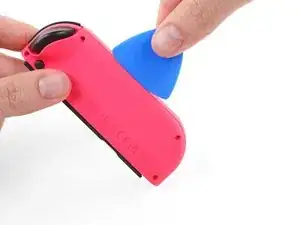
    • Inserisci un plettro di apertura nella fessura nella parte bassa del pannello posteriore (lato opposto ai bottoni del controller posti sul bordo).

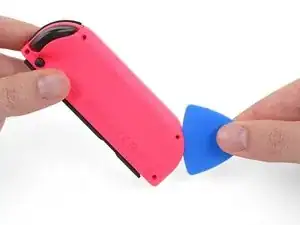
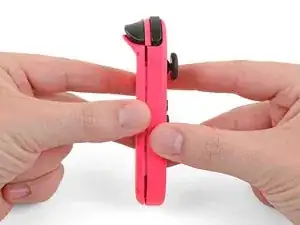
    • Tenendolo piatto, fai scorrere lentamente il tuo plettro di apertura salendo lungo il lato del Joy-Con.

    • Fai attenzione a non spingere troppo il plettro di apertura all'interno del controller. Questo potrebbe danneggiare alcuni componenti interni. Il pannello posteriore si allenta facilmente, non è necessario applicare una pressione elevata.

  3. 1LtIMl4CTjnPJO1x
    1LtIMl4CTjnPJO1x
    3lEEyNrwGwnULvQe
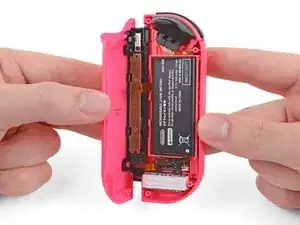
    • Apri il Joy-Con come se fosse un libro, tenendo il lato coi contatti di ricarica lontano da te.

    • Non provare ancora a rimuovere completamente il pannello posteriore. Ci sono ancora due cavi che collegano i connettori di ricarica alla scheda madre.

  4. rvUQgXmGBY3yGOjs
    rvUQgXmGBY3yGOjs
    DQbfH4JIHlCjNePi
    vwd1bV2ZJSv4uG1E
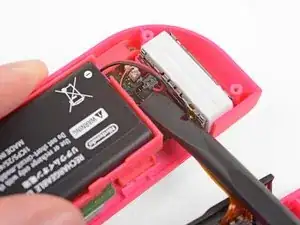
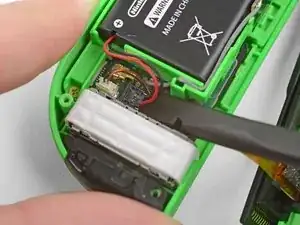
    • Usa uno spudger per far leva delicatamente sul connettore della batteria dalla scheda madre e staccarlo. Questo eviterà che il Joy-Con si possa accendere durante la riparazione.

    • Fai attenzione durante questo passaggio ai cavi del motore della vibrazione che corrono vicino al connettore della batteria. Se stai sostituendo la batteria in un controller destro, dovrai anche fare attenzione a un cavo di antenna durante questo passo.

    Beim wiedereinstecken des Akkus hat sich für mich bewährt die Flache seite des Spudgers etwas zwischen die beiden Akkukabel zu stecken.

    Außerdem sollte man darauf achten, dass wenn man wie in den Bildern zu sehen den Akkustecker von der Platine entfernt nicht ausversehen die Bauteile von der Platine bricht die unmittelbar vor dem Stecker sind

    Sontha -

    Hallo Sontha,

    danke für die Anmerkung. Viel Spaß mit deiner Switch!

    Viele Grüße!

    Fabian Neidhardt -

  5. ixEWVEgTMfUw1THT
    ixEWVEgTMfUw1THT
    2GHEGwVu5KVyUmSH
    GvUFjnKeqEqp3V1B
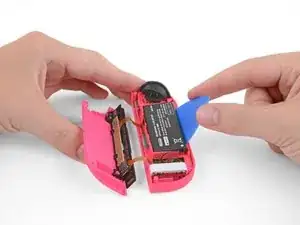
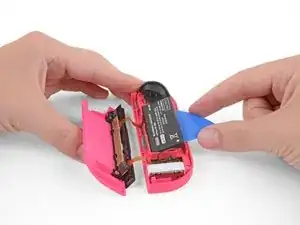
    • Inserisci ilk plettro di apertura tra la batteria e il corpo del Joy-Con.

    • Fai leva delicatamente sulla batteria, che è incollata con nastro poco tenace.

    • Per installare una nuova batteria, spingila nel sua alloggiamento e ricollegala. Se il nastro biadesivo rimane attaccato alla vecchia batteria, sostituiscilo prima di installare la nuova cella.

    thx for making this process ez and affordable.

    definitely saved the environment of dumping 4 perfectly reusable joy-cons.

    Noam Gonen -

    Thank you Ifixit, I changed my battery fairly easy. Your guide has been very helpful!

    Flora Flex -

    Easy-peasy. Joy-Con now works while disconnected again. Thanks, ifixit!

    barefootedmike -

Conclusione

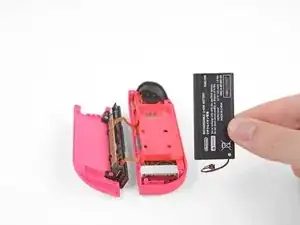
Per riassemblare il controller, segui questa guida in ordine inverso.

Jairo

Membro da: 09/02/12

5038 Reputazione

7 commenti

Bonjour, après avoir suivi les étapes tout fonctionne ,SAUF la recharge … à savoir également que je me suis trompé dans la commande de la nouvelle batterie, celle-ci étant d'une capacité plus faible

Ced -

Bonjour Ced ! Nous sommes désolés de l’apprendre. Avez-vous essayé de calibrer la batterie ? Veuillez prendre contact avec notre service client (support@ifixit.com pour la boutique américaine ou eustore@ifixit.com pour la boutique européenne et française) en indiquant votre numéro de commande. Ce sera un plaisir de vous porter assistance !

Claire Miesch -

Bei mir ging beim roten Joy Con oder Akku nicht mehr, ich hab ihn jetzt auseinandergeschraubt, das Kabel vom Akku gelöst und wieder eingesteckt.

als ich alles zusammengebaut habe ging er. Es war wahrscheinlich nur das Kabel was nicht richtig drin war.

Tobias No name -

Hello, i'm unsure what to do now but I have replaced my battery but my switch still doesn't show the presence of my right joy-con. I opened up the joy-con while connected to the switch and the battery is only charging at 1.2v (without the battery the pins are the same) could it be the charging rail? Any tips would be appreciated. Thanks!

Logan Marynowich -

Mir fiel der linke Joy Con bei einer wilden Play Session auf den Boden und funktioniert nicht mehr. Dank Anleitung und iFixit Set konnte ich den Joy Con öffnen und das Kabel des Akkus wieder fest einstecken - Problem gelöst. Danke ifixit!

Mike -

What type of connector is on the battery.is jst molex dupont Jr futaba or something?can you tell me?

Ravinder Singh Negi -

close up video of your hands are hairy like a guy's

travelox -