Introduzione

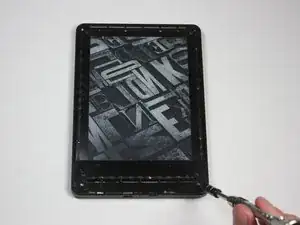
Hai la batteria difettosa che ha bisogno di essere sostituita? Sei nel posto giusto. E sei anche fortunato: la batteria è il componente interno del Kindle di settima generazione più semplice da sostituire. Segui questa guida e il tuo Kindle tornerà a nuovo in un attimo.

  1. U224BwRqPPQoxqEx
    U224BwRqPPQoxqEx
    AwlpEvUCxIOEMKTj
    • Spegni il tuo Kindle prima di iniziare a smontarlo.

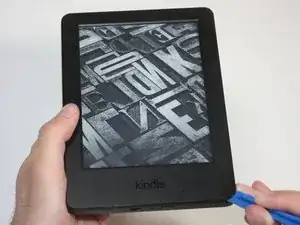
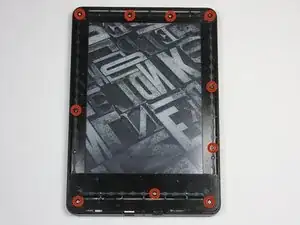
    • Usa lo strumento di apertura in plastica blu per separare la cornice dall'adesivo sotto ogni angolo.

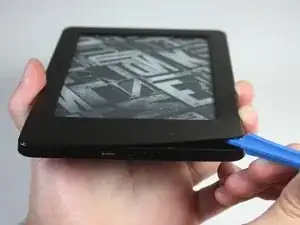
    • Fai scorrere lo strumento di apertura lungo i bordi per separare la cornice.

    i had a battery that wouldn't even last a full day in the end. by accident i let the battery fall below 10% charge and when turned on it only showed the battery icon. I fully charged it and now i am having no problems with it. what i think happened is it reset the batteries memory and that was the problem. worth trying anyway before buying a new battery.

    soupamanx -

  2. tIMKotWQsDZPImRJ
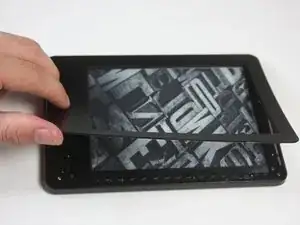
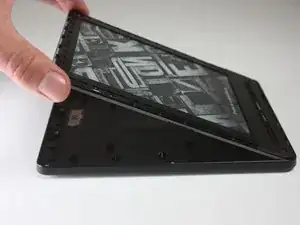
    • Rimuovi delicatamente la cornice dallo schermo.

    • Se è la prima volta che la cornice viene rimossa, può essere necessario fare una notevole forza per staccare l'adesivo.

    • Per evitare di danneggiare la cornice, inizia a scollare partendo dagli angoli e procedendo verso il centro del Kindle.

    • Quando riassemblerai il tuo dispositivo, potrebbe essere necessario dell'adesivo extra per rimontare lo schermo.

    What is the adhesive you are using resecure the screen? Would Tesa 61395 Tape work (4mm) or would this create protrusion?

    Camble Scott -

    Did that option work for you? I'm about to try and change my battery and don't have any idea on what backup adhesive to have

    Lagroth -

  3. DSrvV1cL3BKDbRYS
    DSrvV1cL3BKDbRYS
    N5hIl4JWJ6REHBDs
    • Rimuovi le dieci viti Torx T5 da 5,0 mm.

    • Un tappetino magnetizzato potrebbe aiutarti a non perdere le viti.

    You will break the newer vision of kindle just like this. there is a peg that connect the top center of the screen to the back case. Remove the black double sided tape in the center and push this peg back .

    Kyle Darnell -

    If you see black double sided tape at the top of your Kindle, as the commenter above did, you are on the wrong model—have a look here to see if this is your model: Kindle Paperwhite 3rd Generation Screen/Display Touch Panel Replacement

    Lipsmeyer -

  4. kMq4PUsvd141fy2l
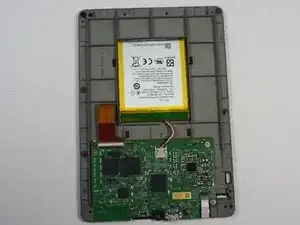
    • Facendo leva in maniera uniforme lungo i bordi e gli angoli, separa i componenti interni dal pannello posteriore.

    • Ci sono numerosi punti di aggancio che fissano lo schermo al pannello. Potrebbe essere utile fare un po' di forza, ma non devi mai avere la sensazione che il Kindle stia per rompersi.

  5. PT55VNoIFN1IjWAL
    • Gira il Kindle, mettendo a vista la batteria e la scheda madre.

  6. 5Y35BjcSfA26YLdW
    5Y35BjcSfA26YLdW
    EAHFRMOaDwNSZHwm
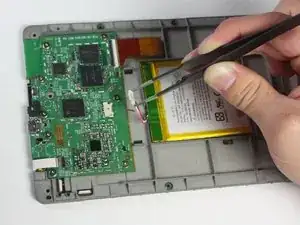
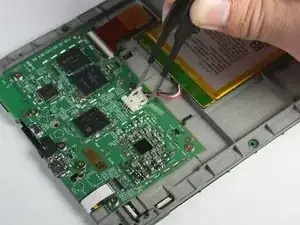
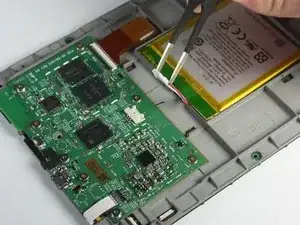
    • Usa le pinzette di precisione smussate per prendere le estremità della clip che collega i cavi della batteria alla scheda madre.

    • Fai scorrere delicatamente il cavo dalla connessione sulla scheda madre.

  7. tjVLggJOmUWVWYTt
    tjVLggJOmUWVWYTt
    JIpoCXjXPBThPTnP
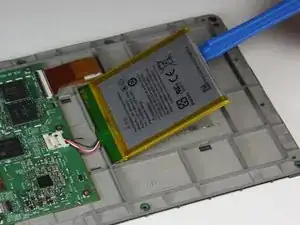
    • Fai leva con lo strumento di apertura in plastica per scollare la batteria dal retro dello schermo.

    • Posa via la batteria.

    • Siccome la batteria è incollata con una quantità eccessiva di adesivo, questo passo potrebbe chiedere uno sforzo in più.

    • Se stai sostituendo la batteria, smaltisci la batteria danneggiata in modo appropriato e usa un po' di adesivo per incollare la nuova batteria.

Conclusione

Per riassemblare il dispositivo, segui le istruzioni in ordine inverso.

Abby Roulier

Membro da: 08/02/15

948 Reputazione

16 commenti

Where can I purchase the battery?

Boon -

Fairly easy to do. Saves a lot of money compared to buying a whole new Kindle :) Thank you for this! A note: I've never seen batteries as...soft as these. Take care when using the removal tool. I could be easy to puncture the battery which could cause a big mess and possibly injury.

Joshua -

Where do I get a new battery from please?

Tracy Armstrong -

The link to buy a replacement battery on amazon is dead. Ideas on an alternate source?

Yagoth -

You can get the batteries on Ebay.

Mike Rayner -

This looks more like an 8th gen battery replacement. The 7th gen battery has screws that hold it in place.

Jeff G -

Does replacing the battery reset the Kindle 7 to factory defaults?

Howard Marshall -

No. I just replaced my battery, and it booted with my settings and content.

stefanhubbard -

I have a 7'th gen kindle paperwhite, and inside the screws look nothing like the pictures here! :(

1. There are way more screws, but none of them a torx.

2. The battery is screwed down, and is in a hard black plastic package

3. the main board is edge-to-egde, and with 3 ribbon connectors goring around the sides

4. main board has 4 metal housings hiding all the chips

Jeppe Rishede Thomsen -

Thanks for this! But as others have said, this doesn't look like my 7th generation Kindle Paperwhite (I'm in the UK – I guess it’s possible there might be regional differences?).

But the principle is just the same. Be prepared for 11 crosshead screws instead of ten Torx. The nice thing about the 7th gen is that the battery is in a rigid carrier held down by three screws instead of glue. I’m impressed with the repairability of this Kindle, and the build quality too.

Charles Butcher -

Comment savoir si la batterie est à remplacer ? merci

Gilles Morysse -

You could have mentioned that this is not a Kindle Voyage 7th Generation! Your instructions have had me trying to prise the back off one of those when it just needs the top panel removing and 4 screws undoing. Thanks to ifu##it.com, I have ruined a Kindle. Thanks very much, I won't be ordering any more tools from you!

Tony Winter -

Hello @tonywinter47915

i understand that your situation is really unsettling. The Kindle and the Kindle Voyage are completely different devices, even if they are both Kindles and they are both black. It is absolutely unsatisfying, I understand that, but you cannot blame iFixit for buying the wrong sparepart or using a wrong guide.

If you still need to contact the support, feel free to contact them at support@ifixit.com

In case you need some more support fixing your Kindle Voyage, we have some guides to fix issues with it: Kindle Voyage

BenZ78 -

Be careful when separating the bezel. It is glued. Make sure that you separate it gently from the body but also from the screen.. Bear in mind that if you do it too quickly, it can tear off the edges of the thin layer that covers the entire screen. Lessons learned, unfortunately.

Tom J. -

"i understand that your situation is really unsettling. The Kindle and the Kindle Voyage are completely different devices, even if they are both Kindles and they are both black. It is absolutely unsatisfying, I understand that, but you cannot blame iFixit for buying the wrong sparepart or using a wrong guide."
Don't you think that adding a clarification to the Kindle 7 guides that it is not the Kindle 7 Voyage would be more helpful than telling me they are both Kindles and both black?

Tony Winter -

What is the type of adhesive used?

DyOB -