Introduzione
Stai avendo problemi di ricarica? Può essere arrivato il momento per una nuova batteria. Segui questa guida per sostituire la batteria nel tuo Kindle Paperwhite di 1a generazione.
Strumenti
Ricambi
-
-
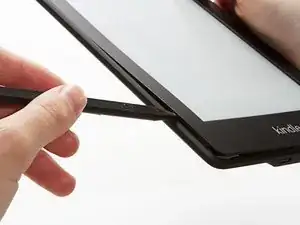
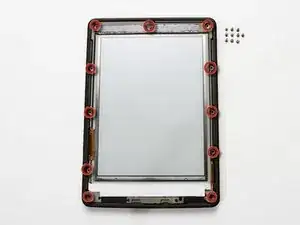
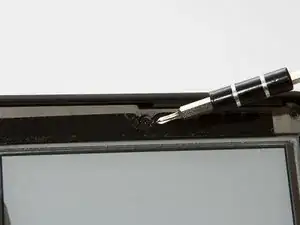
Usando uno spudger o uno strumento di apertura in plastica, separa delicatamente la cornice dallo schermo. è più semplice iniziare negli angoli continuare lungo i bordi fella cornice.
-
-
-
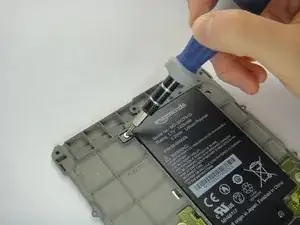
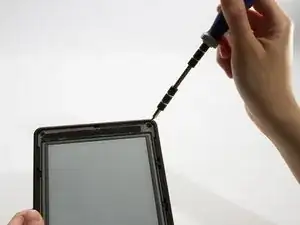
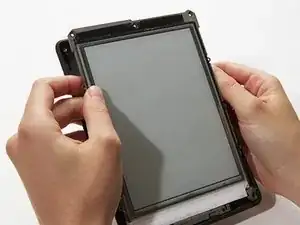
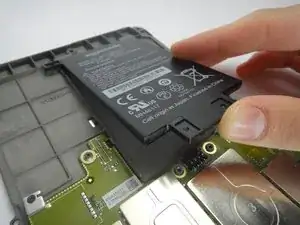
Gira il telaio intermedio a faccia in giù per trovare la batteria.
-
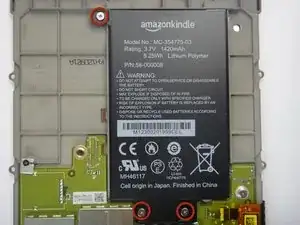
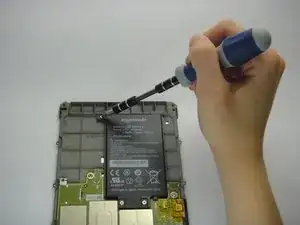
Svita le tre viti a croce Phillips da 3,0 mm che fissano la batteria al telaio intermedio.
-

Per rimontare il tuo dispositivo, segui le istruzioni in ordine inverso.
13 commenti
You may not need a new battery. I had the issue of the paperwhite re-indexing ALL of my content and getting snagged on a corrupted book toward the end of the process. This looks for all the world like the battery is dying.
Backup your kindle devices folder to a computer.
Delete everything but the book you are reading.
Delete the hidden indexes in the system folder.
Restart the kindle.
Now it should charge to 100% - and last weeks instead of hours.
(search for kindle paperwhite indexing battery re-indexing)
If you have a corrupted book how do you tell which one it is?
The spudger was no help what so ever as it was too thick to get between the edge. I finally had to use a exacto knife. And the #2 screwdriver they recommended was laughably large! I ended up using a screwdriver I got with a kit to tighten your glasses. On the battery (which iFixit doesn't sell but recommended from another seller) the last two digits were different (03 rather than 05) and it didn't work. I don't know if that's why, or if something else is wrong. The only thing that was useful was the video - at least I knew what to do and the order to do it. Too bad none of it worked. Guess I'm getting a new Paperwhite Kindle!
pjparke -
The battery on my Kindle Paperwhite 1st Gen died earlier this month. I ordered a replacement battery online, opened my Paperwhite using the instructions on this page, replaced the battery and yeehaa, it works again. Thank you!!!!
I found it easier to start this step off with one of the Opening Picks found in the iOpener pack.
NathanF -
The glue on bezel started to peel the sticky back protective layer off the screen for me - managed to smooth it back down, although now have an unsightly crease. I would try to hold the screen down when you pull the bezel off to stop damaging the screen.
Callum Rogers -
This step is most time consuming. Take you time and try not to scratch the bezel :)
Oleksii -
Couldn't get the plastic spudger under the edge of the bezel. A right-angle X-Acto blade was a satisfactory tool here.
dbrick -
The glue was VERY difficult...I used a trick, from taking apart phones, and used a hair drier to loosen up the glue...worked like a charm.
billkaris -