Introduzione

  1. YnlnA4A5cB5hX4bZ
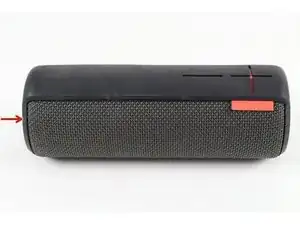
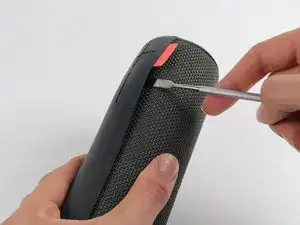
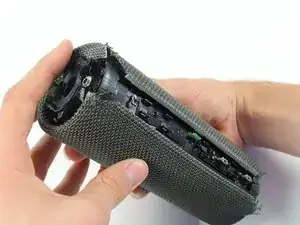
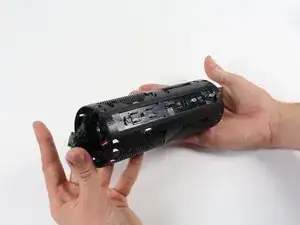
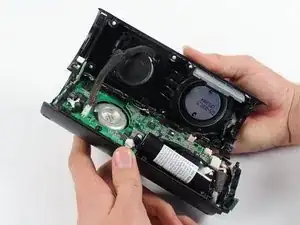
    • Gira il dispositivo a testa in giù. L'anello a D sarà a sinistra della cassa guardando la cassa come mostrata nell'immagine.

  2. ZUHnoi6e5ScLc2F3
    ZUHnoi6e5ScLc2F3
    OkRGCmfcoZTBaGXy
    • Solleva il manico dell'anello a D e svitalo.

    • Rimuovi l'anello a D.

  3. OyrdPMyALqWWKtr2
    • Qualsiasi riparazione eseguita da questo punto in poi invaliderà la garanzia del dispositivo.

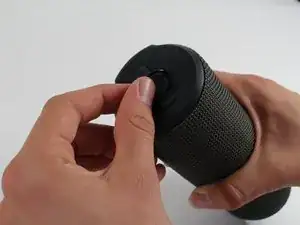
    • Tenendo la cassa dritta, infila uno spudger in metallo tra la copertura e la cassa. Fai leva delicatamente per rilasciare i ganci, in quanto si rompono facilmente.

    This part is not easy. The main risk is to broke the plastics clips.

    Optrolight -

    Use a heat gun (or hair dryer on high) first around the edges before attempting to pry it open. There are six tabs: one directly in line with the charging port; one approx 3/4 inch to the left and right of that tab; one centered against the back of the volume control "panel", and one approx 3/4 inch to either side of that one. So when prying, try to insert your spudger in between those spacings in order to not push on the tabs directly.

    Lotus Flower -

  4. TRBvaJSG5KNCXfBf
    TRBvaJSG5KNCXfBf
    YgLS3FBs1yFpqRr3
    q5EWYjOYvNlkvTRv
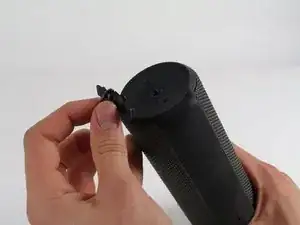
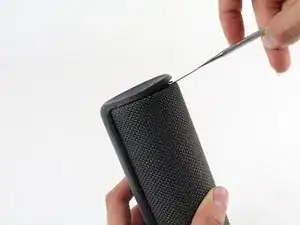
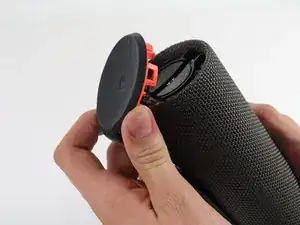
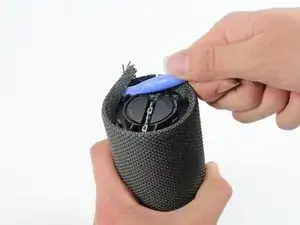
    • Trova la parte della copertura che copre i tasti del volume. Infila lo spudger in metallo sotto questa parte e fai leva su tutti i ganci come nel passaggio precedente.

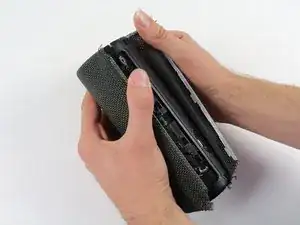
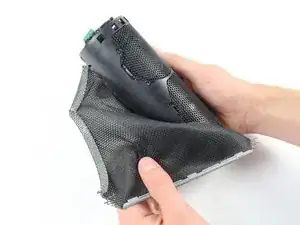
    • Ripeti questa procedura per la parte inferiore della copertura ed aprila con lee dita.

  5. aMJOLjlFTeG4bRwn
    aMJOLjlFTeG4bRwn
    SRjRlgjeJnVEeduA
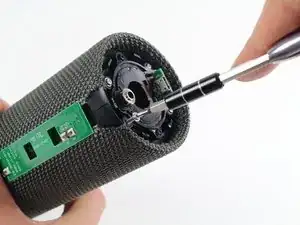
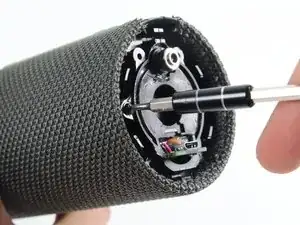
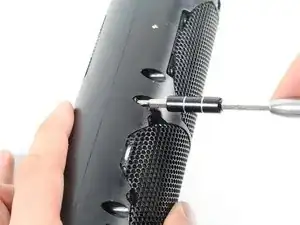
    • Usando un cacciavite a croce JIS J0 svita le quattro viti argento da 9 mm.

    • Fai lo stesso per le due viti nere da 7 mm.

  6. oPqssBfC6ZDxmFKj
    oPqssBfC6ZDxmFKj
    jDQTlFMRdUksISIn
    vWZ6ZlueCYCy5Ppk
    • Questo passaggio richiede l'utilizzo di un saldatore. Ricordati di stare attento in questo passaggio in quanto potresti bruciarti facilmente.

    • Usando un saldatore, dissalda i due contatti del pannello dei tasti.

    Great instructions here guys - just one comment from myself - underneath the plate there is glue holding it down as well as the solder joints. Be sure to heat it up slightly prior to lifting out otherwise the capacitors and other components get stuck in the glue.

    Jamie Horn -

    bei mir sieht der blootooth-adapter anders aus. da muss ich nix löten, er ist klein und liegt nur in einer passenden mulde, aus der er herausgehoben und in die er wieder abgelegt werden kann. meine typbezeichnung ist S-00122.

    thomas propp -

    Definitely start with the middle one, has 2 solder hinge points that took me a couple minutes to heat up, wiggle and finally lift up. One that side lifted, was much easier to go back to the edge hinge, heat up and just gently pull off.

    Michael Arvan -

    It is importante to note that there are two large solder hinge points and for the midle to pin point. Easy to desoldering but not easy to soldering after battery replacement.

    Optrolight -

  7. UsBekJvobsb4OAY1
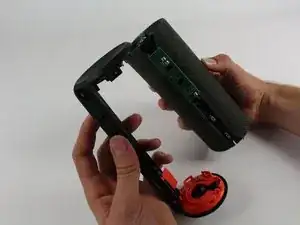
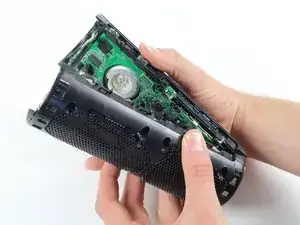
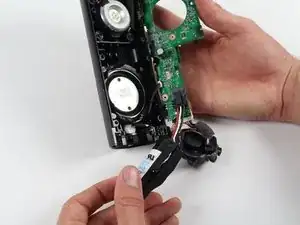
    • Dopo aver scollegato il pannello dei tasti, rimuovilo, ed ora il tuo dispositivo dovrebbe essere come nell'immagine.

  8. NC1PGBVJL5xKtfrV
    • Con uno spudger in metallo, rilascia i ganci della maglia della cassa sulla sua lunghezza.

  9. AkCHJRMYTrWWejjj
    • Usa uno strumento di apertura in plastica per rimuovere la maglia da sotto la cassa.

    Zuerst auf der Gegenseite zuerst den Deckel, dann die Hülle lösen. Erst am Ende die Seite mit dem Power Button.

    Hans Fuchs -

    Translation: First loosen the cover on the opposite side, then the cover. Only at the end the page with the power button.

    Dan -

    A tips that could be help lot of us. i consider it what not easy to pry the sleeve off. But in fact there are many hole around the side that could be used to push through the holes, the plastic ring retainer.

    Optrolight -

  10. EHNBetUFlThiBcdX
    EHNBetUFlThiBcdX
    ZfnhSKEq1MSfpnce
    nIF2npvqCUXjXpkH
    • Rimuovi la maglia.

  11. VrV2FZjmxgmagAjc
    VrV2FZjmxgmagAjc
    mIOdAWdUFjEcI5GI
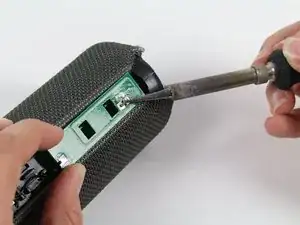
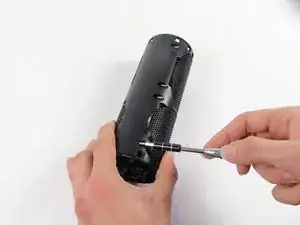
    • Usa un cacciavite a croce Phillips #1 per svitare le otto viti nere da 14 mm sulla lunghezza della copertura.

  12. eXeOLdX6kItOEWuf
    eXeOLdX6kItOEWuf
    r1XUK12YCnUTql6F
    • Dopo aver rimosso le viti, apri la copertura per accedere alle componenti interne.

    • Cerca di aprire la copertura da una delle sue estremità, se ti sembra più semplice.

  13. CqYiDTojj6LXKjub
    CqYiDTojj6LXKjub
    V1Y224N4DQfsYmZX
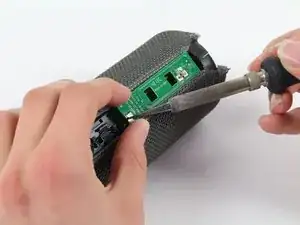
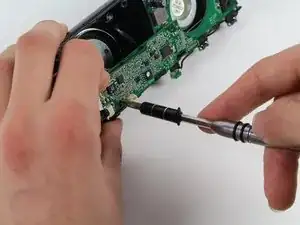
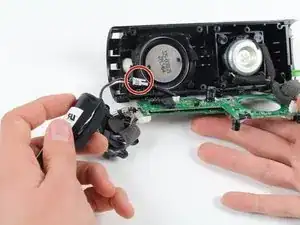
    • Con un cacciavite a croce Phillips #00, svita le due viti da 5,6 mm sulla scheda logica rettangolare.

  14. HWEEYWtNJtvgOSB1
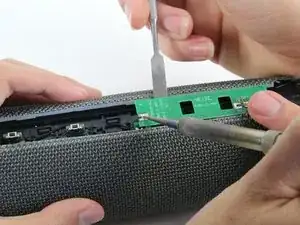
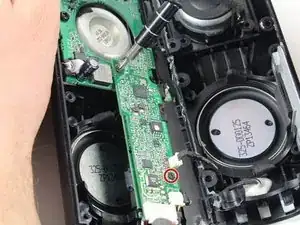
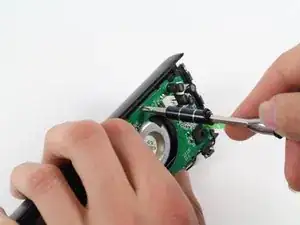
    • Con un cacciavite a croce Phillips #2, svita la vite da 9,9 mm dalla scheda logica più grande attorno allo speaker.

  15. bxGlI2pX4FYd4ttG
    • Dopo aver rimosso tutte le viti, dovresti poter rimuovere la scheda logica e trovare la batteria.

  16. vJ3WfTgmATDZL3OE
    vJ3WfTgmATDZL3OE
    nF1cAPB2CtGGOTQQ
    • Rimuovi la batteria scollegandola dal suo connettore evidenziato nell'immagine.

Conclusione

Per rimontare il tuo dispositivo, segui le istruzioni in ordine inverso.

Jose Cruz Arinaga

Membro da: 01/10/15

1003 Reputazione

27 commenti

What battery is required?

Harrison Leavey -

You've got to be joking - so you spend £100 on a speaker and then need a degree in electrical engineering to replace the battery - what a load of s***e

Kevin Reitze -

exactly, I agree

lisamuehlum -

I replaced the battery in mine. It took about an hour and it was easy, while the instructions appear complicated, undoing a few screws and folding back some tabs took only a few seconds. Before I replaced the battery my Boom had failed completely. Nothing I tried kicked the dead battery into working again, so I had two choices. Try replacing the battery or chucking it in the bin. So I bought a battery and had a go. I read up and had the right tools, and as luck favours the prepared, I was successful. The only warning I can think of is that out of the box the Boom is water resistant I believe, but post repair, I doubt it’s water resistant now.

Brandon Cheshire -

Don't pry open the entire thing. Open the side with the d-ring, there should be 4 screws like in the pic above and access to battery directly under that. There's instructions for changing battery in the box.

Brian Blackford -

Where are those instructions because mine didn't come with any set of instructions other than a quick guide for using it for the first time.

missalandria -

Yeah, what battery is required.

eric bafford -

YouTube has a great video & then i ordered the battery from e-bay

https://www.youtube.com/watch?v=QpHjhUjr...

on e-bay

Brand New Panasonic 18650 NCR18650B 3400mah Rechargeable Battery, with Tabs,

Arthur Zobel -

Thats great and all. (Actually really simps to follow instructions!)

Now - where to find the battery??

And hints on where to source a battery?

Jay -

Thanks for those instructions, if using the Panasonic 18650 3400mah battery to replace original, I assume you just cut the three wires, red, black and white attached to connector and resolver to 18650 terminals...

My question is to,which terminal do you attach which wires?

Ross Kentwell -

Does anyone know where I can take the UE Boom to have the battery replaced?

David Brown -

Hi there, my comment is as above. Does anyone know where you can take the UE Boom in, to get the battery replaced as it seems like a complicated procedure doing it yourself. I’ve contacted Logitech and thy are unable to offer any assistance on who to take it to but just to buy a replacement battery and DIY. Does anyone know what the battery model is to replace if you do decide to DIY? Thanks.

Vicki Price -

The battery in mine is a standard Panasonic NCR16850B 3.6V 3200mAh. Got a new one for $7. Unfortunately, the guide stops short of the end of the procedure. After you complete step 16, you have to then cut open the black shrink wrap with something like a razor blade. Then you will find a circuit board with metals tabs connecting to each battery terminal. You’ve have to desolder the terminals from the old battery then solder them to the new battery. If you know how to solder, it’s not difficult, but be sure you have the tools before you even begin taking the UE Boom apart or else you won’t be able to finish the job.

Christopher Sokolowski -

I found battery on e bay for $30 but what about if is not the battery and is charging port ?

Omar Marron -

Do you need to include a new Bluetooth adapter with a new battery purchase? What's the procedure on reconnecting the Bluetooth adapter.

Daniel Thompson -

Step 6 and more aren't necessary. once you opened it like on step 5. you will see the 3 wire and the battery. You can't pull out the battery without disconnecting the wire. For that push the hard plastic between the wire and the battery in battery direction. then carefully unplug the connector. once done you can replace the battery. You can by battery on the web that already have the same connectors. I bought mine there https://www.batteryupgrade.ch/shopBrowse...

Nolu -

Seriously, nothing beyond step 5 is needed. Pop the bottom (the side with the D ring), unscrew the 4 screws, pull the battery, replace the battery, close up, and done. I did it with mine and it worked beautifully (finally). Done in 20 minutes.

I previously had huuuge dead spots on the OEM battery. Got maybe one session out of it. Now it finally plays as advertised.

Ian O'Leary -

Logitech do not support battery replacement. https://support.logi.com/hc/en-us/commun...

Andrewsarchus -

My experience was exactly as the pictures indicate. I have seen other models of the Boom that had removable end caps and, yes, it was possible to remove only the lower end cap to access the battery. But my latest Boom project needed to be completely disassembled in order to detach the battery from the main board. The end caps were not removable from the case. They were part of the case. I had to  remove  the switch in order to access the covering , split the case , and unfasten the circuit boards to access the battery. A BIG thank you to the author for posting these instructions and pictures!

Dwight Corella -

I have found it much easier to take off the top and bottom and remove the whole volume control and cover. And then just go in from the bottom near the charge port. It’s a tight fit. But way less work than all this. No soldering involved.

derik sorensen -

This guide saved my Boom. Thanks! The dismounting was rather easy, the hardest part being the soldering iron step. Dismounting the sleeve with a screwdriver without breaking its two plastic rings proved impossible: I broke each of them into three parts in the process, but it caused no issue when I had to mount it again. It even made it easier.

Mounting was a tad more difficult:

1. The protruding part of the new battery must face the board, otherwise it prevents the casing reassembly.

2. The bottom of the battery must touch the board, and its cables has to leave some room for the USB port cables. Even then, I had to firmly press the bottom part when putting back the screws.

4. Important: before putting back the top and bottom parts of the sleeve, first position the sleeve left and right edges on their marks.

5. I tried hard to put back the switch plate, but I couldn't. When I realized it was just the NFC plate, I decided not to put it back. The Boom works very well without it. And I never used NFC anyway.

Flavien Gaillard -

Thanks for this tutorial. It was very useful. Several glue, and plastic clips, are on the way. Not easy to restore all of them.

Optrolight -

Mine wasn't built like this and is a generation 1. Either this guide is featuring an older version or newer then the Original OE Boom. There is a small board on the + and - side of the speaker that is held together via hope and dreams and is extremely fragile.

That fragile board actually broke the whole speaker, can't even solder it on. Seems like a tamper measure.

D-aniel Panda Ng-ô -

This is the first generation of the Boom, you likely have either the 2nd or 3rd

UE Boom 2

Logitech UE Boom 3

Dan -

Nothing after Step 5 is necessary for the 1st generation UE Boom, nor is any soldering needed. The game changer is to cut out this small plastic "bar" that sits above one side of the battery clip, making it impossible to pull the clip up and out even if you do manage to disconnect it from the socket. I used this video: https://www.youtube.com/watch?v=u2KX80xS...

My advice, break the tab first, this will give you access to be able to squeeze the clip with pliers and extract it. Note, the actual battery itself is also held in place with some space-filling foam, so you will need to find a way to pull HARD to get it out, and then line up the battery within the cutouts of the foam, otherwise you won't be able to push it back in far enough to screw the cover back on.

Lotus Flower -

You tube has a great video on this and a lot easier no need to destroy the speaker I got the OG more than 10 years ago and it still charges up and lasts about 40 minutes so I do need to change the battery but even if I mess it up I paid 200 from t Moble about 12 years ago and it still sounds great so I will try to change the batteries just because it sounds so sweet and …… well I’ll buy a new one they are a lot cheaper now days

John Vigil -

I have the original your boom speaker I got it when my grandson was in kindergarten now he is in the 10th grade still works but I found it. The battery was going low too fast within 30 minutes so what I did was I basically gave it a trickle charge by charging it till it’s stopped in the lights dude steady and then doing it again and it would start charging again and I kept doing that. I did it at least five or six times and I like to listen to music when I go to sleep and when I wake up I’m old now, so I only sleep about maybe six hours But when I woke up it was still playing but now it let me charge it all the way up and I get a very decent amount of time out of it so just a thought you might want to try and charge it until the light stops blinking then stick the charging wire back in it again and it’ll start to blink again keep doing that what you are in fact doing is giving it a trickle charge. Try it you might be surprised.

John Vigil -